How to Create a Pastel Gradient Background
In the following steps, you will learn how to create a pastel gradient background in Adobe Illustrator and Adobe Photoshop. Cool and warm, this timeless trend will give a soothing effect to any design. All you have to do is look for the best gradient combinations.
Looking to download some pastel gradient backgrounds? Head on over to Envato Elements, where you can find a large selection of premium backgrounds, including this trendy pastel gradient background with AI and JPG files.

What You'll Learn in This Pastel Gradient Tutorial
How to create a pastel gradient background in Illustrator
How to create a pastel gradient background in Photoshop
What You'll Need
You will need the following image in order to create a pastel blue gradient background:
Heavy clouds from above photo
1. How to Create a Pastel Gradient Background in Illustrator
1.
Step 1
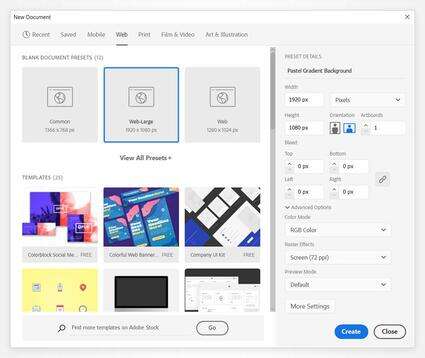
Hit Control-N to create a new document. Select Pixels from the Units drop-down menu, enter 1920 in the width box and 1080 in the height box, and then click that More Settings button. Select RGB for the Color Mode, set the Raster Effects to Screen (72 ppi), and then click Create Document.
Step 2
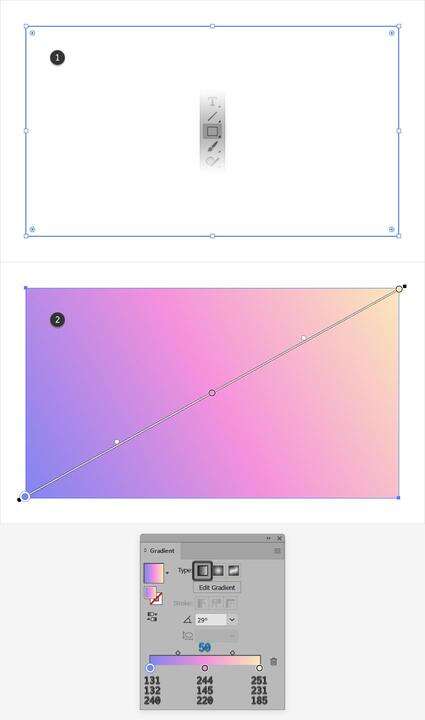
Pick the Rectangle Tool (M) and create a shape the size of your artboard (1920 x 1080 px). You can do this manually or you can click on the artboard to open the Rectangle window. Enter the size values and then click OK.
Let's start with the most basic method that you can use to create a pastel aesthetic background. Make sure that your rectangle is selected, open the Gradient panel (Window > Gradient), and click the gradient thumbnail to apply the default black to white linear gradient.
Double-click the left gradient color and change it to R=131 G=132 B=240, and then double-click the right gradient color and change it to R=251 G=231 B=185. Simply click on the gradient bar to add a third gradient color, set the Location to 50%, and change the color to R=244 G=145 B=220.
You can set the angle of this pastel pink gradient from the Gradient panel, or you can select the Gradient Tool (G) from your toolbar and adjust the angle of the gradient directly on the shape.
Step 3
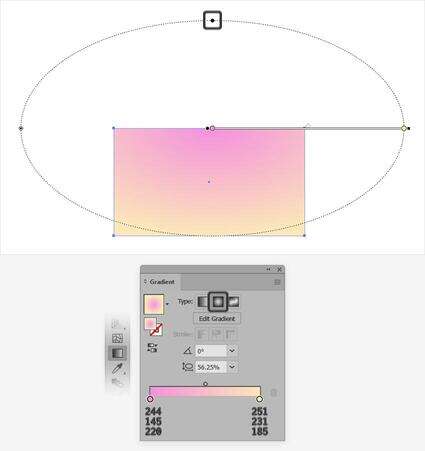
The second type of gradient that you can use to create a pastel aesthetic wallpaper is a radial gradient. You can easily apply one using the button from the Gradient panel.
Pick the Gradient Tool (G) to adjust the size of this gradient and use that black dot handle to squeeze or stretch the gradient as you wish.
Step 4
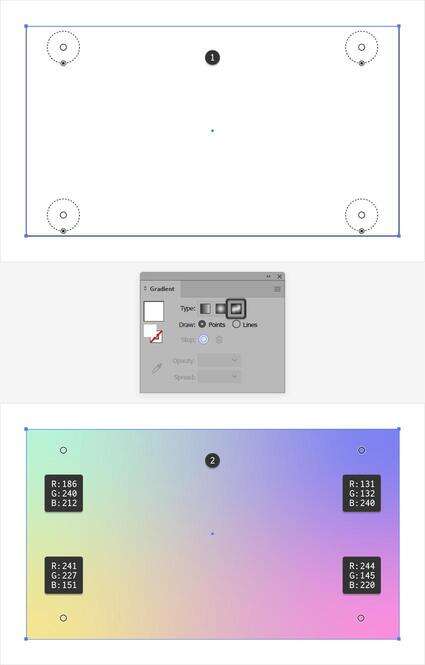
The third type of gradient that you can use to create a pastel aesthetic background is a freeform gradient. You can easily apply one using the button from the Gradient panel.
Illustrator will add four color stops to your rectangle. Select the color stops one by one and adjust the colors as shown below.
Step 5
You can always add a new color stop with a simple click, or you can delete a selected color stop.
Using the circular area around the color stop, you can increase or decrease the spread of that color. This value can also be adjusted from the Gradient panel. Select the bottom left color stop, and increase the Spread to 100%.
Simply click and drag a color stop to change its location.
Step 6
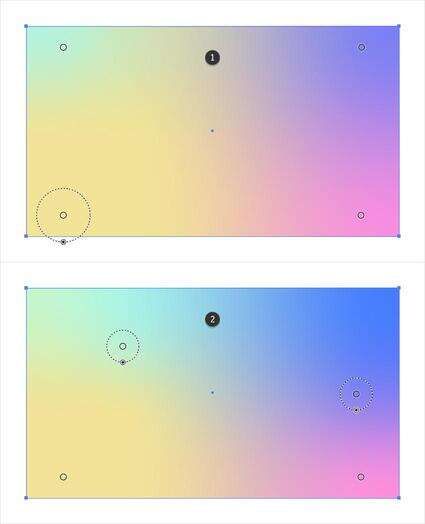
Another way of creating a pastel gradient wallpaper is by using a mesh.
Create a rectangle that covers your entire artboard and make sure that it stays selected. Pick the Mesh Tool (U) from your toolbar and click in the center of your selection to turn your shape into a mesh. Now you can easily select these mesh points and change their colors as you wish.
Switch to the Direct Selection Tool (A) to select the leftmost mesh points and change the color to R=107 G=245 B=202. Select the rightmost mesh points and set the color to R=253 G=225 B=186. Then select the middle mesh points and change the color to R=252 G=128 B=180.

Step 7
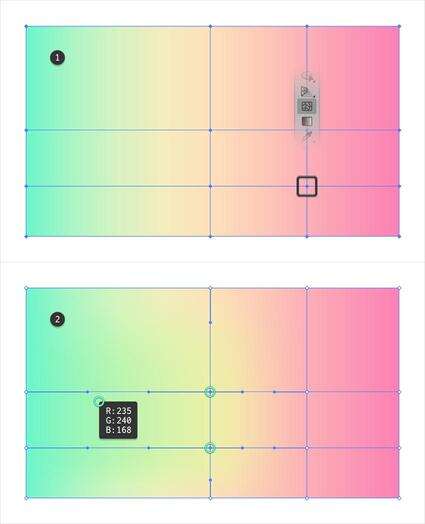
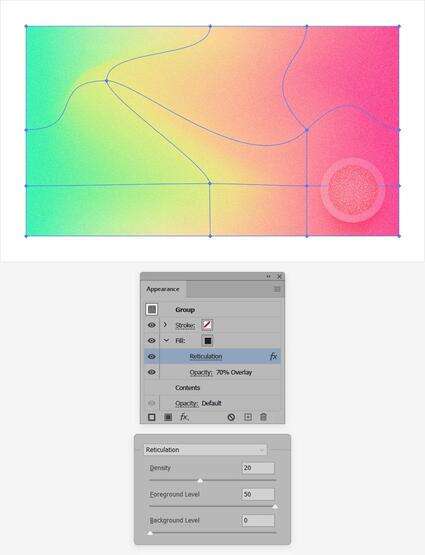
With your mesh and the Mesh Tool (U) still selected, add a new point as shown in the first image.
Switch to the Direct Selection Tool (A), select the mesh points highlighted in the second image, and change the color to R=235 G=240 B=168.
Step 8
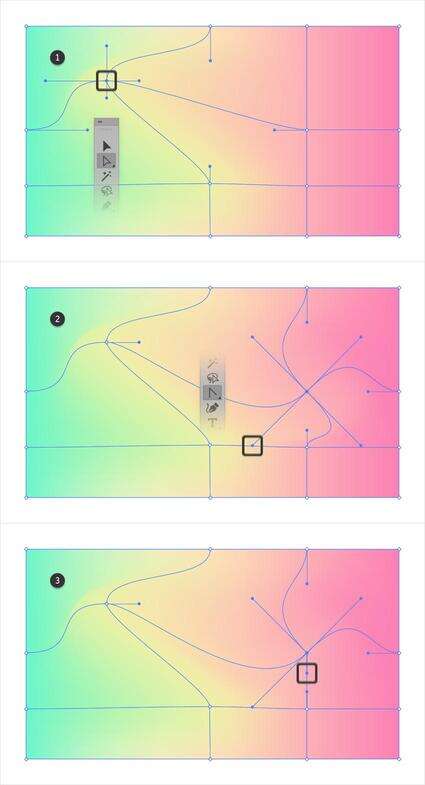
If you want to adjust the position of a mesh point or a mesh point handle, simply click and drag it using the Direct Selection Tool (A).
Pick the Anchor Point Tool (Shift-C) when you want to drag a mesh point handle independently or when you want to click a mesh point and drag new handles.
Step 9
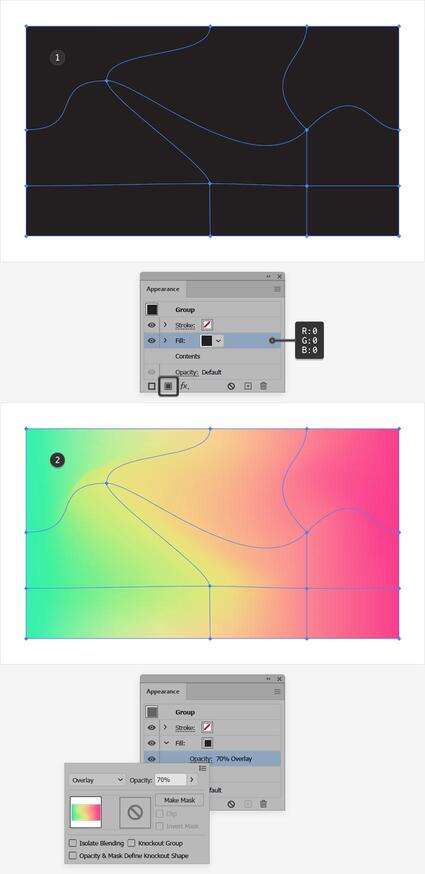
Let's add a subtle texture to this mesh. Select it and press Control-G to Group it.
Make sure that your group stays selected, open the Appearance panel (Window > Appearance), and add a new fill using the Add New Fill button.
Select it and set the color to black (R=0 G=0 B=0), and then lower its Opacity to 70% and change the Blending Mode to Overlay.
Step 10
With that black fill still selected, go to Effect > Sketch > Reticulation. Enter the settings shown in the following image and then click OK.
2. How to Create a Pastel Gradient in Photoshop
2.
Step 1
Let's start with the most basic method that you can use to create a pastel gradient in Photoshop.
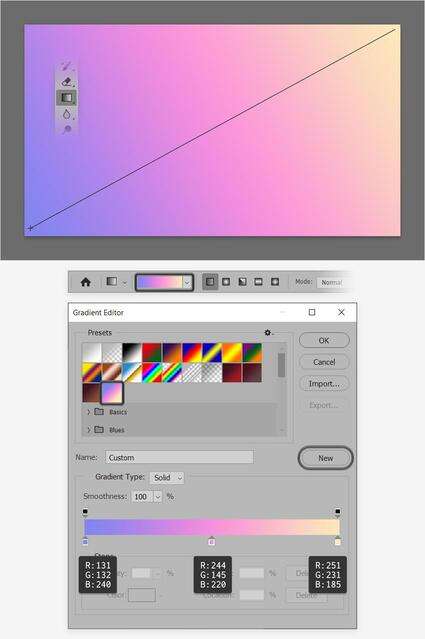
Create a 1920 x 1080 px document and select the Gradient Tool (G) from your toolbar, and then click the gradient thumbnail from the control panel to open the Gradient Editor.
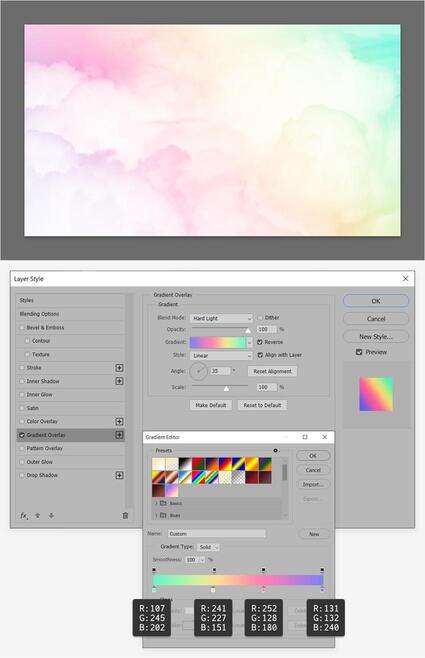
Double-click the left gradient slider and change the color to R=131 G=132 B=240, and then double-click the right gradient slider and change the color to R=251 G=231 B=185. Click somewhere close to the bottom edge of the gradient bar to add a third gradient slider. Select this new color stop, set the Location to 50%, and change the color to R=244 G=145 B=220.
Once you're done, you can click the New button to save your pastel gradient in the Presets panel, which will make it a lot easier to use it later.
Click OK to close the Gradient Editor panel. Focus on your canvas, and drag a path from the bottom left corner to the top right corner to easily apply your pastel pink gradient.
Step 2
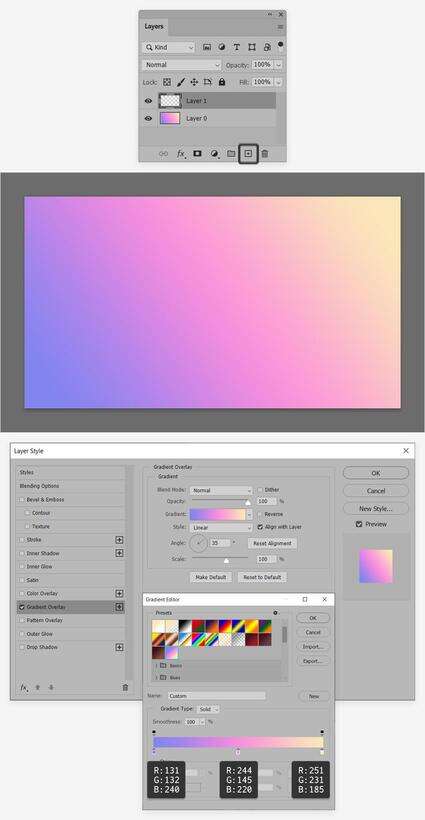
Alternatively, you can apply a pastel gradient on a layer using the Layer Style dialog box.
Move to the Layers panel (Window > Layers) and add a second layer using the Create New Layer button.
Double-click this new layer to open the Layer Style dialog box, and enable the Gradient Overlay. Click the gradient thumbnail and select your saved gradient from that list, and then feel free to adjust the angle or the other properties as you need.
Step 3
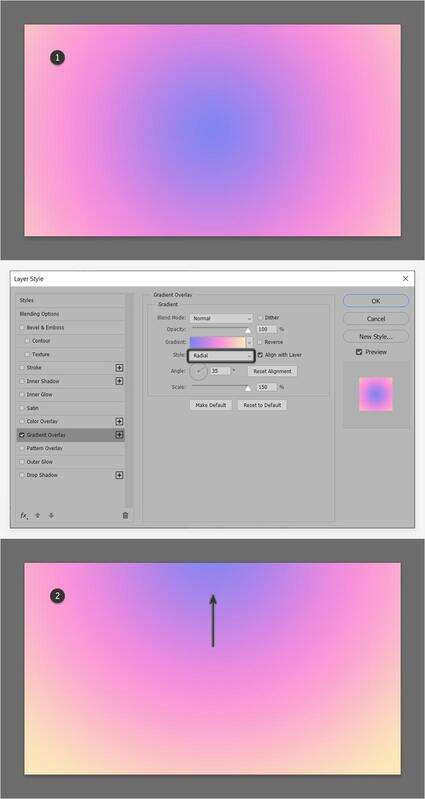
The second type of gradient that you can use to create a pastel gradient background is a radial gradient.
You can easily switch to a Radial gradient using the Style dropdown menu. Keep in mind that you can manually adjust the cente point of the gradient directly on the canvas. Simply click and drag to change this location.
Step 4
Besides linear and radial gradients, in Photoshop you can also apply Angle gradients, Reflected gradients, or Diamond gradients.

Step 5
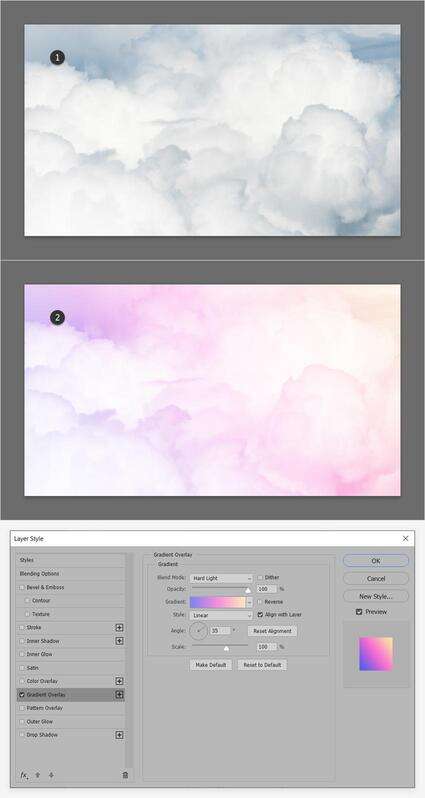
The Gradient Overlay technique can also be used to apply a pastel gradient to a photo.
Download this Heavy clouds from above photo and drag it inside your document. Double-click this new layer in the Layers panel to open the Layer Style dialog box and activate the Gradient Overlay.
Apply your saved gradient and change the Blending Mode to Hard Light to make the gradient blend with the photo.
Step 6
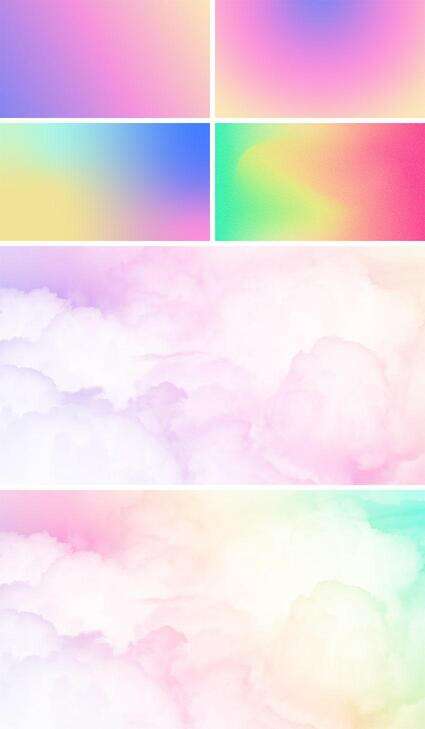
You can always try different gradients or blend modes. Feel free to use this pastel rainbow gradient or look for the best gradient combinations that suit your need.
Congratulations! You're Done!
Here is how your cool gradient background should look. I hope you've enjoyed this tutorial and can apply these techniques in your future projects. Don't hesitate to share your final result in the comments section.
Feel free to adjust that final pastel rainbow gradient as you wish. You can find some great sources of inspiration on GraphicRiver, with interesting solutions to improve your pastel gradient wallpaper.
Popular Pastel Aesthetic Backgrounds From Envato Elements
Envato Elements is an excellent resource for pastel aesthetic wallpapers. Here's a short list of some of the most popular pastel aesthetic wallpapers that you can find.
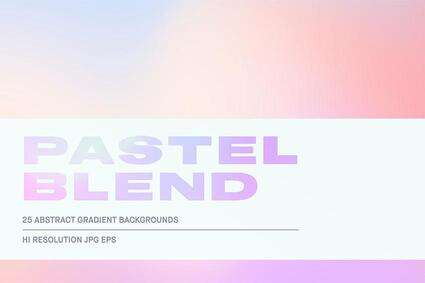
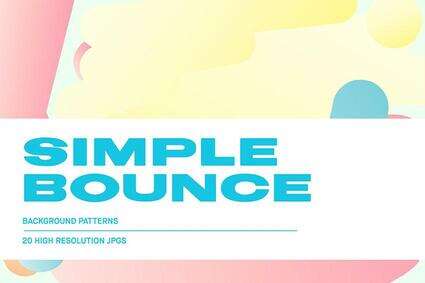
Pastel Gradient Backgrounds (JPG, EPS)
Give your design a soft feel with this pastel pink gradient. You will get 24 other cool gradient backgrounds in this pack.
Pastel Backgrounds (JPG)
These pastel backgrounds are perfect for presentations, templates, banners, flyers, web design, or as overlays for photos and artworks.
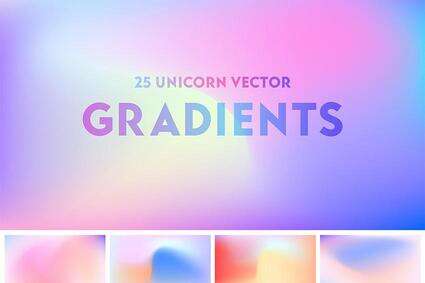
Vector Pastel Gradients: Best Gradient Colors (AI, JPG)
Besides this pastel blue gradient background, you will find another 24 cool gradient backgrounds which can be easily resized to any proportions.
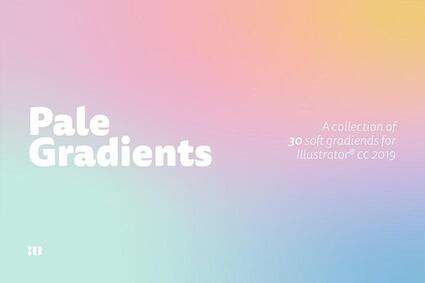
Pale Pastel Gradients (AI, PNG)
Don't waste your time looking for the best gradient color. This collection comes with the best gradient combinations and can be easily used to give your presentation a touch of color.
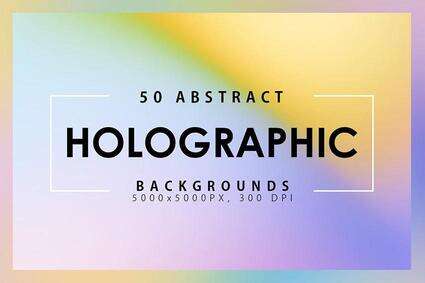
50 Holographic Backgrounds (JPG)
This massive collection of bright and vibrant pastel aesthetic backgrounds can be used for presentation backgrounds, foregrounds, websites, book covers, and more.
Want to Learn More?
We have loads of tutorials on Envato Tuts+, from beginner to intermediate level. Take a look!
Text Effects
How to Create a Quick Soft Pastel Text Effect in Adobe Photoshop
Rose
Adobe Photoshop
How to Create a Pastel Color Swatch in Photoshop
Ivan Gromov
Gradients
How to Make a Pastel Effect in Photoshop (Aesthetic Edit Action)
Ivan Gromov
Resources
Trend Watch: Ice Cream & Pastel Design
Melody Nieves
Photoshop Actions
How to Create a Pastel Photo Effect Action in Adobe Photoshop
Marko Kožokar
Flyers
How to Create a Pastel Neon Club Flyer in Adobe InDesign
Grace Fussell
Summer
How to Create an Ice-Cream Script Poster in Adobe InDesign
Grace Fussell
Text Effects
How to Create an Abstract Pastel 3D Text Effect in Adobe Photoshop
Rose
Adobe Photoshop
How to Make Gradients in Photoshop (And More!)
Jonathan Lam
Gradients
How to Make, Save and Load Gradients in Adobe Illustrator
Jonathan Lam