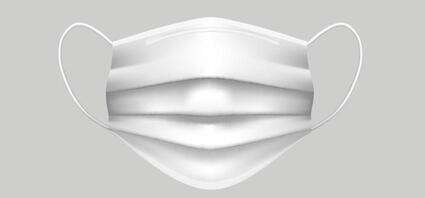
How to Create a Vector Medical Face Mask Mockup in Adobe Illustrator
Learn to use Adobe Illustrator's Mesh Tool to create a realistic medical face mask mockup.
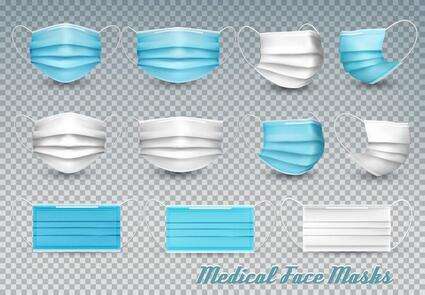
If you'd like to skip the tutorial and just use this item in your work, you can go ahead and purchase a whole set of face mask mockups with Collection of Medical Face Masks from GraphicRiver!

What You'll Learn in This Gradient Mesh Tutorial
How to use Gradient Mesh in Illustrator
How to use the Warp function in Illustrator
How to create dashed lines by using the Stroke panel
How to apply different Transparency modes
How to create Mesh grids out of Gradients in Illustrator
1. How to Draw the Face Mask Mockup
1.
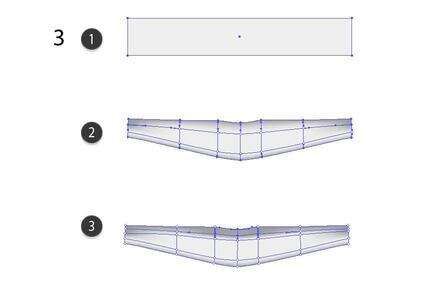
Step 1
Let's begin by drawing the top part of the mask mockup with Gradient Mesh!
Firstly, draw a rectangle using the Rectangle Tool (M) and fill it with a light grey color (#EBEBEB).
Then, take the Mesh Tool (U) and begin by placing mesh nodes as indicated in the screenshot below. Grab the nodes on the sides of the rectangle with the Direct Selection Tool (A) and drag them to bend the shape according to the below picture.
Next, select the indicated nodes on the edges of the shape and change their color to #A6A6A6.
Finally, change the color of the nodes in the middle to #FFFFFF.
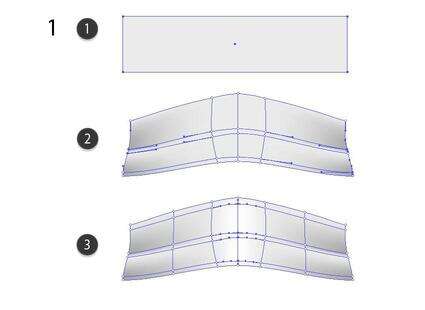
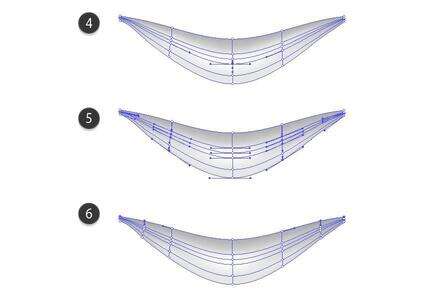
Step 2
Continue coloring the selected nodes according to the screenshot below. You will need to use #F9F9F9 and #D8D8D8 respectively.
Step 3
Finish coloring this part of the medical face mask by changing its bottom nodes to #797979 and some nodes in the middle to #E2E2E2.
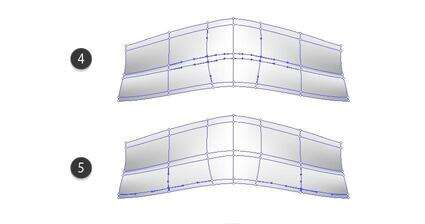
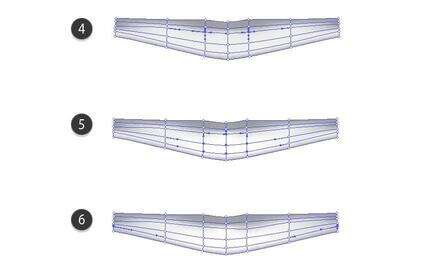
Step 4
Similarly to Step 1, begin creating another element of the medical face mask mockup.
Draw a rectangle, and then add mesh nodes to it and begin shaping and coloring it to achieve the below result. You will need to use these colors:
#F3F3F3
#888888
#D7D7D7
Step 5
Finish coloring this part of the surgical mask mockup using these colors:
#F9F9F9
#FEFEFE
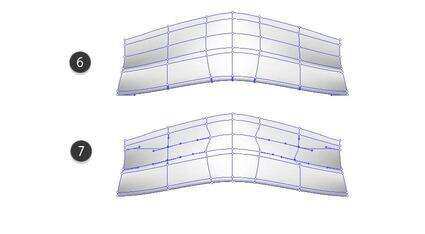
Step 6
Time for the third part! Follow the same process as in Steps 1 and 4, using these colors:
#EEEEEE
#9A9A9A
#A3A3A3
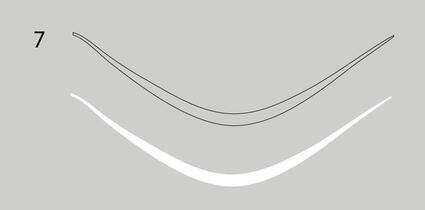
Step 7
Continue by adding a couple more nodes to the shape and changing their color as seen below.
#D9D9D9
#FFFFFF
#CACACA
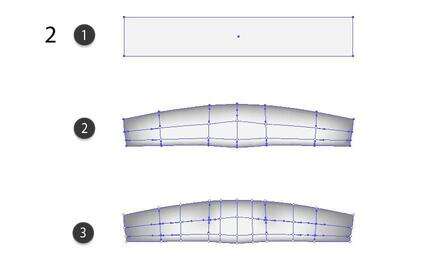
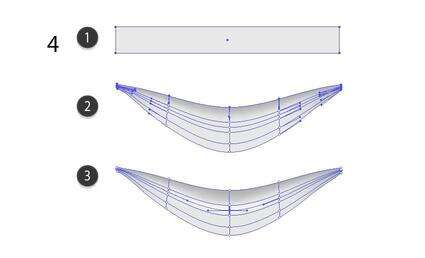
Step 8
Next, draw the lower part of the face mask mockup. Use Gradient Mesh and these colors:
#E7E7E7
#ACACAC
#FFFFFF
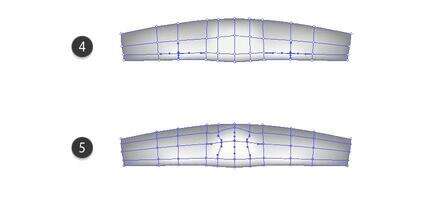
Step 9
Finish drawing the last big element with these colors:
#FEFEFE
#D3D3D3
#A1A1A1
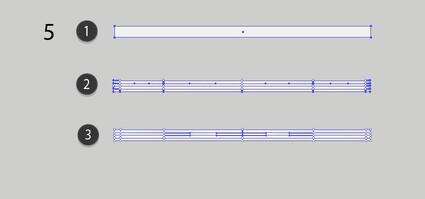
Step 10
Let's move on to the smaller shapes! Use the same process as before and the colors below:
#F1F1F1
#DDDDDD
#FFFFFF
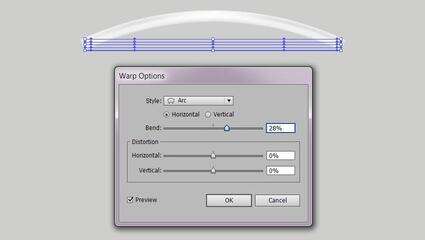
Step 11
Time for a break from Mesh! Use Effect > Warp > Arc to bend our shape. Input 28% for Horizontal Bend.
After applying the effect, select Object > Expand Appearance to make the item more editable.
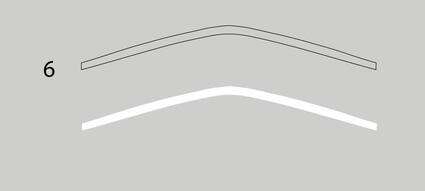
Step 12
For this object, use the Pen Tool (P) to draw an outline as pictured below, and fill it with #FFFFFF.
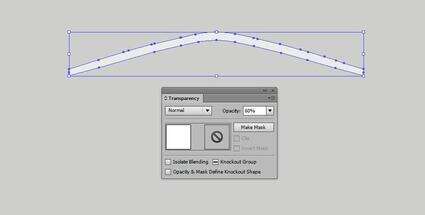
Step 13
In the Transparency window, change the Opacity of this part of the face mask mockup vector to 60%.
Step 14
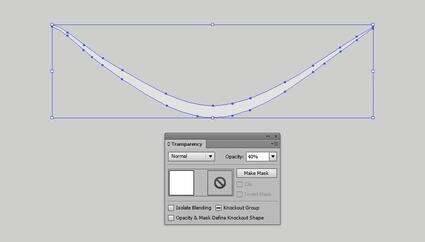
Similarly to Step 12, draw an outline and then color it with #FFFFFFF.
Step 15
Again, lower the Opacity of the shape—this time to 40%.
Step 16
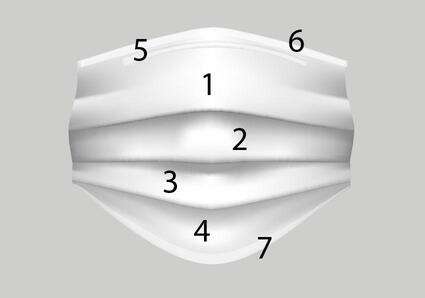
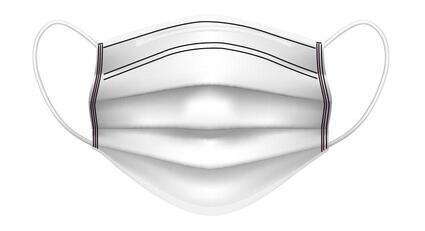
Take all of the elements we have made so far and construct our mask mockup! Shapes number 6 and 7 should be placed on top of the edges of 1 and 4.
2. How to Draw Ear Loops for a Medical Face Mask
2.
Step 1
Once we've finished drawing the main part of the mask, it's time to add more elements to it—beginning with the necessary rubber ear loops.
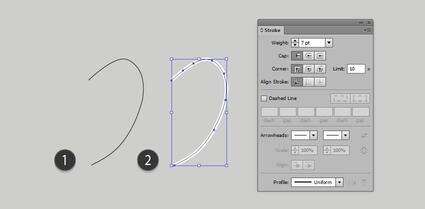
Start by drawing a curve with the Pen Tool (P). Then, using the Stroke panel, add a 7 pt white stroke to it.
Step 2
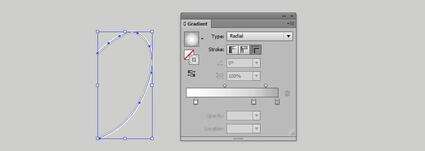
Next, apply a Radial Gradient to the white Stroke.
The colors used (from left to right):
#FFFFFF
#D5D5D5
#ABA9AA
Step 3
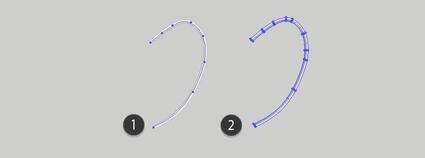
Continue by selecting Object > Expand Appearance. This will create a Mesh Grid for us to further edit.
Step 4
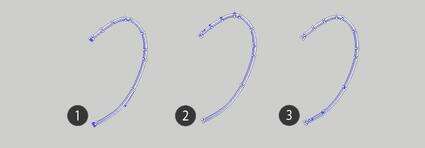
Change the colors of the nodes selected below.
#ABA9AA
#D7D6D6
#D1CFD0
Step 5
Finally, make a mirrored copy of the finished ear loop (you can use Object > Transform > Reflect) and attach both loops to the sides of our surgical mask mockup.
3. How to Add a Stitch Texture to the Mask Mockup
3.
Step 1
Great job—our face mask mockup vector is almost done! We need just a couple of finishing touches, like the stitch marks we can see on medical masks.
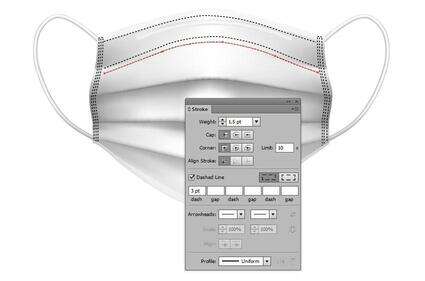
Using the Pen Tool (P), draw several lines along the sides and the top creases of the face mask.
Step 2
Select all of the lines and open the Stroke panel.
Tick the dialog box for Dashed Line, leaving the Dash value at 3 pt. Then, change the Weight of the Stroke to 1.5 pt.
The result should be similar to the screenshot below—if you are not getting the same look, try to tweak the values.
Step 3
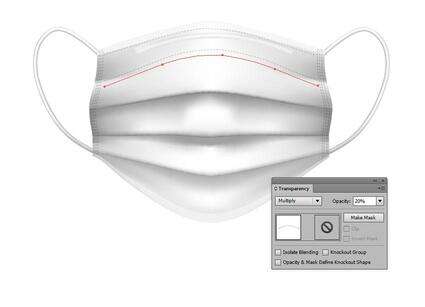
Once you're happy with the look of the dashed lines, open the Transparency panel.
Select all of the lines and change their Blending Mode to Multiply. Next, lower the objects' Opacity to 20%.
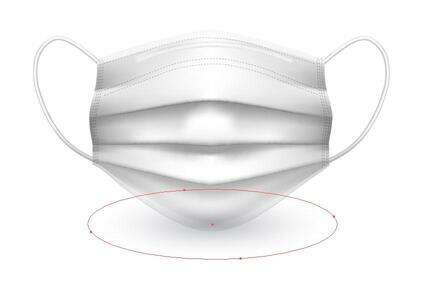
Step 4
You can also add a small shadow under your medical face mask mockup. Do so by creating an ellipse with the Ellipse Tool (L) and filling it with a Radial Gradient from light gray to white.
Change the shape's Blending Mode to Multiply.
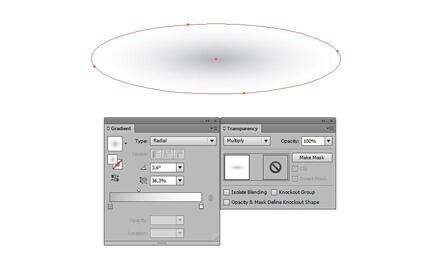
Step 5
Place the shadow under the mask (you can use Object > Arrange > Send to Back).
Awesome Work, You're Now Done!
What now? You can try any of my other tutorials from my profile, or check out my portfolio on GraphicRiver, as well as the original face mask mockup vector we partly recreated in this tutorial.
I hope you enjoyed the tutorial, and I would be super happy to see any results in the comments below!
Check out these other medical and mockup tutorials!
Gradient Mesh Tool
How to Create a Hand Holding a Stethoscope in Adobe Illustrator
Vladimir Galantsev
Illustration
How to Create a Medical Banner With Icons in Adobe Illustrator
Vladimir Galantsev
Gradient Mesh Tool
How to Create a Vector T-Shirt Mockup Template in Adobe Illustrator
Vladimir Galantsev