Illustrator’s Pen Tool: The Comprehensive Guide
If you use Adobe Illustrator, then it's almost certain that you use the Pen Tool when creating your paths. This comprehensive Pen Tool Illustrator guide aims to introduce or remind you of features, shortcuts, and methods for working with what is arguably Adobe's most essential tool.
In this Illustrator Pen Tool tutorial, you'll become comfortable using all of its features, from learning how to add anchor points in Illustrator to using bezier curves.
What You Will Learn in This Adobe Illustrator Tutorial
How to use the Pen Tool in Illustrator
How to move anchor points in Illustrator to create a path
How to use different shortcut keys to improve and speed up your workflow
How to adjust the preference settings to your liking
What the best practices and suggestions are for using the Pen Tool
Follow along with us over on our Envato Tuts+ YouTube channel:
1. How to Use the Pen Tool Functions
1.
Pen Tool (P)
Click on the artboard to create paths with straight segments. Click and drag to create paths with Bezier curves.

Add Anchor Point Illustrator Tool (+)
Click on a path segment to add anchor points.

Delete Anchor Point Tool (-)
Click on an anchor point to remove it from the path.

Convert Anchor Point (Shift-C)
Click on an anchor point and drag to create bezier handles where there were none. Click on an anchor point with handles to remove them.
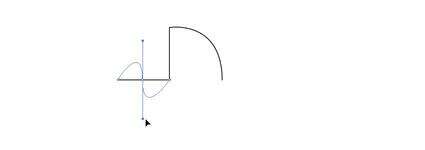
Alternatively, click and drag midway along a path to manipulate it as a curve.

Scissors Tool (C)
Not part of the Pen Tool group, but definitely associated with it. Click on a path segment to divide it into two paths.

Move Anchor Point Illustrator Tool (Direct Selection Tool)
Move Anchor Point Illustrator Tool (Direct Selection Tool)
Another useful tool to use is the Direct Selection Tool (A). This will allow you to select an anchor point and move it to adjust your path to the way you want it.

2. How to Use Keyboard Shortcuts
2.
Select Pen Tool (P)
Select Add Anchor Point Tool (+)
Select Delete Anchor Point Tool (-)
Select Convert Anchor Point Tool (Shift-C)
Select Scissors Tool (C)
Join two anchor points (Command/Control-J)
3. What Are the Different Cursors?
3.
The Pen Tool takes on different forms depending on what you're doing when you're using it. Each cursor intuitively makes you aware of the action you are about to perform.
(Caps Lock to toggle between pointer and cross hair)


4. What Are the Secondary Mouse Controls (With Path Selected)?
4.
Pen Tool hovers over anchor point: changes to Delete Anchor Point Tool
Pen Tool hovers over path segment: changes to Add Anchor Point Tool
Pen Tool hovers over end anchor point: changes to Continue Anchor Point Tool
5. How to Use the Keyboard Controls
5.
Hold Shift to constrain movements to 45°, 90°, 135° or 180° whilst creating or editing anchor points and Adobe Illustrator handles.
Select an anchor point with the Direct Selection Tool (A) and click Delete. The anchor and adjoining path segments will be deleted, leaving two paths.
Pen Tool-Option (Alt): changes to Convert Anchor Point Tool.
Pen Tool hover over bezier handle + Command (Control): allows editing of a bezier curve.
Pen Tool-Option (Alt) whilst creating a bezier curve: splits the curve (unhinges handles).
Pen Tool hover over bezier handle + Option (Alt): splits the curve (unhinges handles).
Scissors Tool (C)-Option (Alt): changes to Add Anchor Point Tool.
Add Anchor Point Tool-Option (Alt): changes to Delete Anchor Point Tool.
Delete Anchor Point Tool-Option (Alt): changes to Add Anchor Point Tool.
6. How to Set Up Different Preferences
6.
You can access the preferences which influence the Pen Tool (P) and other related tools by going to Illustrator > Preferences > Selection & Anchor Display.
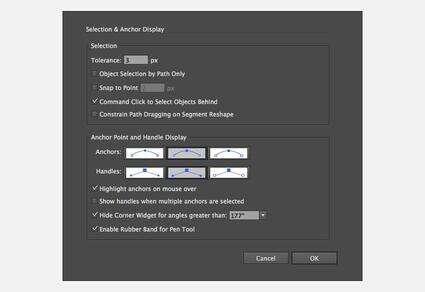
Tolerance
Radius of the selection area around anchor points. Must be between 1 and 8 pixels: 1px if you're deadly accurate with your mouse or have a lot of anchors in close range of one another, 8px if you prefer less precision. 3px is the default value.

Object Selection by Path Only
When checked, this option allows selection of objects only by clicking their paths. Clicking on their filled areas is ineffective, comparable to working in Outline mode (View > Outline).

Snap to Point
Also checkable via View > Snap to Point, though via the Selection & Anchor Display dialogue the tolerance can also be determined from 1 to 8 pixels. This value again represents the radius around anchor points. When lining up two objects, anchor points from one will snap to points of the other should they be positioned within the specified range.

It's worth noting that since the release of Adobe Illustrator CC 2014 Bezier handles are immune to grid-snapping. You can therefore make sure your anchors all stick to the grid (great for web use) whilst maintaining precision with free curves.
Anchor Point and Handle Display
Determines the way in which your path anchor points and handles are displayed.

Highlight Anchors on Mouseover
When checked, highlights anchor points when hovered over with cursor.

Show Handles When Multiple Anchors Are Selected
When checked, this option displays the Adobe Illustrator handles of points when multiple points are selected. Otherwise, the handles of multiple selected points are not displayed.

Hide Corner Widget
Corner widgets allow you to drag corners in order to make them rounded. You may find it helpful to specify the corner angle at which you no longer want to have the widget displayed. Choose from 105°, 120°, 135°, 150°, or 165°.

Enable Rubber Band
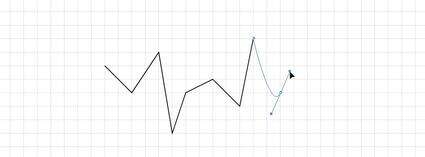
When I want to lay down an anchor point, I always find it helpful to know what the path will look like. Checking the Rubber Band option gives you a preview of the path before you commit.
7. What Are the Other Shortcuts and Tips?
7.
Select the Direct Selection Tool (A) before selecting the Pen Tool (P). Hold-Command (Control) to give you access to the last tool selected (in this case the Direct Selection Tool) for editing of paths and handles without deselecting the path.
With the path selected, use the Spacebar to give you access to the Hand Tool (H). Move your screen without deselecting the path or changing tools.
While creating or editing an anchor point, click and Click-Hold-Spacebar to alter the position of the anchor point you're working on. Since the release of Adobe Illustrator CC 2014, this manipulation is also possible on the closing anchor of a path.

With the Direct Selection Tool (A), select the end point and starting point of a path. Command (Control)-J to Join.
With the Direct Selection Tool (A), select the end point and starting point of a path. Command (Control)-Option (Alt)-Shift-J to join and average simultaneously.
Bear in mind that the colour of your highlighted paths and their Bezier handles is dependent on the colour of the layer they're placed on.
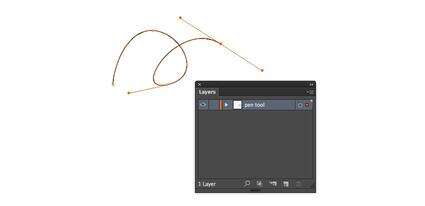
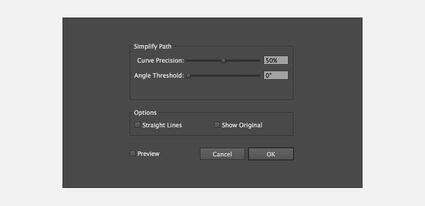
To smoothen a path by reducing the number of anchor points, open the Simplify dialogue (Object > Path > Simplify) and adjust according to your needs.
Conversely, should you want more anchor points to improve manipulation, go to Object > Path > Add Anchor Points. A new anchor point will appear after every existing anchor point on the selected path.
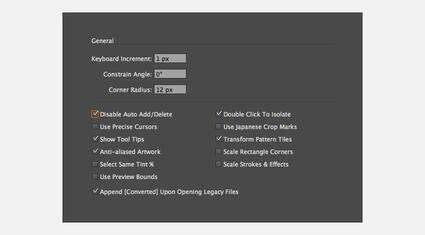
To prevent the Pen Tool (P) from changing its function when interacting with other anchor points or paths, open the general preferences dialogue (Illustrator > Preferences > General) and check the Disable Auto Add/Delete option. The Pen Tool will now only draw paths.
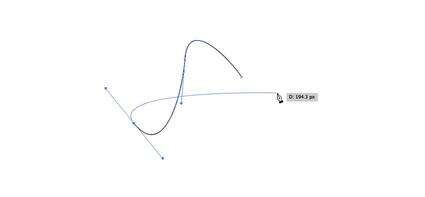
Since the release of Adobe Illustrator CC 2014, control over Bezier handles has improved. Now, whilst dragging the handles of an anchor point, press and hold Command/Control to independently stretch and shrink the leading handle, whilst keeping its movement paired to the trailing handle.

8. How to Use Best Practice Suggestions
8.
Drag handles from the first anchor point when beginning a curved path.
Drag your handles around just one-third of the curve you're creating for a smooth path.

Position anchor points on a curve where the paths begin to change direction, not in the middle of its curve.

Be sparing with your use of anchor points: fewer points = neater path.
9. How to Use the Pen Tool: Exercise
9.
This is all well and good in theory, but while these tips are fresh in your mind, why not put them into practice? Download the Pen Tool Exercise file and follow the guides to create precise paths, using the hints and shortcuts covered in this article.
Here you can put to use what you've learned in this Pen Tool guide for Illustrator!


If you need some inspiration for your designs, check out the popular vectors on Envato Market. If you're struggling to create a particular vector with the Pen Tool, you might find something there that you can use in your project.
Learn More Tools in Adobe Illustrator!
If you liked this and are looking to develop your skills in Adobe Illustrator further, check out the tutorials below! Expand your expertise by going through these in-depth guides. Happy designing!
Text Effects
How to Use Outline Stroke in Illustrator
Diana Toma
Illustrator Brushes
How to Install and Use Brushes in Adobe Illustrator
Mary Winkler
Adobe Illustrator
Illustrator in 60 Seconds: How to Use Compound Shapes
Andrei Stefan
Adobe Illustrator
Illustrator in 60 Seconds: How to Use Selection Tools
Andrei Stefan
Adobe Illustrator
Illustrator in 60 Seconds: How to Use the Snap to Grid Option
Andrei Stefan