6 Photoshop Tools Every Newbie Should Learn
Most Important Adobe Photoshop Tools
Photoshop Tools are the assets that you can use to edit, modify anything you need on images. You can make simple changes to an amazing transformation visually on any raster photographs. Specifically, we are mentioning ‘Raster’ images because you can apply the tools of Photoshop to this kind. If you want to know more about Raster image and Vector image, you can read, “8 File formats for high-quality image”. We will learn about the tools that are mostly used. So, let’s go for the Most Important Adobe Photoshop Tools that you should know.
Adobe Photoshop Tools
Adobe Photoshop is an amazing software to manipulate photos just in any way you can think of. Getting started with Photoshop can be cumbersome if you don’t know the basics of Photoshop. The tools that can be useful to turn an ordinary image into a masterpiece are the things to photoshop. In today’s presentation, I will give you a brief on the Photoshop tools and some helpful topics we have. We have another blog that contains new features for this version. Go for, “Top 10 Photoshop CS6 Features” if you are interested in learning about them.
Image source:
Note: I am using Photoshop CS6 for this blog, but you can use Photoshop CS3 or higher versions. Previous versions may not contain all the tools we are about to discuss here.
Basic Photoshop Selection tools
Talking about selection tools, it is one of the mandatory sections in Photoshop. Any editing in a specific area or replication, the addition you need, the selection is a must. You will have a better idea during your work in action. We have a complete blog on isolating a subject from the background by selection tools. So, check out, “How to do Photo Cut Out easily in Photoshop” to know more. Photoshop cs6 tools are easy and effective to make selections. Here, we will introduce you to the tools only.
Move tool
Marquee Tools
Lasso Tools
Magic Wand Tools
Crop Tool
Move tool
Photoshop tools definition starts with this one. The Move tool is not directly a selection tool but has great intimacy with them. You can click and drag any image in a project with this one. Use the mouse to do the operation easily. Use keyboard key ‘V’ to choose the tool as a shortcut. Or, you can use the mouse and click on the tool from the photoshop tools panel.
Marquee Tools:
Tools that we use with basic shapes are called Marquee tools. You can use them when you have a subject or any specific part of an image matching this. The tools are four in number. See below for details about them.
1. Rectangular Tool
The Rectangular tool we use to select a square or rectangular area of a photo. To maintain the aspect ratio in the selection press and hold the Shift key for both Win and MAC. Click and drag from one end and release when you have the area you want to mark.
2. Elliptical
It’s used for circular and oval selections. Press and hold the Shift key for both Win and MAC to maintain the aspect ratio as above.
3. Single Raw
We use the Single Raw Marquee tool to select a single row of an image pixel.
4. Single Column
This Marquee tool you can use to select a single column of an image pixel.
Lasso Tools
1. lasso Tool
You can use the Lasso Tool to create irregularly shaped selections. It includes the lasso for automatic selections.
2. Polygonal
It’s used to make selections by drawing a series of strength lines to make a polygonal shape.
3. Magnetic
In this tool, you click within the image to start or creating your selection and drag the mouse to create a selection path
Magic Wand Tools
The Magic Wand tool lets you select a consistently colored area without having to trace its outline. You specify the color range or tolerance, for the magic wand tool’s selection.
Crop Tool
Crop Tool as the name suggests used to crop images. Crop the whole image and manage the visible area with this one. You can activate the Crop tool by pressing (C) on the keyboard or see the image below for the crop tool icon.
Image Editing tools
photoshop tools and functions Some of the broadly used Photoshop Tools are:-
Spot Healing Brush Tool (J)
Pen Tool (P)
Brush Tool (B)
Clone Stamp Tool (S)
Eraser Tool (E)
Blur Tool (R)
History Brush Tool (H)
Horizontal Type Tool (T)
Rectangle Tool (U)
Eyedropper Tool (I)
Zoom Tool (Z)
Slice Tool (K)
Spot Healing Brush Tool
Removing spots or stains from fabric is easy with detergent or chemicals. But, what would you do when it comes to removing sports from an image. Photoshop CS6 comes with the Spot Healing Brush Tool as a rescue. Well, this was available in some previous versions as well. Use the keyboard key ‘J’ to select the tool. The operation is pretty simple. Just brush over the impure areas and see the changes. No need to take a sample from nearby clean areas. Photoshop will automatically do this for you and you will have satisfactory results instantly.
Pen Tool (P)
The Pen tool is a legendary tool in the Photoshop toolbar. You can create a work path and make a selection for further activities. The best part is, you can make the path as you wish. Creating straight lines are very simple. Click once to start the path and go for the next one. You will see a straight line. Click and drag a bit if you want to draw a curved line. We have a complete guide on the Photoshop Pen tool. So, check our tutorial, “Understanding and Master the Pen Tool in Photoshop”.
Brush Tool (B)
Like the Pen tool, the Brush tool is also quite remarkable. You can draw, use color, hide/unhide areas in the mask, or use it with multiple tools. The shortcut to selecting the tool is ‘B’. you can make the brush bigger or smaller. Also, you can make it hard or soft whenever you need to. Press and hold Alt/Option for Win/MAC then click and move the left mouse button and see the changes by yourself.
Clone Stamp Tool (S)
Have you heard of cloning? Creating a copy of an existing creature with the DNA is cloning. The Clone Stamp tool follows a similar method for photo editing. Here, you cannot create a creature but you can replicate an area from one place to another in photos. Mastering the Clone Stamp Tool allows you to do advanced image retouching and manipulation. Use keyboard shortcut ‘S’ to select the tool. Take a sample by pressing Alt/Option for Win/MAC and click at the point. Release Alt/Option and brush over the area where you want to apply. As simple as that.
Eraser Tool (E)
You need to use the Eraser tool when it comes to vanishing something from the whole image. Working on a layer, the tool works as making an area transparent. Press ‘E’ to select the tool then select the layer where you need to use it. Brust over the area and you will see the below layer is becoming visible. You can also control the flow while erasing. The Control panel is above the work window, just below the menu bar.
Blur Tool (R)
Photoshop Blur tool is something that we use artificial blur. Definitely, the Blur tool is cool. It makes things blurry. Click and drag over the image or any specific section to make things blurry. The more you click and drag, the more blur you get. Use keyboard command ‘R’ to select the tool. Sometimes you can make a DSLR effect on a photograph if you have the subject in a different layer.
History Brush Tool (H)
This tool works just like the Brush Tool except for the information that it paints with is from the original state of your image. If you go Window>History, you can see the History Palette. The History Brush tool paints with the information from whatever History state is selected.
Rectangle Tool (U)
By default, it draws a Shape Layer in the form of a rectangle. And, fills up the foreground color according to your selection. You can use this tool to create squares as well. Also, you can access some more shapes in this group. Activate the Rectangular tool by pressing ‘U’ for both Window and MAC operating systems. Moreover, you can modify the fill from the options above the work window if you need.
Eyedropper Tool (I)
The Eyedropper Tool is the key to pick a color that you will get in the toolbar in photoshop. The tool works by changing your foreground color to whatever color you click on. Holding the [Alt] key will change your background color. You will see the foreground and background color options in the lower portion of the toolbar.
Zoom Tool (Z)
The Zoom Tool you can use to magnify the image you are working with. Well, it is very important to see the details during editing. As raster images are made of pixels, working perfection depends on proper observation of the image. Use the keyboard key ‘Z’ for both Win or MAC to select the tool. Click on the image to enlarge as many times as you need. Press and hold Alt/Option for Win/MAC and you will see the ‘-’ (Minus) sign in the cursor. Then click to zoom out when you need to.
Slice Tool (K)
Need to divide an image and save them separately, you need to use the Slice Tool. You can have the tool by using the keyboard key ‘K’ for both Windows and MAC. The other way is, click and hold on to the Crop tool in the toolbar until you have other options. Now, release the click and click on the Slice Tool. You can use this amazing tool to mark and separate multiple areas from an image. Just click and drag an area that you want to slice, release when you are satisfied. Right-click on the selected area to edit information for the selection. You can rename, add links, and do more here. Go to File > Save for web, click save, and choose the location. You will have the images sliced according to your selection.
Conclusion
Photoshop CS6 is a heavily loaded photo editing software you can use for your image manipulation. All the tools and options are hard to explain in a few words. So, we tried to mention a list of photoshop tools here. Though some other tools are close to these that we mentioned here. We will come again with them from time to time. However, the uses of the tools need some knowledge and practice. And, if you are a beginner, we believe this content will be of your help. Try them and deliver with expertise with the skill you have within.
FAQ
What is the most used tool in Photoshop?
Ans: The most used tool in Photoshop refers to the necessity of editing and image category. Commonly the Pen tool, Brush tool, Move tool, Horizontal Type tool, etc. are important.
What are the tools used in Photoshop?
Ans: Throughout the content, we tried to discuss some important tools of Photoshop. Some more tools you may find within groups. Also, you will find more advanced tools and options in the latest versions.
How do I use all tools in Photoshop?
Ans: The tools in Photoshop are for different purposes. Sometimes several tools do similar functions and sometimes one tool can do many. So, the use of the tools is completely dependent on requirements.
What can I use instead of Photoshop?
Ans: A number of photo editing programs are available for you. Gimp is the closest to Photoshop. But, if you want a convenient program we suggest Photoshop only.
How do I find tools in Photoshop 2020?
Ans: Go to the menu bar Window>Tools to make visible the toolbar in Photoshop 2020. Generally, the tools are located at the left border of the window by default. If you lost it by chance, follow the location and you can have it back.
Photoshop Training: How To Use The Tools In Photoshop
The tools in Photoshop CC 2020 provide a variety of ways to perform your edit work process.
We cover the tools used in Photoshop in detail in our Photoshop training courses.
This article explores each tool and how to use them.
We have also written detailed articles on using the object selection tools and using the content-aware fill tool in Photoshop.
The Toolbar
The Photoshop Toolbar can be configured depending on how you do your work. You can display the tools in one long pane, or as we prefer: display the Toolbar as a double panel.
And if that were not enough, you can drag the Toolbar and have it “float” anywhere on your “canvas”.
Photoshop has many useful keyboard shortcuts. In this case, instead of right-clicking on the tool, you can press “W” and then “Shift-W” to toggle between two tools.
When you select a tool, a video displays next to the tool to show how it works. It’s a good way to let you know that you have the desired tool.
From the Edit menu, you can select the Tools… option. The Customize Toolbar window lets you customize the toolbar to fit the way you do your work.
These are the most commonly used Photoshop tools:
Move Tool
Marquee Tools
Lasso Tools
Quick Selection Tool/Magic Wand Tool
Crop Tool
Eyedropper Tool
Spot Healing Brush/Healing Brush/Patch Tool/Content-Aware Move Tool/Red Eye Tool
Clone Stamp Tool
History Brush Tool
Eraser Tool/Background Eraser Tool/Magic Eraser Tool
Zoom Tool
The Move Tool
The Move Tool is used to move part of a layered image to a new location.
You need to be aware that this tool only works when there is something to move inside the image. In other words, you need at least two layers to use the Move Tool.
Or a single layer that is not locked.
In the image below, the image is in its own layer.
Select it and select the Move Tool and drag the object to another location in the image.
There are several marquee tools that you can use to select a part of an image.
NOTE: Hold the SHIFT key to add to the selected area, and hold the Option/Alt to subtract from the selected area.
As you might expect, the Rectangular Tool makes a rectangular selection, and the Elliptical Tool makes a round selection.
Here is an example of using the Rectangular Tool:
You can also make selections using the lasso tools. The Lasso Tool lets you make a selection around anything on a layer just like you would if using a real lasso.
The Polygonal Lasso Tool also lets you select an area, but only by making straight lines.
The Magnetic Lasso Tool allows you to select an object by trying to find the edge of the object and assigning anchor points like you are using a magnet to attract the points.
Here is an example of using the Lasso Tool:
The Quick Selection Tool/Magic Wand Tool
The Quick Selection Tool allows you to select objects by concentrating on the edges. Just drag the tool over the object to select it. The Magic Wand Tool makes a selection based on the part of the object where you click your mouse.
Here is an example of the Magic Wand Tool identifying the background of a given image:
The Crop Tool
The Crop Tool allows you to crop an image just by dragging the markers on the image border.
Here is an example of the Crop Tool:
The Eyedropper Tool
The Eyedropper Tool lets you click on a colour in the image in order to use it in other areas of an image or in another image entirely. The Color Sampler Tool allows you to sample up to four different colours in an image.
The most recent versions of Photoshop even include a handy indicator for what color is above and below so you can clearly identify the position it is pulling your color from.
Here is an example of the Color Sampler Tool. The selected area can be seen on the basketball:
The Spot Healing Brush/Healing Brush/Patch Tool/Content-Aware Move Tool/Red Eye Tool
The Spot Healing Brush lets you remove imperfections. It looks at the area around where you click the mouse in order to blend the imperfection into the image.
The Healing Brush Tool also lets you eliminate imperfections in an image. You have to select a point on the image, unlike the Spot Healing brush.
The Patch Tool lets you make a selection as the Lasso Tool does. You can drag the selection to the area in order to fill it with the selection.
The Content-Aware Move Tool looks at any content selected to be moved and tries to fill in the area from which the selected content has been moved. For example, if you move a window from a house in an image, Photoshop will try to fill in the empty area with content from the rest of the house, as if the window had never been there.
The Red Eye Tool is a way to quickly remove areas that have red eye from improper flash lighting.
Before and after example of the Spot Healing Tool, notice how the lens flare inside the rock has faded significantly:
The Brush Tool
The Brush Tool is a very important tool; you’ll probably use the Brush Tool the most if you are retouching images. The Pencil Tool lets you draw on an image as if you were using a real pencil. The Brush Tool using the colour selected by the Eyedropper Tool. In the example below, a yellow panel of the balloon was selected and used as a brush.
As you can see, you could easily change the entire background to fit a suitable color to the rest of the image.
The Clone Stamp Tool
The Clone Stamp Tool is used to clone or copy image information from one area to another. You can hold the Option/Alt key and click an area of an image. Then, click the image to brush with the color and image information that you sampled.
Before and after example of the Clone Stamp Tool, notice how the rock has grown significantly:
The History Brush Tool
This tool is like an Undo feature. You can use it to step back until you return to the desired change.
Here is an example of using the History Brush Tool from the previous tool, the rock has been returned to its original shape on the left but stayed large on the right. This is due to it being History Brushed away on the left only.
The Eraser Tool/Background Eraser Tool/Magic Eraser Tool
The Eraser Tool removes undesired detail just like a real eraser.
The Background Eraser Tool lets you remove the background from an image. Drag the eraser along the edges of an image and its background in order for it to remove the background.
The Magic Eraser Tool can remove part of the background of an image depending on the area you select.
Before and after example of the Eraser Tool:
The sky in the background has been erased.
The Zoom Tool
The Zoom Tool is used to magnify a portion of your image when you are doing detailed work. Click and drag a selection of an image and Photoshop will zoom in on that area.
Example of the camera image being zoomed in on.
This has been a description of the more commonly used tools in Adobe Photoshop CC 2020. Open up your Photoshop canvas and see how these tools can help you edit your favourite images.
6 Photoshop Tools Every Newbie Should Learn
A Post By: Rick Berk
In the days before digital imaging, if you truly wanted to elevate your photography to the level of art, you learned how to process your images in the darkroom. You learned dodging, burning, masking, sandwiching negatives, flashing and fogging – all designed to get the most out of your images, and deliver your artistic vision to your viewers.
With the advent of digital imaging, photographers have a new way to bring their artistic vision to life, known as the digital darkroom. While there are several different applications available for photographers, one has become synonymous with photo editing, and that is Adobe Photoshop.
Many of the tools in Photoshop can trace their origins to the wet darkroom of yesteryear. If you’re new to Photoshop, it can seem overwhelming the first time you open an image in the program. I’ve created this list of six must-know Photoshop tools to help you get started editing your images. These aren’t by any means the only tools needed, and there are of course tools within the tools to figure out, but this list should give you some idea of where to start. The great thing about most tools in Photoshop is that there are a lot of sliders, meaning you can experiment and see what each tool does, then undo it if you don’t like it.
1 – Adobe Camera Raw
It is my personal belief that if you aren’t photographing RAW images, you are doing yourself a disservice as a photographer. When you allow your camera to process your image into a JPEG, you are throwing out potentially critical information from your image. You are trusting your camera to make creative decisions for you about the color, contrast, tone, and more, with regards to your image.
To get the most out of your image, you’ll want to set your camera to capture the image as a RAW file. A RAW file contains unprocessed, uncompressed, grayscale data from your camera’s image sensor, as well as metadata about how the image was captured. Adobe Camera RAW is the plugin for Adobe PhotoShop that can take this information and process a color image.
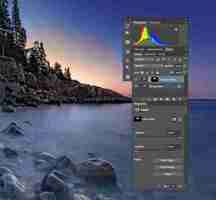
When you open a RAW image in Adobe Camera RAW, you’ll be presented with a toolbar across the top, and a tool palette on the right side. The tool palette is divided into 10 tabs: Basic, Tone Curve, Detail, HSL/Grayscale, Split Toning, Lens Corrections, Effects, Camera Calibration, Presets, and Snapshots. The tabs I use most in my workflow are Basic, Lens Corrections, Effects, and Camera Calibration.
The beauty of a RAW file is that you can change the settings using the sliders, and other tools, as often as you like. If you don’t like what you’ve done, or you want to try something different, you can always revert the image back to the original settings, and the file is the same as it was when you downloaded it from your camera. Don’t be afraid to play with the sliders and see what they do. You can’t ruin the RAW file, so you might as well see what everything does. For more on using Adobe Camera Raw, check out Understanding the Basic Sliders In Adobe Camera Raw.
2 – Layers and Layer Masks
I consider this number 2a and 2b. If you’re going to learn layers, you’re going to have to learn layer masks as well. In Photoshop, one of the first things you’ll notice when you open an image is the Layers Palette on the right side of the screen. Initially, it will likely only have one layer called “Background” which contains your image. You can add new layers as needed. You can also add empty layers which will allow you paint, draw, or copy portions of the image below onto them, and you can use layers to create a composite from multiple images. Layers can be adjusted to different opacities using the opacity slider at the top of the palette, so they can be made partially translucent which allows the layers underneath to show through.
In addition, you can create layer masks, which allow you show or hide portions of a layer, and allow you to see the layer or layers beneath. You do this simply by painting with black on the layer mask to hide that part of the layer, or painting white to show that part of the layer.
Layers give you room for quite a bit of creativity, allowing you to edit areas of an image non-destructively. If you don’t like what you did, simply delete the layer and start over. You can sandwich together two separate images, much the way you’d sandwich negatives in a wet darkroom, and create photo composites. For more on using layers, read A Beginner’s Introduction to Using Layers.
3 – Blend Modes
As mentioned above, the Opacity Slider allows you to blend the active layer with the layers beneath. The Blend Modes, found in a drop-down menu to the left of the Opacity Slider, work in a similar fashion, but use different mathematical calculations to change the appearance of the layer being blended for different things. For instance, if you simply duplicate the image on a new layer and set the Blend Mode to: Multiply it will darken the image by about a stop, and Screen Blend Mode will lighten the image by a stop. If you create a layer on top of your image with black text inside a white box, using Multiply will eliminate the white box, and allow the layer below to show through. Screen will do the opposite (see image above).
As of Adobe Photoshop CC 2015, there are 27 Blend Modes. The two modes I noted above are ones I use often, usually adjusting the opacity slider as well to get to my final look. Knowing what each mode does will help in choosing which one to use for your particular purpose. Darren Rowse put together a great tutorial, An Introduction To Blend Modes In Photoshop to give you a more in depth look at Blend Modes. You can also check out The First 3 Blend Modes You Need to Understand.
4 – Adjustment Layers
Photoshop Adjustment Layers are a great way make changes to an image, without actually changing the original file. It’s an easy way to try things, such as adjusting contrast or saturation, so that you can go back and change it again later – as long as you’ve kept the layers in tact by saving as a PSD or a TIFF file, formats that both support layers.
There are 19 different adjustment layers, which can be combined to create different effects on your image. Some basic uses are color adjustment, contrast adjustment, saturation, and black and white conversion. In addition, you can use Layer Masks to apply the effects in specific areas only, rather than the entire image, if you so choose. You can also adjust the Opacity of an adjustment layer to reduce the effect of the adjustment on your image.
Adjustment layers provide a ton of flexibility when editing an image, without forcing you into a change that can’t be undone easily. For more on Adjustment Layers, check out Photoshop: Applying Fixes using Adjustment Layers and Masks and Burning and Dodging with Adjustment Layers and Layer Masks.
5 – The Spot Healing Brush
The Spot Healing Brush is one of the primary retouching tools in Photoshop, allowing you to remove blemishes and errors, or other parts of your photos. In the digital age, the bane of all photographers’ existence is dust on the imaging sensor, and the Spot Healing Brush provides a quick and easy way of removing those fromyour images. The Spot Healing brush works similarly to the Cloning Stamp tool, in that it samples from one area of the image to correct other areas.
The Spot Healing Brush automatically detects the content or texture of the surrounding area, and attempts to replicate it wherever you click in the image. There are several options to work with which appear at the top of the screen. These include brush size and hardness, Blending Mode, and the type of fix you want to use, such as Content Aware, Create Texture, or Proximity Match. Each image will have different needs, depending on the content, so it’s best to experiment with the various settings if you find you’re not happy with the results you’re getting.
The Clone Stamp Tool
As I mentioned above, the Clone Stamp Tool and the Spot Healing Brush are similar in that they are both used for retouching images, and both use sampled areas of the existing image. The Clone Stamp, however, allows you to select the area from which to sample by holding the Command key and clicking (on Mac) or CTRL and click (on Windows), and creates an exact copy of the area you sample. Then you simply click on the area you want clone out and a copy of the area you sampled appears.
Again you have some options at the top of your screen, including Blend Modes, Opacity, and whether or not to sample a specific layer, or use all layers. You can also change the edge hardness and size of the stamp. The clone stamp works well when you have a well-defined edge to maintain, such as the wall of a building. The Healing Brush tries to blend edges, which can cause a blurred mess when you really need a clean edge. For more on using the Clone Stamp, head over to 12 Tips for Mastering the Clone Stamp Tool in Photoshop
These six tools in Photoshop are my go-to tools for editing my images. I would estimate that about 90% of my image editing is done using these tools. What are some of your tried and true Photoshop tools?