How to Make a Booklet in InDesign
Print a booklet on a double-sided printer
You can make a folded booklet (like a small book or pamphlet) by printing pages of a document in a special order and changing a couple of printing options.
These instructions are for printing a booklet from a PDF document.
If you want to print a booklet from a LibreOffice document, first export it to a PDF by choosing File ▸ Export as PDF…. Your document needs to have a multiple of 4 number of pages (4, 8, 12, 16,…). You may need to add up to 3 blank pages.
To print a booklet:
How to Remove Inserted Blank Pages in InDesign Booklet Printer
1. Change the page range you include in your booklet output so it matches the page-count requirements for the format you selected. For example, the 2-Up Booklet format requires multiples of two and adds blanks to fill out documents with odd numbers of pages, whereas the Consecutive option accommodates the three-page spreads necessary for foldout brochures. If you target the 2-Up Booklet format in a document that includes five pages, select only four of them for output -- if the result produces meaningful output -- and Adobe InDesign adds no blanks. Separate continuous page ranges with a dash and discontinous page numbers with commas when you type them in the Range field on the Setup screen of the Print Booklet dialog box.

2. Add pages to your project so it complies with the format without the need for blank pages. If you haven't finished your design, insert placeholders where the missing pages belong. If you leave these placeholders blank, activate the Print Blank Pages option in your Print or Print Settings dialog box so Adobe InDesign won't ignore them when you create your booklet.
3. Change the perfect-bound Signature Size in the Print Booklet dialog box to alter the number of pages Adobe InDesign prepares for each signature, which represents the pages that appear together on a single press sheet. For example, if you set up a four-page project in 2-Up Perfect Bound format and use an 8-page signature, InDesign adds four blank pages to fill out the signature. If you set the signature size to 4 pages, the program adds no blanks.
How to Make a Booklet in InDesign
Ready to take the next step in layout design? In this tutorial, I'll show you how to make a booklet in InDesign. For this stylish design, we’ll use essential tools for setting up pages that will help you in your future projects.
Booklets are a form of brochure containing more than four pages and not more than 48 pages (the page count should be divisible by four). This non-periodical publication is great for marketing purposes because it allows you or your client to show your business in detail.
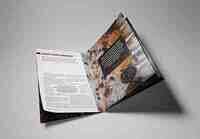
In a hurry? We’ve got amazing InDesign booklet templates over at Envato Elements, just like this one:
This modern booklet template for Adobe InDesign is ready to download from Envato Elements.
In this tutorial, I'll show you how to make a booklet in InDesign CS6 and above. You can also keep this as a four-page document to create a brochure in InDesign. Regardless of which you choose to do, you'll be learning essential tools that will help grow your layout skills. We'll be touching on Parent Pages, Paragraph Styles, Color Swatches, and many other tips and tricks.
If you prefer to learn about all of this by following a video tutorial, you're in luck! Watch this new video from the Envato Tuts+ YouTube channel to learn how to create a booklet in InDesign CC:
What You'll Learn in This Booklet Template Adobe InDesign Tutorial
How to create a booklet in InDesign
How to set up guides and parent pages for your booklet design
How to create the cover of your InDesign booklet layout
How to create the inside spreads of your booklet template pages
How to export a file for printing
What You'll Need
You'll need access to Adobe InDesign; if you don't have the software, you can download a trial from the Adobe website. You'll also need the following assets to create your booklet template for InDesign:
Download the assets and make sure the font is installed on your system before starting. When you're ready, we can dive into this tutorial on making a booklet in InDesign!
1. How to Create a Booklet in InDesign
Step 1
In InDesign, go to File > New. Name the document Booklet. We'll create a letter size InDesign booklet template. Set the file to the following dimensions:
Width to 8.5 in
to Height to 11 in
to Orientation to Portrait
to Units to Inches
to Pages to 12
to Check Facing Pages
Margins: 0.75 in
Bleeds to 0.125 in (it's best to seek your professional printer’s preference)
Click Create.
Step 2
For this tutorial on making a print booklet template in InDesign, we'll work with different Layers. Organising layers is an important practice to keep all the elements in the file organised. Bring up the Layers panel by going to Window > Layers. Double-click on Layer 1 and rename it Copy (Back).
In the Layers panel main menu, select New Layer. Name it Background. Click OK. Create two additional layers named Images and Copy (Front).
Step 3
Head over to Window > Color > Swatches to expand the Swatches panel. Choose New Color Swatch button from the main menu. Set the Swatch Name and values to the following:
Light: C=15 M=35 Y=45 K=0
Medium: C=35 M=80 Y=80 K=40
Dark: C=65 M=70 Y=70 K=75
Click Add and OK after you input each of the color values.
Step 4
For this tutorial, we'll create a list of Paragraph Styles that we'll use to format parts of the InDesign layout for our booklet design.
Head over to Window > Styles > Paragraph Styles to open the Paragraph Styles panel. In the main menu, select New Paragraph Style, and set the Style Name to Title. Select the Basic Character Formats option from the left side menu. Use the following settings:
Font Family: Bw Modelica
Font Style: Black Condensed
Size: 30 pt
Tracking: 25
Case: All Caps
Select the Character Color option from the left side menu. Set the color to the Medium swatch. Click OK.
Create a New Paragraph Style, setting the Style Name to Deck. In the Basic Character Formats option, use the following settings:
Font Family: Bw Modelica
Font Style: Regular Condensed
Size: 18 pt
Tracking: 25
Select the Character Color option from the left side menu. Set the color to the Medium swatch. Click OK.
Create a New Paragraph Style, setting the Style Name to Copy. In the Basic Character Formats option, use the following settings:
Font Family: Bw Modelica
Font Style: Regular Condensed
Size: 9 pt
Leading: 12 pt
Tracking: 10
Select the Indents and Spacing option from the menu on the left and set the Space Between Paragraphs Using Same Style: 0.1 in.
Select the Character Color option from the left side menu. Set the color to the Dark swatch. Click OK.
Create a New Paragraph Style, and set the Style Name to Pull-quote. In the Basic Character Formats option, use the following settings:
Font Family: Bw Modelica
Font Style: Bold Condensed
Size: 20 pt
Tracking: 10
Select the Character Color option from the left side menu. Set the color to the [Paper] swatch. Click OK.
Create a New Paragraph Style, setting the Style Name to Folio-Page number. In the Basic Character Formats option, use the following settings:
Font Family: Bw Modelica
Font Style: Bold Condensed
Size: 8 pt
Tracking: 100
Select the Character Color option from the left side menu. Set the color to the Medium swatch. Click OK.
Create a New Paragraph Style, setting the Style Name to Folio-Section. In the Basic Character Formats option, use the following settings:
Font Family: Bw Modelica
Font Style: Harline Condensed
Size: 420 pt
Tracking: 10
Select the Character Color option from the left side menu. Set the color to the Light swatch. Click OK.
2. How to Set Up Guides and Parent Pages for Your Booklet Design
Step 1
On the Pages panel, double-click on the A-Parent pages. Head over to Layout > Create Guides. In the Create Guides option window, set the Rows Number to 5 and Gutter to 0. Set the Columns Number to 8 and the Gutter to 0.1875 in. Under Options, select Fit Guides to: Margins. Click OK.
Repeat this process on the opposite page of the booklet design.
Step 2
On the Layers panel, select the Copy (Front) layer.
Using the Text Tool (T) from the toolbar, create a text box under the bottom left corner margin. Right-click on the text box and select Insert Special Character > Markers > Current Page Number. A letter “A” will represent the page number. On the second line, you can add the title of your booklet.
Select the text and head over to the Paragraph Styles panel. Format the text with the Folio-page number style.
Select the text box and press Command-C to Copy and Command-V to Paste. Place this duplicated text box on the opposite page. Press T to activate the formatting tools on the Control panel. Select the paragraph formatting tool and set the text box to Align Right.
Step 3
On the Layers panel, select the Background layer. Using the Rectangle Tool (M), create a small rectangle with a Width of 0.7 in and Height of 0.4 in. Using the Swatches panel, set the color to the Medium swatch.
Place the rectangle on the left margin of the left page. Duplicate it by pressing Option and drag. Place the newly duplicated element on the right margin of the right page. This is a great anchor for the title in the InDesign layout of your booklet.
Step 4
Head over to the Pages panel, right-click on A-Parent and select Apply Parent to Pages. Under To Pages, type 2-11. Click OK. These are the pages the A-Parent page will be applied to.
3. How to Create the Cover of Your InDesign Booklet Layout
Step 1
On the Layers panel, click on the Background layer.
Head over to Page 1. Using the Rectangle Tool (M), create a shape on the top portion of the cover of your print booklet template for InDesign.
While selecting the rectangle, press Command-D to Place the Close up of coffee seeds image. Select the image with the Direct Selection Tool (A) and resize the image on the Control bar to 20%.
Create another rectangle of the same size as above. Head over to the Swatches panel, select the Dark swatch, and set the Tint to 60%.
Step 2
Create a rectangle for the bottom portion of the cover with the Rectangle Tool (M). Using the Swatches panel, set the color to the Dark swatch.
Using the Line Tool (), create a line that goes across the width of the page. On the Swatches panel, set the stroke color to the Light color swatch. On the Control panel, set the Stroke Weight to 5 pt.
Place the line between the image and the bottom of the cover.
Step 3
On the Layers panel, lock all the layers and leave Copy (Front) unlocked.
Using the Text Tool (T), add a title and a deck to the booklet and place it in the top left corner of the page.
Open the Character panel (Window > Type & Tables > Character). For the title, set the Font to Bw Modelica Bold Condensed, Size 55 pt, and Leading 50 pt.
For the deck, set the Font to Bw Modelica Light Condensed and Size 18 pt.
Step 4
Using the Text Tool (T), add a text box to fit the width of the page and place it over the bottom margin. While selecting the text box, press Command-B to open the Text Frame Options window. Under Columns, set the Number to 3. Click OK.
Add contact information to the text frame. On the Character panel, set the font to Bw Modelica Light Condensed and Size 9 pt.
4. How to Create the Inside Spreads of Your Booklet Template Pages
Step 1
Let’s work on Pages 2-3 of the booklet. On the Layers panel, unlock the Images layer.
Head over to Page 2 and using the Rectangle Tool (M), create a rectangle that measures 10 in in Width and 11.25 in in Height. This element will go over the gutter of the page.
Select the rectangle and press Command-D to place the Coffee cup with roasted beans image inside it. Using the Direct Selection Tool (A), move the image to find a good placement.
To make the page number visible, we need to change the color. Press Shift-Command and click on the page number to unlock it from the Parent Page. Using the Swatches panel, change the color of the type to [Paper].
Lock the text frame by pressing Command-L.
Step 2
On Page 3, add a text box using the Text Tool (T). Place the text box at the very top of the page, and add a title and a deck. Using the Paragraph Styles panel, format the title and the deck with their corresponding styles.
Create a text box using the Text Tool (T) for the bottom portion of the page—this will house the body copy. This text box should take the remaining width of the page. While selecting it, press Command-B to open the Text Frame Options window. Under Columns, set the Number to 2 and the Gutter to 0.1667 in. Click OK.
Add content and use the Paragraph Styles panel to format it to the Copy style.
On the Layers panel, select the Copy (Back) layer (lock all the other layers if necessary). Using the Text Tool (T), draw a text box and add the section number. Using the Paragraph Styles panel, format the text box to the Folio-Section style. Place the section number anywhere on the page—I chose to display it near the title and deck.
Now we can use this spread as a base for the rest of the inside pages.
Step 3
For Pages 4-5 of your print booklet in InDesign, we'll create a mirrored layout of what we created on Pages 2-3.
Select all the elements on Pages 2-3, and press Command-C to Copy. Head over to Pages 4-5 and press Shift-Option-Command-V to Paste in Place.
The elements will be pasted onto one layer, but it's best to move the elements to their respective layers. You can do so by selecting an element on the page, heading over to the Layers panel, and dragging the square on the right to another layer.
Using the Selection Tool (V), move the image to the right. Select all the elements on the right side of the page and move them towards the left side.
Let’s start editing by changing up the image. Select the image and press Command-D to Place the All kinds of coffee on spoons image. Using the Direct Selection Tool (A), select the image followed by R to Rotate the image.
To add a pull-quote to the booklet template in InDesign, create a text box using the Text Tool (T). While selecting the text box, press Command-B to open the Text Frame Options window. On the window, set the Inset Spacing to 0.375 in on all sides. Click OK.
Using the Paragraph Styles panel, format the text box with the Pull-quote style. For the quote credit, open the Character panel. Set the Font to Bw Modelica Light Condensed and Size 14 pt.
Use the Text Tool (T) to add your own copy on Page 4.
To add a pull-quote on the body copy, create a text box with the Text Tool (T). Format the text box on the Character panel, setting the Font to Bw Modelica Bold Condensed, Size 14 pt.
On the Swatches panel, set the color to Medium.
On the Text Wrap panel (Window > Text Wrap), select the Wrap around bounding box. Set all the Offset sides to 0.125 in.
Step 4
For Pages 6-7, we'll create a resting spread to our InDesign booklet template. This will give the reader a visual break.
Press Shift-Command, select both of the rectangles on each side at the top of the page, and press Delete.
On the Layers panel, select the Background layer. Using the Rectangle Tool (M), cover the spread with a rectangle. Use the Swatches panel to set the color to the Dark swatch. Lock the Background layer on the Layers panel and select the Images layer.
Press Command-D to add the Experienced barista making coffee and Hot drink warm up images. Feel free to arrange them as you wish—here I placed both on opposite sides of the spread.
Copy the pull-quote from Page 5 by pressing Command-C. Paste the element by pressing Command-V on Pages 6-7. Use the Text Tool (T) to edit the quotes.
Step 5
Pages 8-9 will have a different layout than the rest of the booklet. This interview style spread is a good visual contrast to the rest of the layout.
Press Shift-Command, select the rectangle on Page 9, and press Delete.
Using the Rectangle Tool (M), cover the spread with a rectangle and make sure this is on the Background layer. Use the Swatches panel to set the color to the Dark swatch. Lock the layer and select the Images layer.
Copy (Command-V) and Paste in Place (Shift-Option-Command-V) the title text box from Page 4 onto Page 8. Use the Text Tool (T) to edit the text. Using the Swatches panel, change the color of the text to the Light swatch.
Create a text box using the Text Tool (T). Head over to the Control bar, and set the Width to 2.9 in and the Height to 5.7 in.
Using the Text Tool (T), add copy, and use the Paragraph Styles to format the text to the Copy style. Select the text and change the color on the Swatches panel to Light.
Select three words from the beginning of the text box, and head over to the Character panel. Set the Font to Bw Modelica Black Condensed. This is a great way to let the reader know where each interview starts.
Select the Ellipse Tool (L), and click on the document to open the Ellipse option window. Set the Width and Height to 1 in. Click OK. Place the ellipse over the text frame and use the Align panel to Center both elements.
Using the Text Tool (T), create a small text frame under the ellipse. This will serve as the name/title text. Use the Paragraph Styles to format the text to the Copy style. With the help of the Swatches panel and the Character panel, create your own combination of styles.
Duplicate the text frame and circle three times by pressing Shift-Option and dragging. Repeat these elements on the opposite page.
Select each circle and press Command-D to Place the following images: A person holding a sign, Portrait of pretty young waitress, Barista cafe, and Attractive business owner. Using the Direct Selection Tool (A), select each image within the ellipse to move and resize.
Step 6
For Pages 10-11, we'll go back to the initial layout.
Copy (Command-C) and Paste in Place (Shift-Option-Command-V) the title, deck, section number and copy from Page 4 onto Page 10. Use the Text Tool (T) to edit the copy.
To create a copy that extends to the next page, we'll use the threading option. Duplicate the text frame onto Page 11 by pressing Shift-Option and dragging. Delete the text in the new text box.
Select the text box on Page 10. If you have overflowing text, you'll see a red plus symbol on the bottom right. If you don’t have any overflowing text, you’ll see an empty blue box. Click on the red plus symbol or blue box, followed by a click on the empty text box on Page 11. This will allow you to continue the text on the next page or anywhere you're threading the text box.
Press Command-D to place the Coffee image. Place the image in the bottom left corner of Page 10, and make sure it's bleeding out of the page. Head over to the Text Wrap panel (Window > Text Wrap) and select the Wrap around bounding box button.
Press Command-D to place the Barista at work image. This time, place the image in the top right corner of Page 11. Make sure it's bleeding out of the page and covering the first inside column of Page 10. Head over to the Text Wrap panel and select the Wrap around bounding box button. Set the Offset to 0.125 in—this will help with the text frame underneath.
Step 7
Using the Rectangle Tool (M), cover the back page. While selecting the rectangle, press Command-D to Place the Coffee beans image.
Create another rectangle of the same size as above. Head over to the Swatches panel, select the Dark swatch and set the Tint to 60%.
Copy (Command-C) and Paste (Command-V) the contact information from the front cover.
5. How to Export a File for Printing
Before exporting a file for printing, it's useful to take a look around all the edges of the design. This is to make sure all the images and vectors bleeding out are touching the bleeds.
Step 1
To export the file, go to File > Export. Name the file Booklet and choose Adobe PDF (Print) from the Format dropdown menu. Click Save.
Step 2
In the Export Adobe PDF window, set the Adobe PDF Preset to Press Quality. Under Pages, select Export As Pages.
On the left side of the panel, select Marks and Bleeds. Check All Printer’s Marks and Use Document Bleed Settings. Click Export. You'll have a ready-to-print PDF file.
Great Job! You’ve Finished Your Booklet Template Pages!
In this tutorial, we learned how to make a booklet in InDesign CS6 and above. We covered important tools that will help you set up a multi-page InDesign template. If you lowered the page count, you can use this as an InDesign brochure template. Today, we learned to:
create a ready-to-print InDesign file
set up Parent Pages with folios
organise Paragraph Styles to format text
add Color Swatches
format text boxes into columns
use the Text Wrap tool on images and text
If you're new to InDesign and need booklet templates right away, head over to Envato Elements. We’ve got many options to explore!
Top InDesign Booklet Templates From Envato Elements
Booklet making in InDesign is a valuable skill to have. It can also be a time-consuming skill to put into practice. If you need to create a handout quickly, you'll want to use print booklet InDesign templates from Envato Elements.
There are a few thousand print booklet InDesign templates to choose from, but we'll look at five here:
This square booklet design is a top option for your next project. It lets you showcase your images across 14 unique pages. This InDesign booklet template can also be used for all types of businesses. Booklet making will be easier and less time-consuming!
Looking to highlight some case studies? There are few booklet templates for InDesign that can handle them like Damelan. It features professional layouts that draw attention to your written and visual content.
Creating a booklet in InDesign doesn't have to take forever with this option! There are 36 pages in this print booklet InDesign template, but you can always add or remove some.
If you want to sell furniture, you'll need to have a stunning lookbook. This InDesign booklet template has a contemporary style that will hold up for years to come.
There are two sizes included here, so you can select the one that fits your content best. Modern and minimal, it's the ideal booklet template for Adobe InDesign for your next booklet.
Green Lifestyle blends an elegant style and useful features into a booklet template for InDesign. This booklet template for Adobe InDesign comes in US Letter size and makes great use of white space for better readability. You'll also be able to use features like:
automatic page numbering
separated and organized layers
parent pages for editing
Choose this option if you need a versatile booklet design for fashion, business, or art.
Let's wrap up our list with this InDesign print booklet that's landscape. It has a health-oriented theme, but you can customize it to fit your needs. There are 16 custom pages included in this print booklet InDesign template, as well as placeholders for your photos.
Start Creating a Booklet in InDesign Today
If you're looking for specific tutorials on how to make a brochure in InDesign, we’ve got plenty of those! Our Envato Tuts+ instructors have put together many useful tutorials and guides to help you learn, including this free InDesign course for beginners:
If you liked this tutorial on creating a booklet in InDesign, you might like these:
Editorial Note: This post has been updated with contributions from Maria Villanueva. Maria is the Associate Editor of the Tuts+ Design channel.