How to Make a Plaid Pattern in Illustrator
Always wanted to create a plaid pattern, but never knew exactly where to start?
Well, if that’s the case, then you’re in luck since in this video I’m going to walk you through the entire process. You'll learn how to recreate an iconic pattern made popular by the movie Clueless.
The creative journey required to create an Illustrator pattern can sometimes prove to be a difficult challenge, especially when you want to design a seamless Illustrator pattern.
From how to create a pattern in Illustrator or how to make a repeating pattern in Illustrator to how to make a seamless pattern in Illustrator or how to make a plaid pattern in Illustrator, this little tutorial should provide all the answers to these questions.
So, if you want to make an Illustrator pattern or an Illustrator repeat pattern and then use it as an Illustrator pattern fill, you should be able to do so once you go through the video.
Also, don't forget you can always expand your pattern library by heading over to GraphicRiver, where you'll find a great selection of vector patterns ranging from simple Illustrator line patterns to more detailed ones.
Follow along with us over on our Envato Tuts+ YouTube channel:
How to Make a Plaid Pattern in Illustrator
Assuming you already have the software up and running, let’s jump straight into it!
Step 1
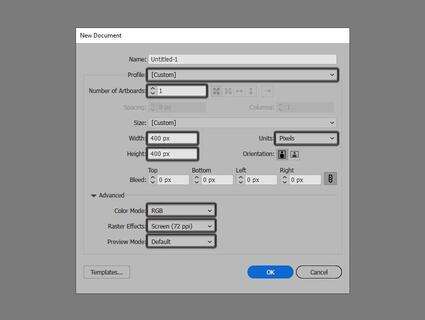
As with every new project, we’re going to start by setting up a new document. Head over to File > New or use the Control-N keyboard shortcut, which will bring up the New Document window prompt.
Here, we’ll want to set our Profile to Web, making sure to define both the Width and Height of our Artboard to 400 px, and then simply hit OK once we’re done.
Step 2
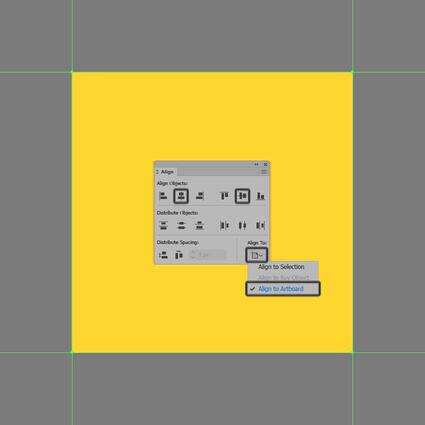
As soon as we’ve finished setting up our project file, we can start working on the actual tile, or in other words the repeating pattern segment, by creating its background using a 400 x 400 px square, which we will color using a light yellow, more exactly #FFD62C, making sure to position it in the center of the Artboard afterwards.
Step 3
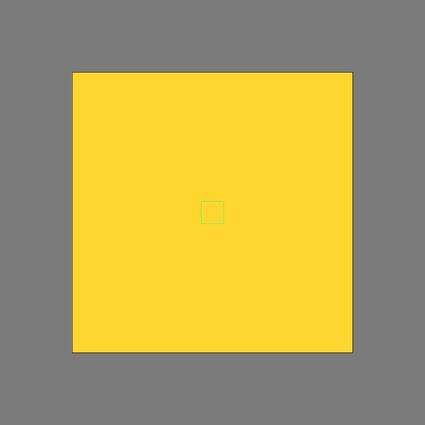
Next, we’re going to create a smaller 32 x 32 px square, which we will center align to the Artboard and then turn into a guide by simply right-clicking and then using the Make Guides option, making sure to lock it afterwards (right-click > Lock Guides).
While basic, this little guide will come in handy when it comes to the process of positioning our composing shapes.
Step 4
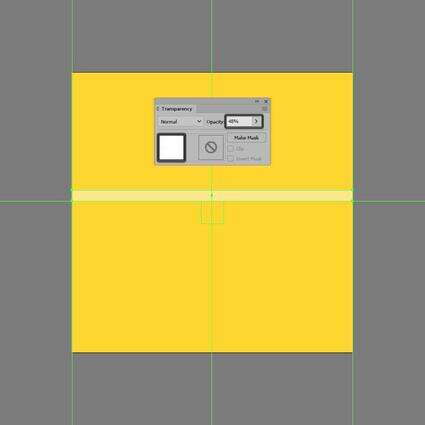
With the guide in place, we can start working on the lighter shapes by creating a 400 x 16 px rectangle, which we will color using white (#FFFFFF) and then position on the guide’s upper edge, making sure to lower its Opacity level afterwards to about 48%.
Step 5
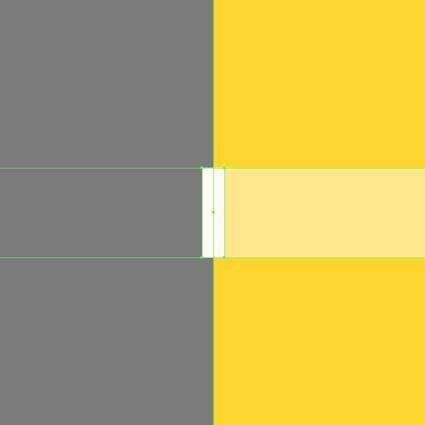
Create the main shape for the smaller diagonal lines using a 4 x 16 px rectangle (#FFFFFF), which we will position in the center of the Artboard’s left edge.
Step 6
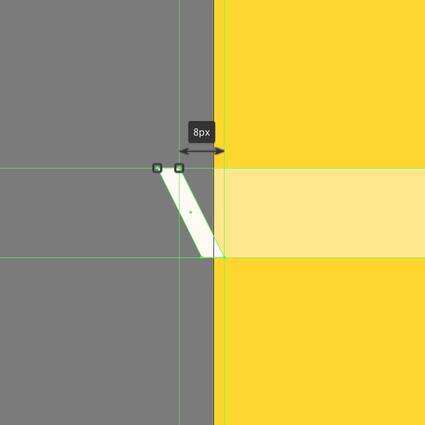
Adjust the shape by selecting its top anchor points using the Direct Selection Tool (A) and then pushing them to the outside by 8 px using the directional arrow keys.
Step 7
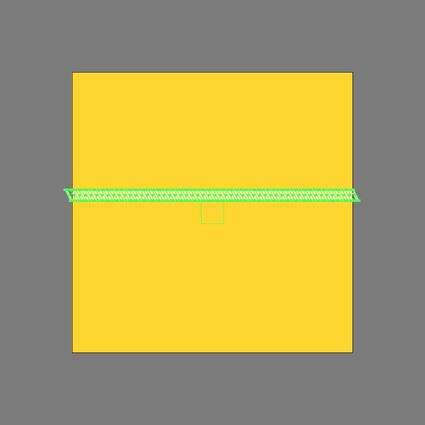
Add the remaining lines by creating an initial copy using the click-and-drag method, positioning it 4 px from the original, and then simply duplicating the action using the Control-D keyboard shortcut, until you reach the other end of the Artboard.
Once you’re done, select and group all the lines together using the Control-G keyboard shortcut, making sure to lower their Opacity level to 64%.
Step 8
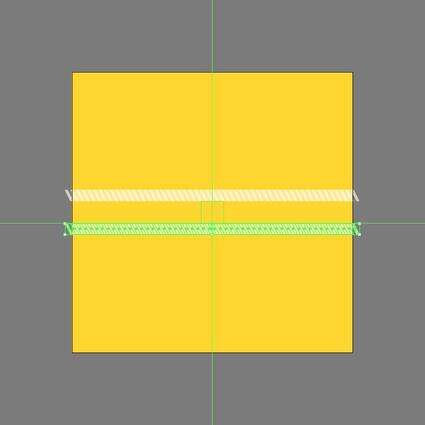
Since we’re pretty much done working on the lighter shapes, we can create a copy using the click-and-drag method, which we will align to the bottom edge of our guide.
Step 9
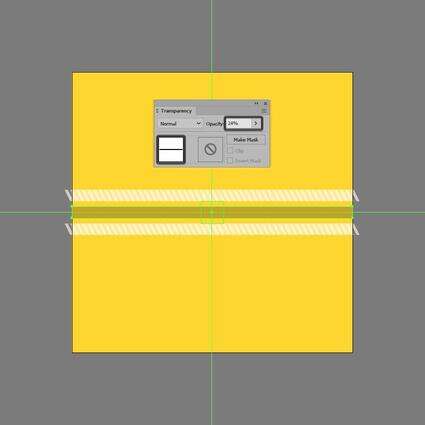
With the copy in place, we can add the inner darker shape using a 400 x 16 px rectangle, which we will color using black (#000000), making sure to lower its Opacity level to 24%.
Step 10
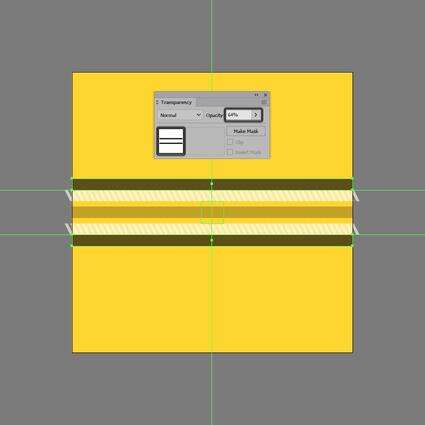
Add the outer darker shapes using two copies of the one that we’ve just created, which we will adjust by increasing their Opacity to 64%.
Step 11
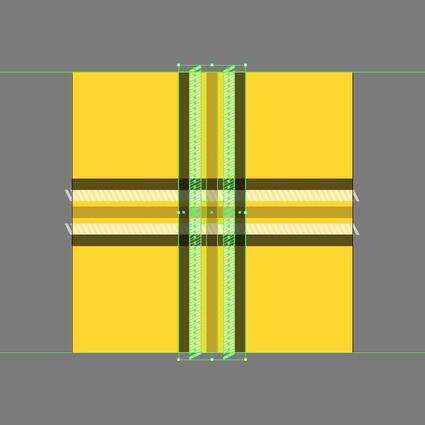
As soon as we’ve finished working on the horizontal section of our design, we can quickly add the vertical one by creating a copy of it (Control-C > Control-F), which we will then rotate (R) using a 90° angle, making sure to select and bring all of the darker shapes to the front (right click > Arrange > Bring to Front) so that they will end up overlapping correctly.
Step 12
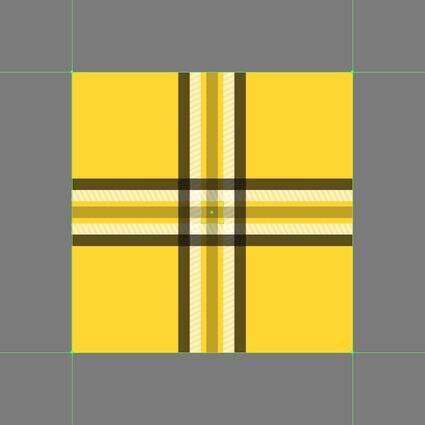
Since we’re pretty much done working on the actual tile, we can now select (Control-A) and group (Control-G) all of its composing shapes together, and then mask them using a copy of the background.
To do this, first paste the background copy in front, and after selecting both it and the grouped shapes, simply right-click and then use the Make Clipping Mask option.
Step 13
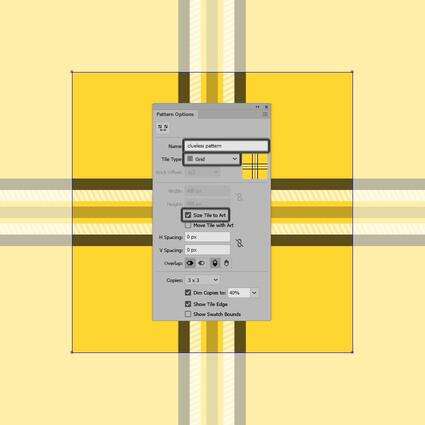
All we have to do now in order to turn our design into a pattern is go to Object > Pattern > Make, which will bring up the Pattern Options window prompt.
Here, we’ll want to give our new pattern a custom name, and then once we’ve made sure that the Tile Type is set to Grid, we’ll want to enable the Size Tile to Art option, leaving all the other settings as they are.
Once we’re ready, we can click on Done, which as you can see will add the pattern to our Swatches panel.
Step 14
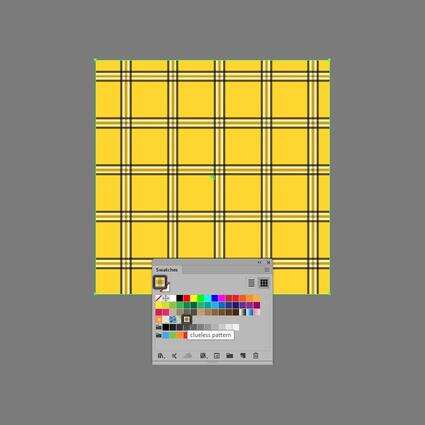
To use it, all we have to do is select the Rectangle Tool (M), and then once we’ve assigned the new pattern as our Fill, we can click and drag until we get the desired shape and size.
Great Job!
As always, I hope you had fun watching this video and most importantly managed to learn something new and useful during the process!
Further Expand Your Pattern-Building Skills!
Just finished going through this quick tutorial, and feel like learning more? Well, if that's the case, you're in luck, since I took the time to put together this little list that should keep you going for the following days!
How to Create Line Patterns in Adobe IllustratorIn today’s tutorial, we’re going to take a quick look at the process of creating a set of vector line patterns in Adobe Illustrator, using nothing more than...
Andrei Stefan
14 Oct 2019
Vector Pattern
How to Create the Carpet Pattern From "The Shining" in Adobe IllustratorIn today’s tutorial we’re going to continue with the Horror Movie Special, and learn how to create the trippy carpet pattern from Stanley Kubrick’s “The...
Andrei Stefan
15 Oct 2018
Patterns
How to Create a Pencil-Themed Seamless Pattern in Adobe IllustratorIn today’s tutorial we’re going to take a quick look at the process of creating a pencil-themed pattern in Adobe Illustrator. Learn you can easily put it...
Andrei Stefan
21 Jun 2018
Patterns
How to Create a Pineapple Seamless Pattern in Adobe IllustratorIn this quick tip, you will learn how to create a pineapple seamless pattern in Adobe Illustrator.
Nataliya Dolotko
17 Jul 2018
Patterns
How to Create an African Celebratory Pattern in Adobe IllustratorThis tutorial shows you how to create a seamless African celebratory pattern in Adobe Illustrator.
Kaylan Michael
11 Apr 2018
Vector Pattern
How to Create a Tribal African Inspired Pattern in Adobe IllustratorLearn how to create a circular African inspired pattern using basic shapes and sacred symbols such as the ankh cross and cowrie shells in Adobe Illustrator.
Kaylan Michael
10 May 2018
Patterns
Quick Tip: How to Create a Monstera Leaf Pattern in Adobe Illustrator In today’s quick tip, you’re going to learn how quickly create a monstera leaf pattern in Adobe Illustrator.
Nataliya Dolotko
16 Jan 2018
Patterns
How to Create a Set of Organic, Hand-Drawn, Retro Patterns in Adobe IllustratorHave you always wondered how to do seamless patterns in Illustrator? Patterns that look effortless and are pleasant to the eye? In this tutorial you will...
Laura Keung
08 May 2018
Patterns
How to Weave a Bedouin Sadu Fabric Pattern Using Adobe IllustratorWould you like to create a digital weave? Follow this textile tutorial to create a beautiful Middle Eastern Sadu fabric weave, using Adobe Illustrator.
Miss Chatz
11 Sep 2018
Patterns
How to Create a Gzhel Pottery Russian Pattern in Adobe IllustratorIn this tutorial, you will learn how to create and use an Art Brush in Adobe Illustrator to create a vector traditional Russian pottery design called Gzhel!
Elizaveta Akimova
29 Nov 2018
Global Influences