How to Use Illustrator on iPad
Get ready to take your illustrations away from your desktop computer and onto your iPad! Adobe Illustrator on the iPad is now available to download on the App Store! Now, for the first time, vector artists will be able to create their beautiful graphics, logos, icons and more using Adobe Illustrator on an iPad.
Many people have been asking, "When will Illustrator come to iPad?" Illustrator on the iPad was one of the most exciting announcements from Adobe MAX back in 2019. Having redesigned Illustrator "from the ground up", this new version allows you to take advantage of the iPad's exceptional touch capabilities, and of course the Apple Pencil.
Now, the answer to the question "When will Illustrator come to iPad?" has finally been revealed. The vector graphics program features core tools such as paths and typography, in addition to some new ones developed specifically for the touch experience!
So follow along with the steps below as we take a look at how we can make the most out of experiencing Adobe Illustrator for iPad whilst also comparing the functions with the desktop version.
If you prefer to learn via video content, you can do so over on our Envato Tuts+ YouTube channel:
What You'll Learn in This Illustrator on iPad Tutorial
How to use Adobe Illustrator on iPad Pro
An introduction to many of the tools and new features available and how they compare between the desktop and iPad versions
How to create a simple logo using Illustrator on the iPad
How to use the Pathfinder options on Illustrator on the iPad
How to create a Gradient on Illustrator on the iPad
1. How to Get Adobe Illustrator on iPad
1.
Step 1
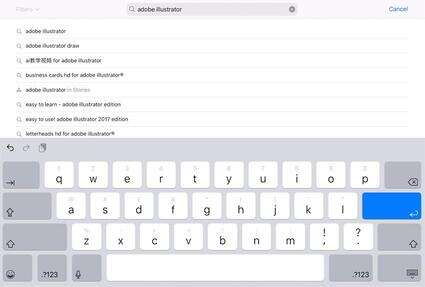
First, let's learn how to get Adobe Illustrator on iPad using the Apple App Store. From the App Store main menu, tap on the Search icon in the bottom right. Type Adobe Illustrator iPad into the search bar that appears at the top of the screen.
For those of you asking "Does iPad Pro support Adobe Illustrator," the answer is yes! It is compatible with most generations of iPad and requires iOS 13.0 or later

Step 2
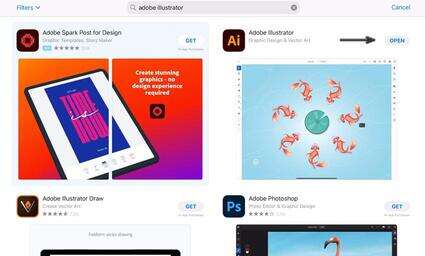
Adobe Illustrator iPad should be among the first options that you can select to download. Just tap on the Download or Purchase button as you would normally.
Step 3
You can also check out the Adobe Inc. developer page to have a look at what other creative and drawing apps you might be interested in. From Photoshop to Lightroom, Adobe Creative Cloud has some of the best creative apps that help you make the most out of your device!

2. A Tour of Adobe Illustrator on iPad
2.
First Impressions
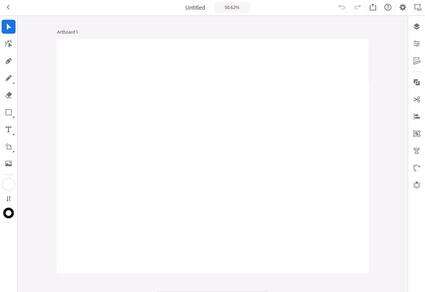
For those of you who are already very familiar with the desktop version of Adobe Illustrator, prepare to be surprised! Compared to its desktop counterpart, the user interface (UI) has been almost completely redone. And that's a good thing!
As with most of Adobe's other recent mobile-focused apps (Photoshop, Fresco, etc.), the UI has been simplified to allow users quicker access to the tools they need. This means that using the app will be a lot easier for beginners.
Compared To...
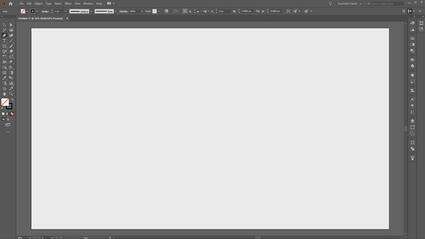
Compare this to the default UI of the desktop version of Adobe Illustrator, where you have panels everywhere! It can be very daunting and confusing for a first-time user.
Long-time users of the desktop version of Adobe Illustrator may be concerned that the iPad version is just another pared-down version of the program that we all know and love. Or that it is considered a "lite" version.
While you shouldn't expect a full mirror of the desktop app, you will be surprised at some of the unique tools that are available on the iPad version. Let's continue with our comparison below.
3. How to Use the Pen Tool on Illustrator for iPad
3.
The Desktop Pen Tool
Often considered one of the most powerful tools in Illustrator's arsenal, the Pen Tool is used for the majority of your workflow creating vectors.
However, for most beginners it can be tricky to use as it requires multiple other functions to get the most out of it. This includes things such as learning how to use Bézier Handles and holding down specific keys on the keyboard for adjustments.
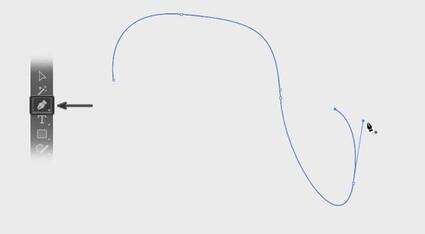
The iPad Pen Tool
Using the Pen Tool on the iPad is an absolute joy! It has been designed specifically to use with a touch device, without the need for a keyboard. You can access it by tapping on the Pen Tool Icon on the left menu bar.
Pen Tool Behaviour
The behaviour of the Pen Tool on the iPad is very similar to the way it works on desktop. Tapping on different points on the canvas will create straight lines, while holding and dragging will create curves.

4. How to Use the Touch Modifier on Illustrator for iPad
4.
The Touch Modifier
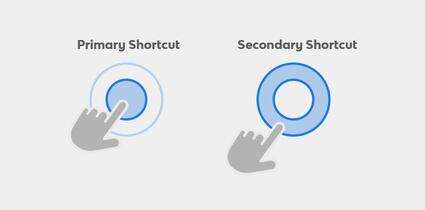
The Touch Modifier is an on-screen button that acts as a sort of keyboard replacement for shortcuts. This changes and adapts to whatever tool you are using, so you can hold it down to access your other sub-tools.
Using the primary touch shortcut: Tap and hold the centre of the touch shortcut circle icon with your other hand to activate the primary action of your selected tool.
Using the secondary touch shortcut: Tap and slide to the outer edge of the touch shortcut circle icon with your other hand to activate the secondary action of your selected tool.
5. How to Use the Pencil Tool on Illustrator for iPad
5.
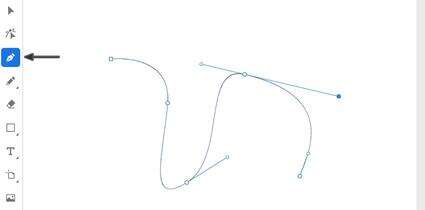
The Desktop Pencil Tool
Another powerful tool that is widely used in Adobe Illustrator is the Pencil Tool. On the desktop, this tool will allow you to create freeform paths as you click and drag along the screen. This allows you to create fast sketches or give your illustrations that hand-drawn look.
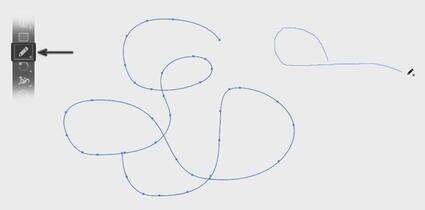
The iPad Pencil Tool
Using the Pencil Tool on the iPad has a few cool features that are unique to the device. Firstly, by stopping your path (without releasing your Apple Pen from the screen), you can create Corner Points. This is extremely useful for separating your curves while still using one continuous line!
6. How to Use the Mirror Tool on Illustrator for iPad
6.
Symmetrical Objects on the Desktop App
One of the easier ways you can create a symmetrical object in illustrator is to duplicate your shape using Control-C to copy and then Control-Shift-V to paste in place. Then, by Right-Clicking on the object, you can choose Transform > Reflect.
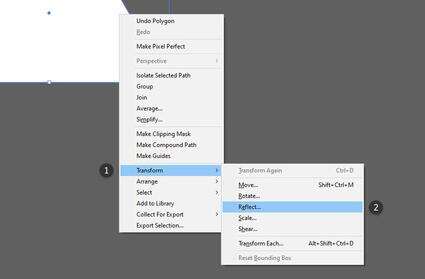
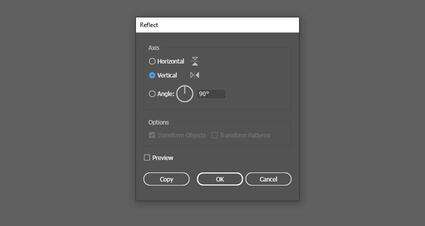
You will then be given the option to reflect the object Horizontally or Vertically.
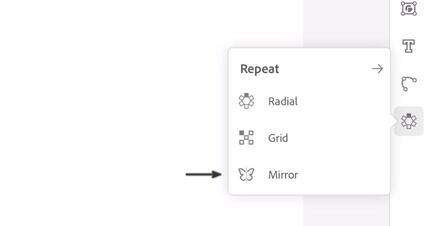
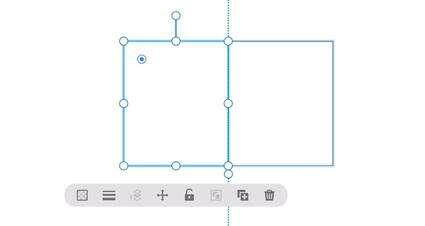
Symmetrical Objects on the iPad App
Unique to the iPad version of Adobe Illustrator is the Mirror Tool. This allows you to create mirrored illustrations live, so you can see exactly what the result is going to be in real time!
7. How to Use Pattern & Radial Repeat
7.
Radial Pattern on Desktop
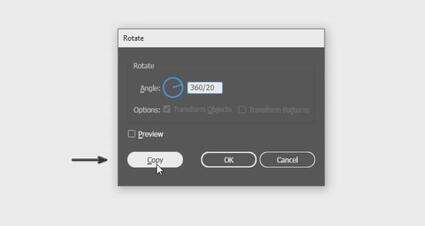
To create a radial pattern using the desktop version of Adobe Illustrator, you need to begin by creating a shape. Select your shape and then hit the R key on your keyboard to select the Rotate Tool. Alt-Click on the canvas to bring up the Rotate dialogue box.
Enter a fraction for the Angle (e.g. 360/20) and then click on Copy.
Upon returning to the artboard, just press Control-D to repeat until you have a radial pattern.

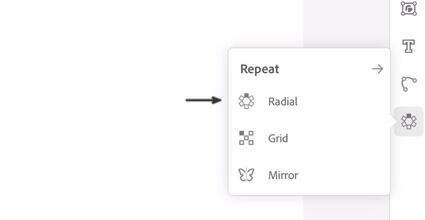
Radial Pattern on iPad
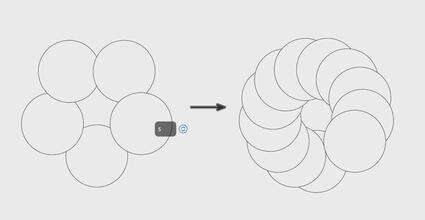
On the iPad, creating a radial pattern is much easier! Simply select your shape and use the Radial Repeat Tool to create your pattern, and use your Apple Pen to Tap-Drag to increase or decrease its size.

You can also easily increase or decrease the number of shapes within your radial pattern.
8. How to Type on a Path on Illustrator for iPad
8.
Type on a Path Desktop Version
To create text on a path, you must first create the path you want to use. Click and hold the Type Tool (T) until you see the option to select the Type on a Path Tool.

With the tool selected, simply hover over the path you want to use until it's highlighted in blue (indicating that you can apply the tool to the path). Then just click anywhere on the path to add your text.

Type on a Path iPad Version
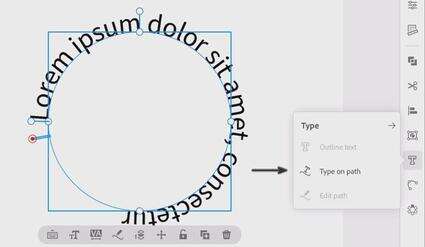
On the iPad, creating text on a path is even easier than on the desktop version. First, create your path.
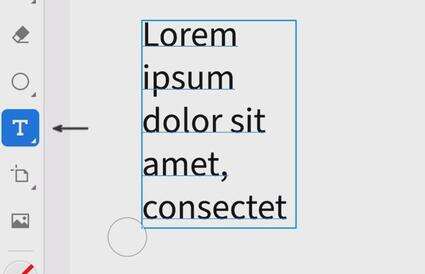
Create some text using the Type Tool.
Drag and drop your text onto the path, use the Selection Tool to select both the path and the text, and then select the Type on Path tool.
9. How to Create a Simple Logo on Illustrator for iPad
9.
Step 1
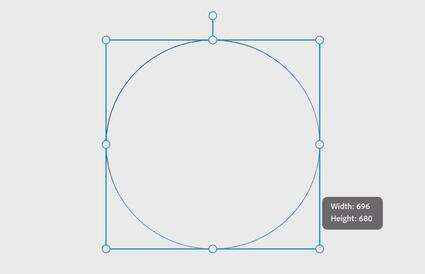
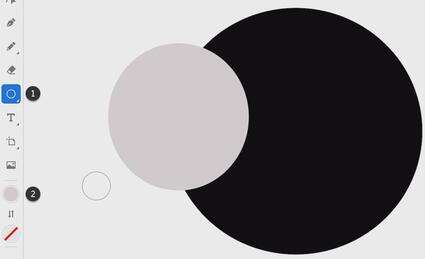
Now that we are familiar with the tools of Adobe Illustrator for the iPad, let's go ahead and create a simple logo. First, create two circles using the Circle Tool. You can also change the colour of each to help differentiate between the two shapes.
Step 2
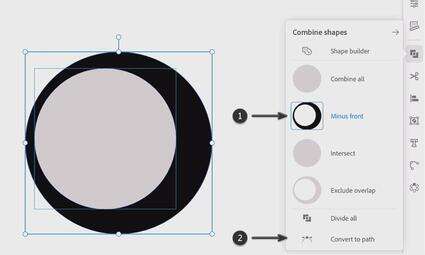
Place one circle on top of the other, and then select both shapes. Use the Minus Front Tool followed by the Convert to Path Tool to create the first shape of our logo.
Step 3
Duplicate the shape a couple of times until you have three shapes. Then use the Move Tool to arrange them until you get a pattern that you like.

Step 4
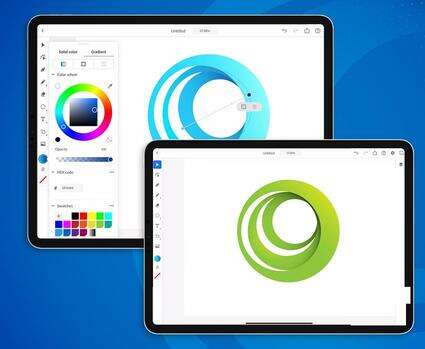
Tap on the Color Tool, and then choose Gradient followed by Linear Gradient.
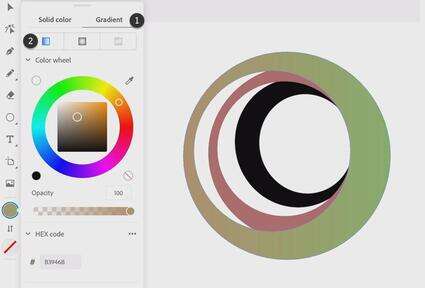
Step 5
Select the first Color Node on the selected shape, and then choose a colour that you like from the Color Wheel.
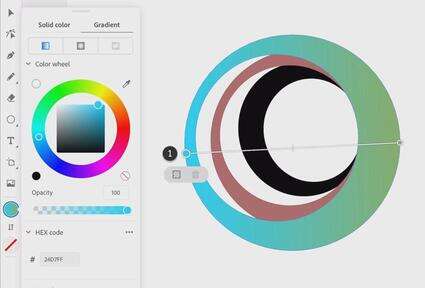
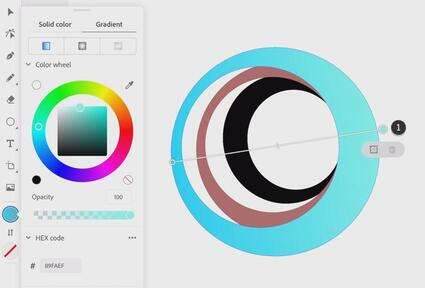
Step 6
Select the second Color Node, and then choose another colour to complete the gradient.
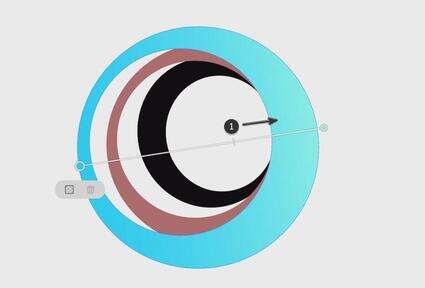
Step 7
You can then adjust the location for the Gradient Transition by using the gradient slider.
Step 8
Repeat this process for the remaining two shapes to complete the logo.

The Final Verdict
Adobe Illustrator iPad has been a long-awaited app, and it has been really worth the wait! With its unique features and modern, minimalist look, Adobe Illustrator for iPad truly feels at home on the tablet. The features are intuitive, and using the Apple Pencil makes using the app a completely new and joyful experience.
This is great news for beginners, and it can act as a great introduction to the desktop version of Adobe Illustrator.
So there you have it! Now you know how to use Illustrator on iPad Pro, and we don't have to wonder "when does iPad Pro support Adobe Illustrator" anymore! Having compared some key features between the desktop version and the iPad version of Adobe Illustrator, hopefully you have a better idea of the advantages and disadvantages of each.
Want to Learn More About Illustrator?
We have loads of Adobe Illustrator tutorial content, both written and video.
Head on over to our Envato Tuts+ YouTube channel for regular design educational content. Including our amazing course on Adobe Illustrator for Beginners.
If you're looking for written content, head on over to these tutorials to find out where you'd like your Illustrator journey to continue:
Adobe Illustrator
101 Awesome Adobe Illustrator Tutorials
Andrei Stefan
Adobe Illustrator
100 Best Illustrator Text Effect Tutorials (for Beginners & Beyond!)
Andrei Marius
Poster Design
30+ Best Poster Design Tutorials for Photoshop, Illustrator, and More!
Nona Blackman
Isometric
22 Illustrator Tutorials for Creating Isometric Illustration
Sean Hodge
Once you've mastered the basics, why not try our 10 Essential Design Tips for Illustrator.
For more advanced users, we have a cracking course on Mastering Logo Design in Adobe Illustrator.
Design & Illustration Apps for the iPad
Looking for Adobe Illustrator iPad alternative apps? Check out some of our content for Adobe Fresco, Procreate, and Affinity Photo:
Adobe Fresco
An Introduction to Adobe Fresco and How It Compares to Procreate
Daisy Ein
Affinity Photo
A Beginner's Guide to Affinity Photo for iPad
Abbey Esparza
Affinity Photo
Affinity Photo for Beginners: A Quick Start Guide
Abbey Esparza
Affinity Photo
Transitioning From Adobe Photoshop to Affinity Photo
Abbey Esparza
Procreate
How to Create a Punk-Rock Portrait in Procreate
Maria Dimova