How to use Photoshop: 5 basic steps to edit a photo
The 5 Best New Features of Photoshop CC 2019
5. A Revamped Implementation of Multiple Undos
Ctrl-Z or Command-Z now steps backward, whereas Ctrl-Shift-Z or Command-Shift-Z steps forward, all without abandoning any History states.
4. Paint Multiple Symmetrical Brushstrokes at a Time around Multiple Axes
Photoshop CC 2018 made this feature available as a hidden Technology Preview. Now it’s out there in the open and more capable than ever. You can even define your own custom symmetry axis from the Paths panel.
3. Preview Blend Modes from the Layers Panel
Ever left scratching your head wondering which blend mode to apply? Well then, Deke has good news for your scalp. Go to the Layers panel, hover your cursor over a blend mode, and watch it apply on-the-fly. You can’t help but get wise.
2. Basic Math
Like Illustrator and InDesign, Photoshop can now compute simple arithmetic operations: namely addition, subtraction, multiplication, and division. Wondering what a number divided by 2 is? Don’t. Just enter /2 and let Photoshop figure it out.
1. The Content-Aware Fill Taskspace
For years, the workings of Content-Aware Fill have been a mystery: Cross your fingers and hope for the best. Now Photoshop devotes an entire taskspace that puts you in control.
You can specify the areas from which Photoshop samples its source pixels, while at the same time previewing the results in real time. CAF even returns its results to an independent layer.
Eager to see how those features work, plus much more? Watch Deke’s Photoshop CC 2019: New Features for all the news on this exciting new update!
Other LinkedIn Learning courses you might be interested in are:
The Top 5 Free Alternatives to Photoshop
The Top 5 Free Alternatives to Photoshop by Brenda Barron on Dec 14, 2022

When it comes to editing your images, Adobe Photoshop is one of the most popular software solutions around. Used by amateurs and professionals alike, Photoshop can help to turn any image into a masterpiece.
Unfortunately, the Creative Cloud subscription that you need to access Photoshop can make it quite expensive for people who are just launching their photography brand. What’s more, with so many tools to choose from on Photoshop, you might find that this tool is tougher to use than other options.
So, what are the top free alternatives to Photoshop? That’s what we’re here to find out. Today, we’ll be looking at:
1. GIMP
The GNU Image Manipulation Program, or GIMP, is one of the best-known free alternatives to Photoshop on the market. As a very feature-rich solution for photographers, GIMP can do almost anything that Photoshop can. However, GIMP isn’t without its issues. For instance, many of the pre-set brushes have the same settings. Also, there are no drawing capabilities in GIMP either.
Pros:
Lots of features
Image slicing support
History toolbar
Blending and layer support modes
Cons:
Complicated UI
Strange text tool
No RAW filter
2. Krita
Krita is another highly popular free alternative to Photoshop. In fact, it’s one of the tools most recommended by photographers in forums about editing and creative image design. The best thing about Krita is how similar it looks and feels to Photoshop. The toolbars look almost the same, and the dark theme reminds you of working with Adobe. Unfortunately, the tool is a little bit laggy at times, and there’s no RAW filter included.
Pros:
Support for pens and drawing tablets
Multiple pre-installed templates
Lots of effects to choose from
Guides and rulers supported
Cons:
No history toolbar
Slow at times
Limited text feature
No RAW filter
3. Paint.NET
Originally, Paint.NET was intended to be an enhanced version of the MS Paint tool. So, you’ll notice many features similar to your Microsoft application here. However, while Paint.NET might not be as powerful as Photoshop, it gives you a lot of features that may make it a great alternative for beginners. If you need free options for Photoshop that are compatible with Windows, this could be the solution for you. Paint.NET comes with layers and blending modes, as well as a history tool. Of course, it’s not quite as powerful as Photoshop.
Pros:
Blending and layer support
History tool
Support for multiple file types
Well-rounded editing tool
Cons:
Outdated UI
Lack of Guide support
No RAW option
No slice, patch or spot healing tool
4. Pixlr Editor
Although it’s a browser-based tool, the Pixlr editor is just as powerful as many desktop applications. Unlike other free alternatives to Photoshop, Pixlr editor was created by AutoDesk – a leading name in computer-aided design. There are multiple versions of Pixlr Editor available. The Editor features a wide variety of tools, including blur, sharpen, noise, levels, and curves. There’s also a toolbox that’s similar to GIMP’s, including stamp tools, healing, brushes, fills and more.
If you’re looking for a quick and simple way to improve your images, and you don’t want to worry about complex software, Pixlr is a great solution.
Pros:
Access on any platform (because it’s browser-based)
Layer and blending supported
Customizable interface
Healing and history tools
Cons:
Flash download required
No pen tool supported
Not as much file support as Photoshop
No guides and rulers
5. Photo Pos Pro
Finally, Photo Pos Pro is one of the best free alternatives to Photoshop on the market today. As an advanced piece of editing equipment designed for people who can’t afford Photoshop, Photo Pos Pro is brimming with fantastic capabilities. Similar to Photoshop, there are layers and layer masks, as well as healing and clone brushes. There are even options for scripts as well as match editing to help save you time with your edits.
Photo Pos Pros also comes with plugins to enhance your editing experience. You can also create and save filters that you want to use in the future.
Pros:
Customizable interface for novices and experts
Support for layers and masks
Intuitive feature selection
Closely resembles photoshop
Cons:
Can be difficult to learn
Software acts strangely at times
Size of exported files is limited
So there you have it! Some of the best free alternatives to Photoshop available today. Which one do you plan on using?
For more tips and tricks to support your photography brand, remember to follow us on Facebook and Twitter.
How to use Photoshop: 5 basic steps to edit a photo
Image: Maria Diaz / ZDNet
Many of us, from professional photographers to complete beginners, get the urge to try our hand at Photoshop. Whichever you are, you shouldn't be intimated by the prospect of editing in Photoshop; it only takes a few steps to make your pictures look great.
Adobe Photoshop offers users endless possibilities to edit their photos and create graphics, which is why it's become my personal go-to over the years. There are several ways to edit in Photoshop. Which ones you choose will depend on preference. We'll cover a very basic method to edit a photo in the steps below.
How to use Photoshop
Step 1: Open your image in Photoshop
Image: Maria Diaz / ZDNet
Open Adobe Photoshop and go to File in the menu at the top of your screen. Click on Open to view the file browser and select which picture you want to edit. I chose a picture that was taken by my five-year-old.
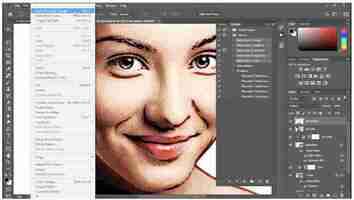
Below is a Photoshop window: Tools is on the left side of the screen, Options is at the top, and the Adjustments and Layers are on the right.
Photoshop lets users pick their workspace layout. This is the Essentials layout, which is the default. Image: Maria Diaz / ZDNet
Photoshop works with layers, so when you make an adjustment like brightness and contrast, you add an adjustment layer on top of your picture. If you decide to delete that layer later on, the brightness and contrast adjustment will be deleted with it.
Always keep your image layer below the adjustments layers. Image: Maria Diaz / ZDNet
It's important to keep the order of your layers in mind as well. If you're editing a photo, that image should be the first layer. Anything below that image layer will not be visible unless you erase a portion of your image (by cutting, using the Eraser tool, or deleting it) to let what's below it show through.
Step 2: Crop and straighten
The Crop tool is on the left side of the window. Image: Maria Diaz / ZDNet
Select the Crop tool. Then, think of the photo as a canvas. The first thing I do when I open a picture in Photoshop is adjust my canvas to the size and composition I need. Just click the corners of the crop frame and drag it to adjust the size. When you're happy with the new framing, you can place your cursor just outside any edge of the Crop Tool's bounding box until you see it turn into a bent, double-ended arrow. Clicking and holding will let you move the frame to rotate and straighten your image.
Image composition is something a photographer takes into account while taking a photo, but you also need to keep it in mind when cropping. This will ensure that that the elements you want to include aren't cropped out and will also maintain good composition.
Use the lines as your guide to ensure the photo is straight. Image: Maria Diaz / ZDNet
Straightening is key to a good photo. A good rule of thumb is to always use the horizon as a guide to straighten pictures. If you have a specific horizon line you'd like to use, you can click Straighten in the Options section. This will let you draw a line that the image will instantly rotate to. Not all photos need to be straight, though, and you can choose a tilted composition as an artistic liberty. Play around a bit to see what looks good to you.
When you're happy with the cropping and rotation of the image, click the Check-mark in the Options bar, or hit Enter on your keyboard to apply the changes.
Step 3: Play with your levels
Image: Maria Diaz / ZDNet
Select Levels under Adjustments to add a layer over your image, which will allow you to play with the levels and familiarize yourself with a histogram. Levels can be used to adjust exposure and make photos look brighter or darker.
Adjusting Levels will display the photo's histogram, which is essentially a graph that represents the light levels of an image. A histogram's left side symbolizes black and the right side symbolizes white. Adjusting the indicator arrows shown below can dramatically change the dark and light levels on the photo.
The indicator arrows can be moved to the right or left to adjust the shadows and highlights of the photo. Image: Maria Diaz / ZDNet
Both ends of the waves on a histogram should theoretically taper off evenly until flat; if a curve abruptly ends on one side, it's an indicator that the picture may be over- or under-exposed. However, a great photo doesn't need to have the curves tapered off in its histogram. If a picture was taken in the dark, the histogram may look more like the one on the left below, for example. It boils down to a histogram simply being a tool to see how light behaves in a photo.
The histogram on the left is from a picture taken at night; the middle is a mid-afternoon photo; and the one on the right is the photo we're editing now. Image: Maria Diaz / ZDNet
There's a lot more to reading a histogram, but this is a place to start for Photoshop beginners. Adjusting Levels is a more advanced way to edit a photo, but it helps beginners become familiar with a histogram.
Step 4: Adjust Color Balance
Image: Maria Diaz / ZDNet
Under Adjustments, select Color Balance to add an adjustment layer that lets you alter the colors on the photo. The picture I chose has a red tinge, since my five-year-old doesn't know how to adjust the white balance on a camera. I'll be using a Color Balance layer to help it look like it would to the naked eye.
I removed the reddish tint on the photo to make the planter the color it truly is to the naked eye. Image: Maria Diaz / ZDNet
This isn't always necessary, as many cameras automatically tailor the white balance when a photo is taken -- especially smartphone cameras. But it's a great tool to learn for the times when it will be needed.
Step 5: Remove any unwanted spots
This has been a very popular request in my time using Photoshop and doing photography. There are a few ways to remove spots, but one of the most straightforward ones uses the Spot Healing brush and the Clone Stamp tool.
The Spot Healing Brush Tool
I removed the smaller scuff marks and water marks from the planter. Image: Maria Diaz / ZDNet
The Spot Healing Brush is an automatic tool to remove marks and blemishes just by clicking on them. It removes outstanding marks, basing the correction on what is around the spot you choose. To use it, first select Spot Healing Brush Tool from the toolbar on the left.
One way to remove unwanted marks on a photo is by using the Spot Healing Brush Tool. Image: Maria Diaz / ZDNet
Make sure the photo layer -- not an adjustment layer like Levels or Color Balance -- is selected on the right, and rasterize the layer if needed (right-click on the photo layer, select Rasterize Layer). Then just click on the blemishes that need to be removed on the photo.
The Clone Stamp Tool
Before and after removing the larger scuff and water marks on the photo. Image: Maria Diaz / ZDNet
The clone stamp tool is handy for larger marks that need removing, particularly on a smooth background. Make sure the photo layer is selected and rasterized, and select Clone Stamp Tool.
Select the Clone Stamp Tool to the left of the window. Image: Maria Diaz / ZDNet
On your photo, find a spot you'd like to replace the blemish with. If it's on a smooth area, I typically pick a place right next to the blemish to avoid issues with shadows and highlights. Then click on it while pressing Alt or Alt Opt, and this will clone the spot. Move the cursor to the blemish you want to remove and click to stamp it.
I removed some scuff marks on the picture above but kept the larger drip mark for the sake of simplicity. It adds character, if you ask me.
This is obviously a condensed introduction to a very vast program, but it will help you familiarize yourself with Photoshop tools and navigation. Hopefully this how-to guide will inspire you to discover other adjustments in Photoshop.
FAQs
How can I zoom in or out on Photoshop? Image: Maria Diaz / ZDNet The Zoom tool is on the left side of the window, in the toolbar. Click on the magnifying glass (or press Z on your keyboard) and the options at the top of the window will indicate + to zoom in on an image or - to zoom out, so you can select the one you need. Zooming is useful when you need to work closely or adjust small detail on an image.
Can I learn Photoshop in a week? While you can learn the basics in a matter of a few days (with considerable trial and error), Photoshop is vastly rich in options and features. I've used it for close to two decades and am still learning new things. Adobe also updates it frequently, so new features are getting added all the time.
How much does Photoshop cost? Adobe began offering software through the Creative Cloud in 2013. Since then, Photoshop and other Adobe software titles have become available as subscription-based offerings. Here's a little more on their Photoshop subscription plans: Photoshop and Lightroom (20GB Cloud Storage) $9.99 per month
Photoshop and Lightroom (1TB Cloud Storage) $19.99 per month
Photoshop (100GB Cloud Storage) $20.99 per month
What is the difference between Photoshop and Photoshop CC? Photoshop refers to the photo editing program itself; it is the software's brand name. It also denotes a copy that was purchased as a standalone product. Photoshop CC or Creative Cloud is the subscription-based version of the software from Adobe available through your CC account.