HOWTO: Set your Pi-Hole as DNS on Huawei AX3 Quad-Core/AX3 Pro/Honor Router 6/WS7200 Router (IPv6 and IPv4)
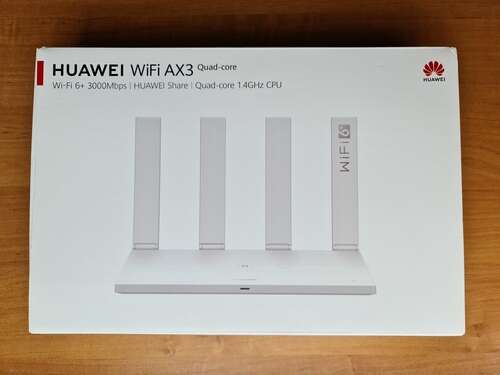
Recently, I managed to find a HUAWEI ax3 quad core Wifi 6 router on sale for just the equivalent of $37. I upgraded from using a TP-Link Archer C20 AC750, which was doing okay but I thought it was time to replace it (among other things, it only had Fast Ethernet ports!).
One thing I noticed with this router, is that just like many other newer consumer-grade stuff, it is a little limited in its configuration. At any rate, I managed to find a way to have it pointing to my Pi-Hole in both IPv4 and IPv6. I am assuming that you already have the Pi set up and running and able to receive requests, and you just need to have devices on your network automatically use it as DNS.
Here is how it's done. I am using the web configuration instead of the Huawei app. I have the Global version with Software Version 10.0.5.33 and EMUI Router version 10.0.5.1. In my region, this is known as the "Huawei Wifi AX3 Quad-Core", but I've seen it elsewhere as the "AX3 Pro" or under the Honor brand as "Honor Router 6". Model number is WS7200. It may also apply to the Dual-Core/Non-Pro version or other Huawei routers of similar vintage.
IPv4
With IPv4, this is straightforward, although not all in one place necessarily like in other routers.
Option 1: Use Static DNS
If you are using the router DHCP, it always advertises itself as the DNS server. Fortunately, you can point it your Pi-Hole as the upstream DNS server and it will totally work just fine.
Go to "Connect to Internet"
Check the "Static DNS" option
Enter your Pi-Hole's IP under "Preferred DNS server"
(Optional) Enter your secondary Pi-Hole IP under "Alternate DNS Server"
Option 2: Turn off DHCP and use the Pi as your DHCP
Go to More Functions -> Network Settings -> LAN
Turn off the DHCP server.
Enable DHCP on the Pi-Hole
IPv6
This is where it gets really interesting/hairy/janky!
Under More Functions->Network Settings->IPv6, you have a few options for how addresses are distributed on the network. However, the DNS configuration is grayed out and set to "Automatic"! Crucially, if you enable DHCPv6, you can set Primary and Secondary DNS servers, but for whatever reason Windows devices respect the setting, but iOS and Android devices refuse to use it and end up using the router as the DNS anyway somehow. I think they are forcing SLAAC for some reason.
There is, however, some good news. I was a web developer once upon a time, and took the liberty of opening up the Developer Tools in my browser. I found that the "DNS Access" option isn't even a disabled or hidden input, it's just a static element! However, I found that the router was somehow sending a "X_IPv6DNSOverrideAllowed=false" flag when I save the page, as well as "X_IPv6DNSServerOne" and "X_IPv6DNSServerTwo" parameters. This got me curious, and as it turns out, those flags totally work!
While the UI gives us no options, we can hack our way through there. So, if you're somehow insistent (as I was) in enabling IPv6 on your network, here are the steps using Microsoft Edge or Google Chrome (all modern browsers can do this. Adapt as appropriate for your browser):
Navigate to the IPv6 settings page (More Functions->Network Settings->IPv6)
Open Developer Tools (F12 or CTRL+SHIFT+I)
Select the "Sources" tab. You may need to click the More Tools ("+") icon to open it.
Select the file top->->views->ipv6->ipv6.js
Find the "postdata" function:
You will see the X_IPv6... options here. What you will need to do is to override the following variables:
toIpv6WanPostdata.X_IPv6DNSOverrideAllowed: set to true
toIpv6WanPostdata.X_IPv6DNSServerOne: set to Pi-Hole IPv6 address*
toIpv6WanPostdata.X_IPv6DNSServerTwo: (optional)
* Your Pi-Hole machine will have multiple IPv6 addresses, most likely. Use the link-local address, which you can tell easily because it always begins with the prefix fe80.
You should then have something like this. Take note of the quotes around the address, in case you are unfamiliar with JavaScript:
toIpv6WanPostdata.X_IPv6DNSOverrideAllowed=true;
toIpv6WanPostdata.X_IPv6PrefixLength=this.addrlength
toIpv6WanPostdata.X_IPv6DNSServerOne="fe80::2eed:74d2:9337:5ca3" toIpv6WanPostdata.X_IPv6DNSServerTwo=this.slavedns
Save your changes with CTRL+S. You should see a warning triangle next to the file name if it's edited:
Note: You will have to do this each time you log in if you make any changes to the IPv6 settings, because the script will revert back to original and the DNS flags will be reset. Best to do this change last. On the other hand, if you really love tinkering with your router, this can get quite annoying, but in that case you should be running a Mikrotik/Ubiquiti/Pfsense/OpenWRT/etc. anyway instead of some cheap-ass consumer grade router like the Huawei. ;)
Finally, click the actual Save button on the IPv6 settings page.
You can verify your settings (both for IPv4 and IPv6) by going to More Functions->About Router:
Honestly, I have no idea why this function is disabled in the first place. The router OS clearly supports it, but there is no corresponding way to set it in the UI.
Thanks for reading - enjoy!