Illustrator's Type Tool: A Comprehensive Introduction
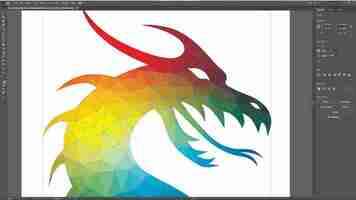
Adobe Illustrator CC Review
Adobe Illustrator is the industry standard for professional graphic design software, and for good reason: It provides some of the best-quality vector tools. However, it requires an expensive subscription and Adobe Illustrator is meant to be used in conjunction with the other programs in the Adobe Creative Suite.
Why you can trust Top Ten Reviews Our expert reviewers spend hours testing and comparing products and services so you can choose the best for you. Find out more about how we test .
To understand Adobe Illustrator CC, you need to know more about Adobe’s Creative Suite, which includes Photoshop, Illustrator and InDesign. Each of these programs handles a different part of digital art and graphic design. Adobe encourages graphic designers to use all three programs to get the best results.
Photoshop is best for photo editing and digital painting, as it works with pixels and offers image-enhancing tools. Illustrator works with vectors to create images that can scale to any size without becoming pixelated, making it ideal for logos and banners. And InDesign is desktop publishing software that helps you place text and imagery onto pages for publication. You don’t have to use all of these programs to create design projects, but it’s best to know that they are intended to work together.
(Image credit: Adobe)
Illustrator has all of the vector tools you need, and then some. This large selection can be daunting at first, but once you know what all of the tools do, you’ll find that it offers the greatest creative freedom of any vector-based graphic design software. There are pen tools, vector brushes, the ability to create custom brushes, and plenty of text tools to help make your designs stand out. For symmetry and balance, use the guides, grids and rulers to make sure everything lines up. We love the way Illustrator responds to tablets; we saw pressure sensitivity in each stroke and could control the way the lines looked.
Image tracing is an excellent time-saving feature. To use it, import a raster image into the program, and choose Image Trace. The raster image will be turned into a vector. From there, select the image, and click Expand. This will make it an editable vector image. It isn’t always perfect, and you will likely need to touch up the converted image, but it saves you a ton of time.
(Image credit: Adobe)
Adobe Illustrator review: Features
Although you can import images and use content-aware scaling in Illustrator, the program is not designed to make pixel adjustments to photos. This means the software lacks filters, HDR imaging tools, panorama stitching, color correction, noise removal and automatic lens correction. Adobe intends Photoshop to handle those tasks. Illustrator comes with 15 free templates, and you can buy more in Adobe Stock, an online royalty-free library of images, graphics and vectors.
Illustrator provides masking tools, which allow you to add or remove elements from your design to make it look more dynamic. There is also perspective-based editing and the ability to create animated GIFs. In addition, Illustrator has batch processing, which lets you apply the same effects to multiple documents at once – a feature that saves you time when working on big projects.
(Image credit: Adobe)
Adobe Illustrator review: Compatibility and Export Options
Illustrator handles most file types, including JPEG, GIF, PNG, TIF, BMP, SVG and AI. You cannot save files as PSDs, and the software doesn’t work with RAW or XLS files. Illustrator is available for both Mac and PC. Adobe Illustrator Draw, a tablet app, is also available for iPad and Android devices.
This software provides everything you need for your printed projects to turn out just the way you envision them. Use the bleed setup to ensure no unwanted white space makes its way onto your physical creations. You can also add printer’s marks, making it easier to know where to cut the paper once it’s been printed. Should anything be off, Illustrator will warn you before sending your file to the printer.
Adobe Illustrator review: Price and Support Options
As with the other programs in Adobe’s Creative Cloud, Illustrator requires a subscription, which costs either $20.99 per month or $239.88 per year. Adobe offers a free trial period, but it’s only seven days, which is much shorter than the 30-day average. If you’d prefer a powerful program that is much more affordable, we recommend Affinity Designer (opens in new tab) and the other Affinity apps.
Adobe has one of the largest support databases of any graphic design software. If you want tips from pros, simply go onto the official user forum or one of the many fan-created user forums. Because this is such a popular program, you’ll also find hundreds, if not thousands, of video tutorials created both by Adobe and pro users. You can contact Adobe via email and live chat if you need further assistance.
Should you buy Adobe Illustrator?
Illustrator is the industry standard for vector-based graphic design software. It’s super-powerful and creates quality effects and vector elements. If you need pixel brush tools and photo touch-up tools, however, you’ll need a photo editing software, and maybe some of the best graphic design software too. The subscription requirement is probably the biggest drawback, but if you’re willing to pay, you’ll have access to some of the most powerful vector tools on the market.
How to Use the Type Tool in Illustrator to Alter Sample Text
Alex is a passionate graphic designer from Texas. She grew up captivated by the world of color, typography, and print design.
Want to learn how to edit text with Illustrator’s Type Tool? Here’s how to modify sample text from vector files to fit the needs of your design or business.
Mockup image via SAHACHATZ. Promotional banner via Romanova Ekaterina.
Shutterstock’s collection of stock vectors allows for quick access to designs and illustrations to jump start your design process. Many of these stock vectors feature layouts for sales promotions or sample text to show you how text may appear within the design. You can download these vectors as an EPS file format and open them within Adobe Illustrator.
Perhaps you’d like to personalize the copy to fit the specifications of a campaign or business, the vector came with the default “Sample Text Here” or the classic “Lorem Ipsum” filler text. How do you go about changing that text if it’s vectorized?
Learn about the many functionalities of both the Type Tool and Type on a Path Tool in Adobe Illustrator below, along with how to use them to edit vectorized sample text in just a few simple steps.
Type Tool Breakdown in Adobe Illustrator
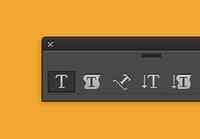
Found in the left-hand toolbar, the Type Tool (T) is inarguably one of the most important tools within Adobe Illustrator. With it, you can type out lines of horizontal text or align text to follow a vector path, to name just a few functions.
Once activated, click and drag a text box to act as a boundary for your text. If you prefer not to have a text box, you can click on your document to act as the starting place for your lines of text. Type away to your heart’s content, but watch out for type that lies outside the text box.
You’ll notice a small box with a red plus sign to alert you of outside text. Simply decrease your font size with Shift + Command + < to ensure all type is displayed properly. If needed, you can expand your text box by clicking and dragging the bounding box with the Selection Tool (V).
The Type on a Path Tool allows for text to be displayed on a curve, an angle, and even upside down, if that suits your fancy. This tool is ideal for editing sample text that follows an incline or is oriented in a circular fashion.
Altering Horizontal Lines of Text
When downloading a sales promotion or design in a vector format, there will be areas of filler or sample text to display how the vector art can be used. Maybe your business isn’t offering 75% off like it mentions on the sample design, or perhaps the promotion code doesn’t match. How do you edit those pieces of text?
Illustrator’s versatile tools allow you to easily alter lines of text to fit the needs of your campaign. By utilizing the handy Type Tool, the Selection Tool (V), and the Character palette, you can drastically change the look of the design in just a few steps.
Image via Graf Vishenka. Changed text with Golden Plains, Bodoni 72, and EB Garamond.
Begin by denoting guides to ensure proper typographic alignment in your design. Bring up the rulers with Cmd + R, then click and drag the light blue lines to the baselines of the original sample text and specify the beginning and ends of the text. Setting up precise rulers to guide your text results in a symmetrical and successful design.
Isolate the sample text by ungrouping all vector elements with Shift + Cmd + G, then delete the text you’d like to replace with the Delete key.
With the Type Tool (T), click and drag along the guides to create your text box. This box allows text to only be visible within the boundaries. If you’re not keen on creating a text box, simply click within the artboard and start typing out your phrase.
Move your text box around as needed with the Selection Tool (V) or simply expand the size of the text box by clicking and dragging the white squares located on the perimeter of the text box.
Scroll through various fonts in the Character palette to find the style that best works for your design. Different font type evoke different meanings, and successful font pairs are crucial for an effective design.
Script styles work best for a feminine or elegant appearance, classic serifs are ideal for professional sales and details, and sans-serifs work best for more casual designs. Experiment with up to three fonts at maximum in your design, and play around with contrasting font styles.
Editing Text on an Angle
In addition to editing horizontally oriented sample text, you can also easily alter text that’s oriented on an angle.
Image via Dmitry Kostrov. Subdued Swirls color palette applied. Sale details replaced with Futura PT.
With the Pen Tool (P) draw out the baseline underneath the angled text you’re planning to edit. Be sure to line up the vector path to the original sample text as accurately as possible, or the text may appear uneven.
Isolate the sample text from the other vector elements with Shift + Command + G, then remove the original text with the Delete key.
Activate the Type on a Path Tool, located within the Type Tool dropdown, to start typing out your phrase along the line segment you drew with the Pen Tool (P). If you’re unable to see your text due to sizing, decrease the font size with Command + Shift + < or bring up the Character palette to adjust the font size.
Adjust the alignment of your text by enabling the Direct Selection Tool (A) and dragging the blue vertical lines located within the text on a path. These lines will change the beginning, center, and end of your text within the line segment.
Experiment with the different font styles and adjust your text’s kerning or tracking within the Character palette dropdown. To alter the alignment of your text, head to the Paragraph menu for various type justification options.
Transforming Text on a Curve
Sample text that fits on a curved banner or a circular shape only appears daunting. The same Illustrator tools above can manage it just fine, though.
Text on Arched Banner
Many sales promotions and advertisements feature a curved banner with sample text. More often than not, you will need to make changes to the text to fit the specific details of your sales promotion.
Image via bokmok. Edited text with Mark My Words and Montserrat.
Begin by using the Pen Tool (P) to draw out a curved path beneath the original line of text. Adjust the bezier curves accordingly to align the path to the baseline, an invisible line upon where most letters sit. This path acts as the baseline for your new line of text.
Ungroup all vector elements in the design with Shift + Command + G to isolate text group only, then click on the text with the Selection Tool (V) and hit the Delete key to remove the original vector text.
Navigate over to the Type Tool on the left toolbar and click and hold your cursor to bring up a menu of Type Tool options. You’ll see the Type on a Path Tool, indicated by a “T” on a curved line.
Activate the Type on a Path Tool, then click on the curved path you created with the Pen Tool to start typing out a phrase along the path. You’ll notice blue vertical lines that determine the beginning and end of your phrase. Activate the Direct Selection Tool (A), then click and drag these lines with the arrow cursor to adjust the length of text.
You can navigate through font selections within the Character palette to see which styles work best for your sales promotion. Decrease or increase the font size as needed with Command + Shift + < / >, and adjust the kerning and tracking of your phrase to improve readability.
Look through these handy Adobe keyboard shortcuts to improve your design workflow.
Text on Curved Circular Path
Just like with text on a slight curve, you can change sample text that follows a circular orientation with just a few steps.
Image via Romanova Ekaterina. Changed text to Montserrat.
Draw out two circles with the Ellipse Tool (L) to accurately frame the top and bottom of the existing sample text, like seen below. If only editing one piece of text, draw out a circle to fit the baseline of the sample text.
With the Type on a Path Tool, select the inner most circle to edit the text that sits on its perimeter. Type out your phrase, then adjust the text’s position along the path with those blue vertical lines. Click and drag the vertical line positioned within the phrase to modify the phrase’s location along the circle path.
When the blue line is positioned inwards, the text will flip along the path, displaying text that may be harder to read. Be sure your text is always positioned upright to avoid legibility issues. As always, adjust the font size, style, kerning, and tracking for a successful design.
Rinse and repeat with the above steps to other areas of text placed on a circular path. This technique isn’t limited to sales promotions and can also be applied to various type of designs, such as badges.
Interested in learning more about the capabilities of Adobe Illustrator? Check out these tips and tool guides:
Illustrator's Type Tool: A Comprehensive Introduction
A few times a each month we revisit some of our reader’s favorite posts from throughout the history of Vectortuts+. This tutorial by Ian Yates was first published on October 4th 2008.
Type is an essential part of Illustrator; whether you're desktop publishing, designing logos, or using type for image building, you'll be reaching for the Type Tool. This guide comprehensively covers the essentials of what is a huge amount of Illustrator functionality, which is type.
Functions
Type Tool: Click on the artboard to begin a Point Text object, alternatively click and drag, or click on a Closed Path to create an Area Type object.
Area Type Tool: Click on a Closed Path to create an Area Type object, which constrains text within that path.
Type on a Path Tool: Click on a path to constrain text along that path.
Vertical Type Tool: Click on the artboard to begin a Point Text object with vertically flowing text.
Vertical Area Type Tool: Click on a Closed Path to create an Area Type object containing vertically flowing text.
Vertical Type on a Path Tool: Click on a path to constrain vertically flowing text along that path.
Keyboard Shortcuts
Select the Type Tool (T)
Show/Hide Character Panel (Command + T)
Show/Hide Open Type Panel (Alt + Shift + Command + T)
Show/Hide Paragraph Panel (Alt + Command + T)
Show/Hide Tabs Panel (Shift + Command + T)
Create Outlines (Shift + Command + O)
Show/Hide Hidden Characters (Alt + Command + I)
Cursors
Prepared to place type on artboard
Prepared to place type on artboard Prepared to place an Area Type object
Prepared to place an Area Type object Prepared to place Type on a Path
Prepared to place Type on a Path Prepared to place vertically flowing type on the artboard
Prepared to place vertically flowing type on the artboard Prepared to place a vertically flowing Area Type object
Prepared to place a vertically flowing Area Type object Prepared to place vertically flowing Type on a Path
Prepared to place vertically flowing Type on a Path Direct Selection cursor prepared to place a linked container for flowing text
Direct Selection cursor prepared to place a linked container for flowing text Direct Selection cursor prepared to place a linked Area Type object for flowing text
Direct Selection cursor prepared to place a linked Area Type object for flowing text Direct Selection cursor prepared to edit end handles on a Type Path.
Direct Selection cursor prepared to edit end handles on a Type Path. Direct Selection cursor prepared to edit central handle on a Type Path.
Direct Selection cursor prepared to edit central handle on a Type Path. In the process of typing (blinking cursor)
Keyboard Controls
Hold Shift whilst Type tool is selected to switch between vertical and horizontal orientation. Press Esc whilst Typing to release from Type object. Selection tool is chosen and Type object remains selected.
The Panels
Type is a huge part of what Illustrator does and as a result the list of options for defining text is immense. The most appropriate panels when working on text-based documents can be revealed by going to Window > Workspace > [Type]. This default workspace will give you all the essential type-editing panels. Further panels can be found under Window > Type, and the most crucial are listed below with brief descriptions.
The Character Panel (Window > Type > Character)
Your text-editing work-horse. Here you can alter the appearance of your type, character by character. Here are some useful terms found in the Character panel :
Font family (self-explanatory, in this case Myriad Pro)
Font style (version of the font such as Regular, Bold, Light, Condensed etc.)
Leading (line-height)
Kerning (spacing between two characters)
Tracking (character spacing across a selection)
Horizontal scale (character width)
Vertical scale (character height)
Baseline shift (height of baseline upon which text sits)
Character rotation (rotation in degrees of specified characters)
The Paragraph Panel (Window > Type > Paragraph)
All your basic options for defining paragraphs (sections of text separated by line breaks). Options here include indentation, alignment, and spacing above and below paragraphs.
Also worth noting is the Hyphenation option. When selected this allows words to be hyphenated (-) should they be too long for the text area and need wrapping to the following line. Where exactly the words become hyphenated is defined by the current selected language (see Character Panel). Make sure therefore that if you choose Hyphenation that the selected language corresponds with the language of the text.
The Open Type Panel (Window > Type > Open Type)
This Panel is used to define how you wish to display alternate Open Type characters within your document. Alternative characters available for the selected font family can be seen in the Glyphs Panel (see below).
The Glyph Panel (Window > Type > Glyphs)
The Glyphs Panel displays alternative characters available for any given font. With the type cursor prepared for typing on your artboard, click on a glyph to insert it into your document. This panel allows different sized thumbnails for ease of viewing, selection menu to display only certain glyphs, and drop-down menus for alternatives.
The Character Styles Panel (Window > Type > Character Styles)
Invaluable when building a document with recurring styles. In the same way that InDesign uses defined styles and CSS defines element styles, here you can predefine styles to apply to multiple instances of type. For example, you have a header which you set to 18pt, Bold, and underlined.
Use the New Character Style from the panel submenu and set these attributes as a style. Future instances of text to which you apply this style will adopt this appearance. Should you edit the style with Redefine Character Style, then all text instances with the style will be automatically updated.
The Paragraph Styles Panel (Window > Type > Paragraph Styles)
This acts in the same way as the Character Styles Panel but (obviously) applies styles to paragraphs.
The Tabs Panel (Window > Type > Tabs)
Whilst text is selected, open this panel to have it appear directly above your text. Add and edit tabs applying immediate results on the selected text.
The Type Toolbar
Simple, yet effective. All your fundamental type options are on the toolbar above your artboard. (Paragraph alignment options shown here apply to vertically orientated text as the vertical type tool is currently selected.)
Preferences
Go to Illustrator > Preferences > Type. Listed here are some of the more important options under the Type Preferences dialogue:
Size / Leading (line-height)
Tracking (character spacing across a selection)
Baseline shift (height of baseline upon which text sits)
Type object selection by path only (allows selection of type only by clicking on the object's path, not the text)
Number of Recent Fonts (determines how many recently used fonts are shown under Type > Recent Fonts for quick selection
Font Preview (determines whether or not font previews are displayed under Type > Font and at what size)
Go to Illustrator > Preferences > Hyphenation. Just as explained under The Paragraph Panel this determines the base language of your text for hyphenation purposes. Exceptions are also allowed, which won't be hyphenated when text wrapping is needed. In this example, Vectortuts and Tutorial are made exempt from hyphenation.
Other Hints and Tips
Text Flow Between Containers
With the Direct Selection Tool, click on the small red cross icon on an Area Type Object (this appears when text is too large for the container). Clicking again on the artboard will create a container of equal dimensions, clicking and dragging will create a container of whatever dimensions you determine. Your text will automatically flow between the newly linked containers.
Deleting Empty Type Objects
Go to Object > Path > Clean Up and select Empty Text Paths to remove unwanted empty type objects which may have slipped your attention.
Handling Type on a Path
Use the Direct Selection tool to edit handle positions along a Type Path. Handles affect start points, end points, position, and the baseline (whether above or below a path). Use the central handle to flip the baseline or go to Type > Type On A Path > Type On A Path Options, select Flip, and click OK.
Conclusion
The Type functionality which Illustrator offers is a massive topic. This guide gives a comprehensive introduction to the type tools. Play around with the many options on offer and watch out for further type tutorials on Tuts+!