Intro to Computer Graphics
5 Photoshop tools & techniques you may have missed
Talk to most Graphic Designers about their go to software when starting out and you’re likely to hear Photoshop; that was certainly the case for me. Even though I have been using it for over 20 years, I’m often learning new tips and techniques online or from my fellow design colleagues. I thought I’d share 5 Photoshop tools & techniques you may have missed.
1. Quick white balance tip
When taking photos, you might notice your image looks too blue or too orange. A quick way to fix the white balance in Photoshop is to create a new Levels adjustment layer. On the left hand side there are 3 eyedropper icons. Select the bottom one to set the white point. Within your image select what should be white, then select the top eyedropper and select what should be black. The bottom line, if the result appears a little too intense for the photo you're working on, no problem, just simply drop the opacity of the Levels layer.
2. Control luminescence with Black & White Adjustment Layer
The Black & White Adjustment Layer is most often used to convert an image to black and white. However, you can use it to control the luminescence values of the colors of your image. This is really handy when you want to directly target a single colour tone, without affecting the rest of the image.
To use this technique, create a new Black & White Adjustment Layer. It will convert your image to black & white but don’t panic! Change its blending mode to Luminosity and the original colour will return. By adjusting the sliders you can control the luminescence of the colour tones: Reds, Yellows, Greens, Cyans, Blues and Magentas.
3. Content-Aware Fill and Content-Aware Move Tool
Content-Aware Fill
Content-Aware Fill is a great tool. It is well hidden so you may have missed it! It provides a very good starting point when it comes to removing an object. I say “a good starting point” because it's never perfect and will likely require some manual refining. To do so, select the object you want to remove with the Marquee Tool or Lasso Tools. Then go Edit > Fill and change Contents to Content-Aware.
Content-Aware Move Tool
The Content-Aware Move Tool is used to quickly move an object from one place to another and does a good job at filling in what's left behind and blending into its new position.
Start by selecting the object you want to move. Then select Content-Aware Move Tool from your toolbar (it might be hidden behind the Healing Brush Tool.) Drag your object to where you want it moved to, double-clicking to confirm.
4. History Brush Tool
The History Brush Tool has been around since Photoshop 5 (1998) along with the History window. It’s a tool that I’ve often forgotten about but it is great for fixing those little "oops" moments when you've messed up a quick comp. It lets you source from a previous history state, revealing areas you want to recover. With a workflow of using masks, adjustment layers and smart objects, the History Brush Tool’s function is relatively obsolete but I think it still has its use.
To use the History Brush Tool, you need to have the History window open, then select a state you want to source from. Select the History Brush Tool and use it like the normal Brush Tool to recover the previous history state.
In the image below, it’s handy for tidying up after using the Content-Aware Move Tool.
5. Non-destructive Dodge and Burn
Dodge (lighten) and Burn (darken) are great tools for increasing the contrast of specific areas or shifting the light direction of an image. However using these tools comes with a problem - they are destructive (not editable). However, there is a technique that is editable:
Create two new Level Adjustment Layers, set one to Screen (lighten) and the other to Multiply (darken). Set both to around 20% opacity and invert their masks to black. We can now use a white brush on either layer to reveal light and dark to specific areas.
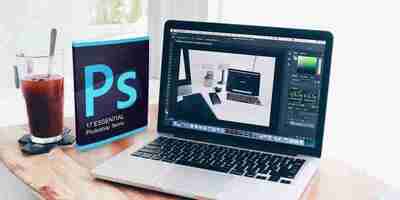
17 Essential Photoshop Terms Everyone Needs to Know
Photoshop comes with a steep learning curve, especially with terminology. Don't worry though, we're here to help you sort your "blend modes" from your "layer masks."
Photoshop is one of the most well-respected photography editing tools for a reason: it's brilliant. It does, however, come with a steep learning curve, especially with terminology. When you're first learning how to use the platform, you might find all of these a little confusing.
If you're not sure where to start, don't worry. We'll help you understand the most important terms you'll encounter when using Photoshop. And so, without further ado, let's hop in.
1. Blend Modes
Setting a blending mode controls how the image you are working on is affected by the paint or editing tool. The base color is the color in the original image. The color that you want to apply to your image is the blend color.
Once a blend mode has been selected and the edit applied, this is known as the result color.
2. Brush Tool
One of Photoshop's most beloved features is the ability to treat a photo as if it were a piece of artwork. The Brush tool is the closest digital equivalent to using a paintbrush.
One of the major advantages over its physical siblings is the ability to change the tip shape, diameter, and hardness almost instantaneously.
3. Clone Stamp Tool
The Clone Stamp tool allows you to paint one part of your photo over another. This is most commonly used for duplicating or removing objects. It is very similar to the Healing tool, except it copies the color and texture—rather than blending them.
You can find the Clone Stamp tool on the left-hand side of your screen in Photoshop; the icon is designed to look like a stamp. See our guide on how to use the Clone Stamp tool in Photoshop.
4. Curves
If you've used Adobe Lightroom before, you'll probably be familiar with tone curves. And in Photoshop, you will find a similar tool to enhance how your images look.
The Curves command is probably one of the best ways to make tonal adjustments to your images. The Curves graph is based on the histogram, and allows you to brighten, darken, add contrast, and adjust colors all from one panel.
To use the Curves tool, hit Ctrl + M (Windows) or Cmd + M (Mac) on your keyboard.
The Dodge and Burn tools are based on a traditional darkroom technique that photographers would use to regulate exposure on certain parts of the image.
The Dodge tool allows you to lighten an area, while the Burn tool darkens. By specifying the exposure for mid-tones, shadows, or highlights, you are then able to airbrush to apply the change or drag and select an area.
The Dodge tool and Burn tools are both accessible from the magnifying glass icon in the left-hand toolbar.
6. Eyedropper Tool
Photoshop uses foreground color to paint and fill areas, and background color to make gradient fills.
You can change these to a color of your choice using the Eyedropper tool. Select the eyedropper, click on a color in the image, and the automatic foreground color will be changed. If you Alt + Click (Windows) or Option + Click (Mac), then you can select the new background color.
7. Feather
Feathering is the term that Adobe uses for creating soft edges. In Photoshop, using feathering you can either adjust harsh edges, blend images, or make a specific object stand out.
8. Histogram
A histogram is a graph that represents the tonal values in your photo or image. By interpreting the graph, you can determine the amount of shadows, midtones, and highlights. The histogram doesn't tell you where these tones are in the image, all it does is count the total number of pixels for each tone.
Using the histogram, you can quickly assess whether your image is properly exposed and has the appropriate level of contrast.
9. History Panel
One of the most important features of an image editor is the ability to undo what you just did. Whether you made a mistake or just wanted to try a different approach or technique, the history panel provides a chronological list of the edits you have made.
Having an opportunity to undo edits makes you more likely to experiment. It also saves hours of heartache if something goes wrong. The default number of states that you can make appear in the history panel is 20, although you can easily change that in the Photoshop menu.
You can find the History panel by going to the right-hand toolbar. There, you will find three squares and an arrow; select this.
10. Layers
When you open an image in Photoshop, it is assigned as a background layer. You can then stack multiple transparent layers on top of the background layer. This allows you to make changes to the image without actually editing the image itself. You could use it to composite two images together, add text, or even add effects.
You can create layers by going to the bottom right and selecting the + icon.
11. Layer Masks
Layers in Photoshop allow you to stack multiple effects, images, and adjustments on top of the original background layer. If you wanted to change the transparency of a layer, you could easily do that using the Opacity option. However, that adjusts the transparency for the entire layer.
If you wanted to composite two images, you can use a layer mask which effectively allows you to hide portions of a layer.
12. Magic Wand Tool
The Magic Wand tool is a huge time-saver when you want to remove a consistently colored area like a background. The Magic Wand automatically selects an area of the same color without you having to trace the outline. You can even specify the color range—known as tolerance—relative to the color that you selected.
You can find the Magic Wand tool in the left-hand toolbar; you'll need to go to the Object Selection tool icon. Press Ctrl on your keyboard before selecting the Magic Wand from the dropdown menu.
13. Metadata
Metadata is best described as information about information. In the case of digital images, the metadata is not the image itself, but rather the information about it. This includes things like geolocation, date and time, exposure, camera model, and ISO.
As the metadata can often reveal far more than you may realize, it's a good idea to remove anything you don't want others to find out before uploading to the internet.
14. Patch Tool
The Patch tool is one of the easiest ways to remove areas of your image without leaving a gaping hole. Using the Patch tool, you simply select the area you want to remove. Then drag the selection over to a part of the image you want to replace it with. Photoshop then removes the original area and using high-quality feathering, and seamlessly blends the new texture in.
The Patch tool is just above the midway point on the left-hand toolbar.
15. PSD File
While image files come in a variety of formats, there are very few formats for saving a work-in-progress image edit. Adobe realized this might be a problem as you may not want to overwrite the original with an unfinished edit. To solve this particular problem, they created the Photoshop Document (PSD).
Just as Microsoft's file formats became the standard for all office documents, Adobe managed the same with the PSD. Fortunately, you don't actually have to use Photoshop to open a PSD if you do happen to get sent one.
16. RAW
One common theme in nearly every photography article and guidebook is that you should be shooting your pictures in RAW. Despite most photos eventually appearing as JPEGs, shooting in the format means you lose most of the photo's digital information.
RAW contains the uncompressed, largely unedited image data that comes directly from your camera's sensors. By shooting in RAW, you don't limit your options when it comes to image editing.
17. Saturation
The saturation refers to the intensity of the color in an image. A saturated image is one that has overly bright colors, whereas an unsaturated image is one where the colors are bleaker. In Photoshop, you can use the Hue and Saturation adjustments to change the saturation to a percentage of the original.
Learning Photoshop Doesn't Have to Be Hard
Photoshop is one of the best tools for photo editing, and it's unsurprising that many professional photographers turn to the software when editing their work. You can alter your images in an incredible number of ways, allowing you to achieve the specific style you're going for.
Now that you've read this guide, you should have a better understanding of the most essential terms you'll encounter on the app.
Intro to Computer Graphics
The Move Tool (V).
The Move Tool (V) moves a selected area or an entire layer. You can invoke the Move Tool temporarily when using most other tools by holding down the Ctrl key (Command key on a Mac).
You’ll notice that some of the tool icons have small black triangles in their bottom right-hand corners. These icons contain hidden treasures! The triangle indicates that there are more related tools available; if you click on the tool icon and hold it down, a “flyout” menu will appear,displaying the additional tools.
Selection Tools
You can use the selection tools to select certain areas of your document for editing. If you use a selection tool, only the area that’s selected will be affected by any changes you make. You can “feather” selections (specify a fuzzy radius for them) using the Feather field in the options bar. The examples below show the difference between no feather and 5 px feather. a
Marquee tools (M) are used to create rectangular or elliptical selections, including selections that are “single row” (one pixel tall, stretching across the entire width of the document) and “single column” (one pixel wide, stretching through the entire height of the document). To make single-row or single-column selections, click with the appropriate tool on the image area where you want to select a row or column.
You can use the Lasso tools (L) to create freeform selections. The Lasso Tool comes in three different forms:
Lasso Tool (L) – Click and drag the Lasso Tool to draw aselection area. Releasing the mouse buttonwill close the selection by joining the start and end points with a straight line.
– Click and drag the Lasso Tool to draw aselection area. Releasing the mouse buttonwill close the selection by joining the start and end points with a straight line. Polygonal Lasso Tool (L) – Click at different points to create vertices of a polygonal shape. Close the selection by moving your cursor to the beginning and clicking once, or pressing the Enter key.
– Click at different points to create vertices of a polygonal shape. Close the selection by moving your cursor to the beginning and clicking once, or pressing the Enter key. Magnetic Lasso Tool (L) – If you think you need help with making your selection, try the Magnetic Lasso Tool. Photoshop will attempt to make a “smart” selection by following the edges of contrast and color difference. Click once near the “edge” of an object and follow around it — Photoshop will automatically lay down a path. You can also click as you follow the line to force points to be created on the path. Close the selection by pressing the Enter key or clicking at a point near the beginning of the selection.
Magic Wand
The Magic Wand Tool (W) selects areas of similar color. You can change the tolerance (how close the color values should be to the sampled color in order to be selected) of a Magic Wand selection, and choose whether you want the selection to be contiguous (pixels that are touching) or not (in which case, matching colors across the entire document will be selected).
Selection Shortcuts and Tasks
Hold the Shift key to add another selection to the first. Hold the Alt key (Option key on a Mac) to subtract your new selection from the first. Hold Shift-Alt (Shift-Option) to select the intersection of your first and second selections. Use the arrow keys to move the selection pixel by pixel.
Next