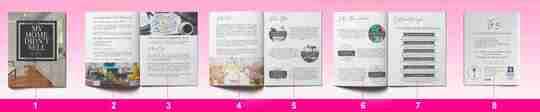
Multipage Booklet Printing
How to Arrange Pages for Booklet Printing
For multi-page booklet printing, there are quite a few things you need to know when it comes to page count and arranging pages for your print-ready PDF. It is important to understand this, so you don’t end up causing delays in the production of your project AND so that, when you open up your booklet for the first time, every page is exactly where you expected it to be.
Free Sample Packet: Click Here
Instant Booklet Pricing: Click Here
Upload Pages in This Order
PrintingCenterUSA requires that your pdf is uploaded in single facing pages in consecutive order. This includes the front cover, inside front cover, all inside pages, inside back cover, and back cover.
Pro Tip
It’s easy to overlook the inside front cover and the inside back cover during designing. If you don’t want the backs of the covers to be printed on, then leave them blank AND include them in your PDF as blank pages in the correct consecutive order. That would mean that, if you refer to the page count image above, pages 2 and 7 would be blank.
Printer & Reader Spreads – Just Say No
Your PDF file should contain single facing pages when ordering from PrintingCenterUSA. For example, in the image above, there would be two single facing pages: one on the left and one on the right. The cover, inside front cover, inside back cover, and back cover all count as four facing pages.
We have our customers upload their files this way to save them the pain of figuring out how to arrange their pages into spreads for them to print correctly as a booklet (trust me, it can get pretty confusing). Instead, you get to simply export your PDF and leave the page arranging to the pros!
Printer Spreads (on left below) do not appear in consecutive page order. They are in order so that when the document is printed onto a large front and back sheet, collated, folded or trimmed, and assembled, all of the pages appear consecutively. We do not recommend providing your PDF file as Printer Spreads. Reader Spreads show consecutive pages in two-page spreads. They are in the correct order for someone to read the document, but if they were printed, collated, trimmed and assembled, the pages would appear out of order. We do not recommend providing your PDF file in Reader Spreads
Pro Tip
If you design your booklet in Adobe InDesign, then your document will default to reader spreads when you first start your project and you will be designing your project in what appear to be reader spreads. During the PDF exporting process, there is an option to select “single facing pages” for your PDF. We highly recommend designing your booklet printing project in Adobe InDesign for this reason.
Pro Tip
If you save your PDF document and are unsure if you exported the pages correctly, then you can use this quick trick to double check! Simply open up your single PDF document in Acrobat®, you should see your pages individually(see image below), one on top of the other as you scroll through it.
Page Count Explained by Binding Type
From here on out, we are going to break page count down even further by binding type. If you already know which binding type you will be ordering, you can go ahead and skip to that section!
Saddle Stitching
Sheets vs. Pages
A single sheet of paper has 2 sides, a front and a back side (Diagram A below). A sheet is folded in half which gives you 4 numbered pages, as shown in Diagram B below.
Note: This diagram is an example of the cover of an 8-page saddle stitch booklet.
Saddle Stitching Explained
Saddle stitching is when single sheets of paper (printed on both sides and collated in page number order) are folded in half and then “stitched”. Since the pages are folded in half, that means that your booklet page count must be in increments of four. There is an 8 page minimum and a 92 page maximum with saddle stitching.
Perfect Binding
Sheets vs. Pages
A single sheet of paper has 2 sides, a front and a back side (Diagram A below). A sheet is scored twice in the center to accommodate the spine which gives you a cover that is 4 numbered pages plus a spine in the middle (Diagram B below).
Note: This diagram is an example of the cover of an 8-page perfect bound book for explanation purposes. The minimum page count for perfect binding is 28 pages.
Perfect Binding Explained
Perfect binding is when single sheets of text weight paper are printed on both sides and collated in page number order, one on top of the other. The sheets are cut down to your trim size and then the edges are ground down. The softcover is wrapped around the inside pages and glued to the edge of them, which is why you have a square spine that you can print on. There is a minimum of 28 pages with a maximum of up to 2 inches thick and you must have page counts in increments of two.
Spiral Binding
Sheets vs. Pages
A single sheet of paper has 2 sides, a front and a back side (Diagram A below). A sheet is cut to the final trim size, then hole punched for the spiral to pass through, which gives you 4 loose numbered pages (Diagram B below).
Note: This diagram is an example of the cover of an 8-page spiral bound book.
Spiral Binding Explained
Spiral binding is when single sheets of paper are printed on both sides, cut down to trim size and collated in page number order. The binding edge is hole punched and the durable spiral coil is passed through the holes. Because of this process, you cannot print on the spine. There is a minimum of 8 pages and a maximum of up to 2 ¾” thick and the pages must be in increments of two.
Wire-O Binding
Sheets vs. Pages
A single sheet of paper has 2 sides, a front and a back side (Diagram A below). A sheet is cut to the final trim size, then hole punched for the wire to pass through, which gives you 4 loose numbered pages (Diagram B below).
Note: This diagram is an example of the cover of an 8-page wire-o bound book.
Wire-O Binding Explained
Wire-O binding is when single sheets of paper are printed on both sides, cut down to trim size and collated in page number order. The binding edge is hole punched and a professional-looking metal wire is used to bind the pages through the holes. Because of this process, you cannot print on the spine. There is an 8 page minimum and a maximum of up to 1 ¼” thick. Pages must be in increments of two.
Numbering of Inside Pages
Another tricky thing when it comes to page count and arranging pages for your booklet printing project is knowing where to put the page numbers for the inside pages of your booklet. Since PrintingCenterUSA requires a single print-ready PDF with all facing pages in consecutive order, our customers can have some confusion when it comes to numbering the inside pages. The easiest way to know which edge (left or right) the page numbers should be on is to put even page numbers on the left side of the page and odd page numbers on the right side of the page (refer to image below for example).
Note: Putting your even page numbers on the left and the odd page numbers on the right is an effective tool only if you start counting your pages on the first inside page (or page 3 in the image below).
Note: Your inside-page numbering does not correlate to the number of pages contained in your print-ready PDF.
That about sums up everything you will need to know about page count! If you want to ensure that your page count will be correct, we recommend that you use our free online booklet design tool, because it does not allow for page counts that are unavailable for the binding type chosen. Not only that, but there are handy page graphics that help you grasp the big picture! OR you can upload your Print-Ready PDF for a free file review before ordering, and we will let you know if any adjustments need to be made.
For more information on how to arrange your pages for booklet printing, visit our help center or give us a call at 800-995-1555.
Booklet Document Setup
Creating a Booklet
InDesign supports creating printer spreads for printing booklets. A printer spread refers to two or more pages that fall next to each other on a sheet of paper. For example, if you’re editing an 8-page booklet, the pages appear in sequential order in the layout window. However, in printer spreads, page 2 can be positioned next to page 7, so that when the two pages are printed on the same sheet, 3 folded, and collated, the pages end up in the appropriate order.
The process of creating printer spreads from layout spreads is called imposition. It is generally easier to work in Layout Spread where the pages are ordered sequentially. Converting your project to a printer spread should be done just before you’re ready to print.
Document Setup (Layout Options)
These setup instructions walk through creating an 8 page booklet printed doubled sided on 8.5 x 11 in paper. Each "page" will occupy half of the letter size paper.
To start a new booklet:
Choose File > New > Document Type the Number of Pages in your field, in this case 4 for the cover, 12 for the inside pages (we’ll use 2 double sided 1/2 sheets of letter). Select Facing Pages—gives you left and right-hand pages in your document. Choose Letter - Half 5.5 x 8.5 for you Page Size Set orientation to Portrait. Setting the Margins: choose .5 in all around Enter 1 as the Number of Columns Click Create
To access your layout settings in an exisiting document
If you’ve already started a document, choose
File > Document Setup to adjust your page size and orientation Alert: Changing page size and orientation may require that you adjust the pre-existing content (type and graphics) in the document Layout > Margins and Columns to modify columns, margins and gutter
Printing your Booklet from InDesign
See :
Multipage Booklet Printing
Multipage Booklet Printing
InDesign CC is able to impose pages and print foldable spreads to the Xerox 7835. This is useful for creating 5.5×8.5 bookelts from 8.5×11 paper, or an 8.5×11 booklet from 11×17 paper folded in half.
Multipage Booklet Printing
For a 2-up saddle stitch, you will need a total number of pages in multiples of 4, or example, 4, 8, 12, 16, etc. pages. If your booklet falls short of being a multiple of 4, you will need to add more pages, either blank or with additional content.
The InDesign File>Print Booklet… command will automatically rearrange individual pages so that they print next to the appropriate page in a printers spread. For example, in an 8 page booklet, page 1 prints to the right of page 8, page 2 prints to the left of page 7, page 3 prints to the right of page 6, and page 4 prints to the left of page 5.
Options in the Print Booklet… and Print Settings area need to be chosen carefully, so that you achieve the proper orientation, so that both sides of the paper print in the same direction, so that you leave room for printers marks and bleed, if needed, and so on.