Photoshop Pointillism Painting Effect
Learn how to create a realistic pointillism effect in Photoshop by turning your images into paintings of colored dots using the Pointillize filter, Smart Filters and layer blend modes. For Photoshop CC and CS6.
In this tutorial, I'll show you how to easily turn your images into pointillist works of art with Photoshop! Pointillism was developed back in 1886 by a painter named Georges Seurat. Rather than mixing colors on a palette and applying them to the canvas using traditional brush strokes, pointillism involves the painstaking and time-consuming process of painting with single dots of color. The colors and spacing of the dots are specifically chosen and arranged so that when viewed from a distance, they trick our eyes into seeing a greater range of tones.
If the idea of pointillism sounds familiar to you, it may be because digital photos work much the same way. When viewed up close, a digital image is nothing but rows and columns of individual pixels, each set to a single color. But from a distance, we see a continuous tone, full color photograph. Printers also use a similar technique, arranging tiny dots of cyan, magenta, yellow and black on the paper to produce a detailed, full color print.
A true pointillist painting takes an unbelievable amount of time, effort and skill. But as we'll see, faking a pointillist painting in Photoshop is quick and easy. All it takes is a combination of the Pointillize filter, Smart Filters and layer blend modes. The only real trick is knowing which dot size will work best for your image, but at the end of the tutorial, we'll see how to easily edit the pointillism effect so you'll always get the best results.
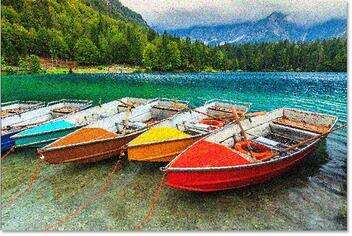
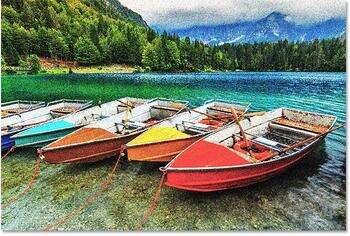
Here's the image I'll be starting with (colorful boats photo from Adobe Stock):
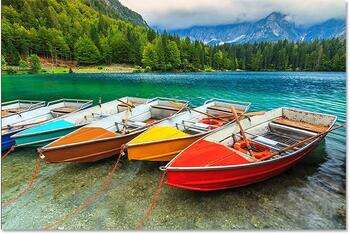
The original photo. Credit: Adobe Stock.
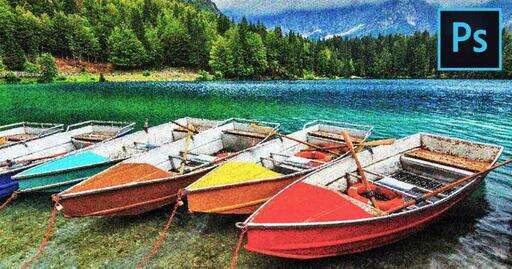
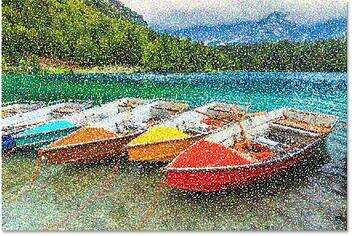
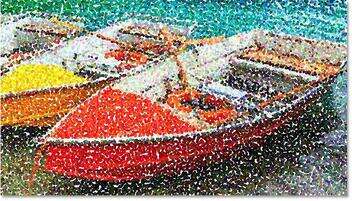
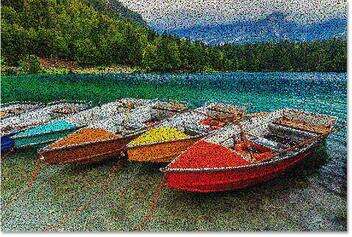
And here's how it will look after transforming it into a pointillist painting with Photoshop:
The final pointillism effect.
Let's get started!
Download this tutorial as a print-ready PDF!
How To Create A Pointillism Effect In Photoshop
For this tutorial, I'm using Photoshop CC but every step is compatible with Photoshop CS6.
Step 1: Rename The Background Layer
If we look in the Layers panel, we see the image sitting on the Background layer. Double-click on the Background layer to rename it:
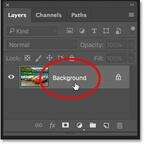
Double-clicking on the Background layer.
In the New Layer dialog box, rename the layer "Photo" and then click OK:
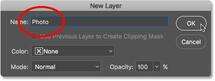
Renaming the Background layer "Photo".
Back in the Layers panel, the Background layer is now the "Photo" layer:
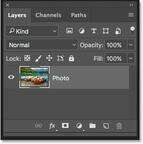
The Background layer has been renamed "Photo".
Step 2: Convert The Layer Into A Smart Object
To keep the pointillism effect editable and non-destructive, we'll create it using Smart Filters. To use Smart Filters, we first need to convert our "Photo" layer into a Smart Object. Click on the menu icon in the upper right corner of the Layers panel:
Clicking the Layers panel menu icon.
Choose Convert to Smart Object from the menu:
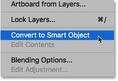
Choosing "Convert to Smart Object".
A Smart Object icon appears in the lower right of the layer's preview thumbnail, letting us know that the "Photo" layer is now a Smart Object:
The Smart Object icon in the layer preview thumbnail.
Step 3: Reset The Foreground And Background Colors
To create the pointillism effect, we'll use Photoshop's Pointillize filter which turns the image into single dots of color. To fill in the spaces between the dots, the Pointillize filter uses your current Background color. Before you apply the filter, make sure your Foreground and Background colors are set to their defaults by pressing the letter D on your keyboard. This sets the Foreground color to black and the Background color to white.
The current Foreground and Background colors are shown in the color swatches near the bottom of the Toolbar. The Background color swatch in the lower right should be filled with white:

Press "D" to reset your Foreground and Background colors.
Step 4: Apply The Pointillize Filter
Go up to the Filter menu in the Menu Bar, choose Pixelate, and then choose Pointillize:

Opening the Pointillize filter from the Filter menu.
This opens the Pointillize filter dialog box. The Cell Size option at the bottom controls the size of the color dots. The only tricky part with this effect is knowing what Cell Size value to use since it will depend on your subject and the size of your image, as well as the overall effect you want to create. Luckily, since we're using Smart Filters, we can easily experiment with different values until we find the settings that work best.
We're also going to apply the Pointillize filter several times, each time using a different cell size, to add variety to the size of the dots. I'll begin by setting my initial Cell Size value to 20. Note that I'm working with a fairly large image here. For smaller images, you'll want to try smaller values:
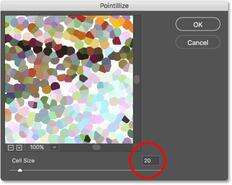
Setting the Cell Size to 20.
Click OK to close the dialog box, and here's the initial effect created by the Pointillize filter:
The image after applying Pointillize.
If I zoom in on the image, it's easier to see that the Pointillize filter has turned it into patterns of colored dots:
Zooming in for a closer look at the pointillize effect.
Step 5: Change The Pointillize Filter's Blend Mode To Darken
In the Layers panel, the Pointillize filter appears as a Smart Filter below the "Photo" layer. To hide the areas of white between the dots, double-click on the Smart Filter's Blending Options icon:
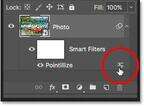
Opening the Pointillize filter's Blending Options.
This opens the Blending Options dialog box. Change the Mode of the filter from Normal to Darken, and then click OK:
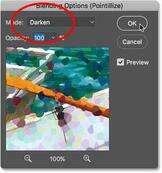
Changing the Pointillize filter's blend mode to Darken.
The Darken blend mode hides the white and leaves only the dots of color visible:
The effect after changing the Pointillize filter's blend mode to Darken.
Step 6: Swap Your Foreground And Background Colors
To add more color dots, we'll re-apply the Pointillize filter two more times. First, change your Background color from white to black by pressing the letter X on your keyboard. This swaps the colors, and the Background color swatch in the Options Bar should now be filled with black:

Press "X" to change the Background color from white to black.
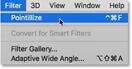
Step 7: Apply A Second Pointillize Filter
Go back up to the Filter menu in the Menu Bar. Since the Pointillize filter was the last filter we used, it now appears at the top as the first item in the menu. Click on it to select it:

Choosing the Pointillize filter from the top of the Filter menu.
In the Pointillize dialog box, choose a Cell Size value that's smaller than last time. My previous setting was 20, so this time I'll go with 15. Again, these values may not be the best choices for your image, but we'll learn how to change them later:
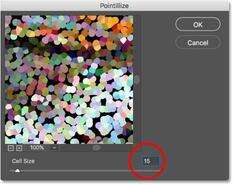
Adding a second Pointillize filter with a smaller Cell Size value.
This adds more color dots to the image, this time smaller, with the areas between the dots filled with black:
More color dots have been added to the effect.
Step 8: Change The Blend Mode To Lighten
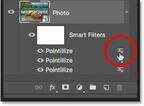
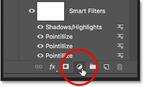
Back in the Layers panel, the second Pointillize filter appears as another Smart Filter below the "Photo" layer. Photoshop lists Smart Filters from bottom to top in the order they were added, so the new one sits above the previous one. To hide the areas of black between the dots, double-click on the top Pointillize filter's Blending Options icon:
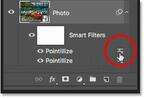
Opening the second Pointillize filter's Blending Options.
In the Blending Options dialog box, change the Mode from Normal to Lighten, and then click OK:
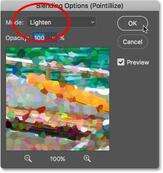
Changing the blend mode of the second Pointillize filter to Lighten.
Our pointillism effect now has twice as many color dots as before, but we're not done yet:
The effect after changing the second Pointillize filter's blend mode to Lighten.
Step 9: Change The Background Color To 50% Gray
In the Toolbar, click on the Background color swatch:

Clicking the Background color swatch in the Toolbar.
Photoshop opens the Color Picker. Change the Background color to 50% gray by setting the B (for Brightness) value in the HSB section to 50%, and then click OK to close the Color Picker:
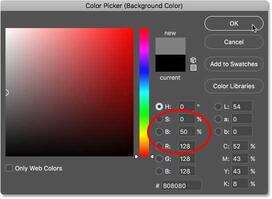
Changing the Background color to 50% gray in the Color Picker.
Step 10: Apply A Third Pointillize Filter
Go back up to the Filter menu and once again choose Pointillize from the top of the list:
Reselecting the Pointillize filter from the Filter menu.
In the Pointillize dialog box, choose a Cell Size that's again a bit smaller than last time. I'll go with a value of 10. Click OK to close the dialog box:
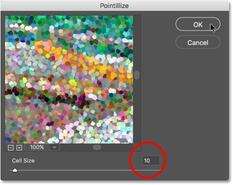
Applying Pointillize a third time with an even smaller Cell Size value.
Step 11: Change The Blend Mode To Overlay
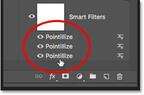
Photoshop adds more color dots and this time fills the empty spaces between them with 50% gray. To hide the gray, double-click on the Blending Options icon for the new Pointillize Smart Filter in the Layers panel:
Opening the Blending Options for the third Pointillize Smart Filter.
Change the Mode from Normal to Overlay, and then click OK:

Changing the blend mode of the third Pointillize filter to Overlay.
With three Pointillize filters now applied, the image is completely filled with color dots. But after changing the blend mode to Overlay, the contrast and color saturation are now too strong:

The Overlay blend mode boosted the contrast and saturation of the image.
Related: The five essential blend modes you need to know
Step 12: Add A Shadows/Highlights Image Adjustment
To reduce the contrast and saturation, add a Shadows/Highlights image adjustment. Go up to the Image menu, choose Adjustments, and then choose Shadows/Highlights:
Going to Image > Adjustments > Shadows/Highlights.
In the Shadow/Highlights dialog box, select Show More Options in the lower left corner:
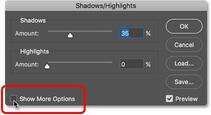
Clicking "Show More Options".
This expands the dialog box to show more advanced options. In the Shadows section at the top, set the Amount to 15%, leave Tone set to 50% and increase the Radius to 100px. Use the same settings for the Highlights section below it. Then in the Adjustments section, lower the Color value to 0 to prevent Shadows/Highlights from increasing the color saturation even further. Click OK to close the dialog box:
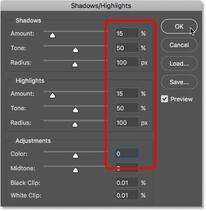
The Shadows/Highlights settings.
The contrast has been reduced, but the color saturation is still too strong:
The pointillism effect after applying the Shadows/Highlights adjustment.
Related: Restore hidden image detail with Shadows/Highlights
Step 13: Add A Vibrance Adjustment Layer
Finally, we'll reduce the color saturation using a Vibrance adjustment layer. Click on the New Fill or Adjustment Layer icon at the bottom of the Layers panel:
Clicking the New Fill or Adjustment Layer icon.
Choose Vibrance from the list:

Adding a Vibrance adjustment layer.
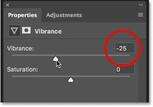
The controls for the Vibrance adjustment appear in Photoshop's Properties panel. Drag the Vibrance slider to the left to reduce the color saturation until you're happy with the results. I'll lower mine down to -25, but you may want to go even lower:
Dragging the Vibrance slider to reduce color saturation.
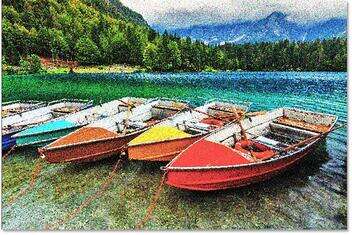
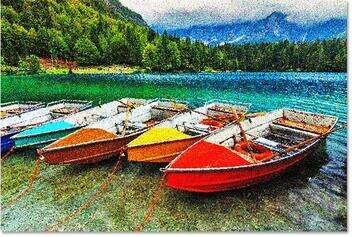
And here, after reducing the color saturation, is my final Photoshop pointillism effect. We still haven't looked at how to edit the settings, so we'll do that next:

The final pointillism painting.
Editing The Pointillism Effect
If you're not happy with the results because the color dots are either too big or too small, you can easily go back and change the cell size for each of the three Pointillize Smart Filters. Just double-click on the name of one of the filters in the Layers panel to re-open its dialog box. Enter a different Cell Size value, and then click OK. You can do this for each of the three Smart Filters, and because Smart Filters are non-destructive, you can edit them as many times as needed until the effect looks good:
Double-click on each Pointillize Smart Filter to change its Cell Size if needed.
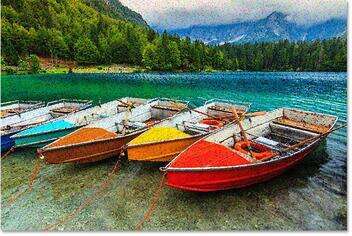
For example, here I've changed the cell sizes from the original 20, 15 and 10 to smaller values of 12, 9 and 6. The smaller dots produce finer details and a cleaner overall effect. Larger dots would produce a more exaggerated effect:
The pointillism effect using smaller cell size values for the Pointillize filters.
And there we have it! That's how to easily turn a photo into a pointillism painting using the Pointillize filter, Smart Filters and blend modes in Photoshop! For similar effects, try turning your photo into a watercolor painting or learn how to use the Oil Paint filter in Photoshop! Visit our Photo Effects section for more Photoshop effects tutorials!