Photoshop Tools and Toolbar Overview
Learn all about Photoshop's tools and the toolbar. You'll learn how the toolbar is organized and how to access its many hidden tools. Includes a complete summary of all 70 tools available in Photoshop that you can use as a reference! Now updated for Photoshop 2021!
In the first tutorial in this Photoshop Interface series, we took a general tour of the interface and its main features. This time, we'll learn all about Photoshop's tools and the toolbar. The toolbar is where Photoshop holds the many tools we have to work with. There are tools for making selections, for cropping and retouching images, for adding shapes and type, and many more!
We’ll start with a look at the toolbar itself, including how the toolbar is organized and how to access the many tools hidden within it. Then we’ll look at each and every tool in the toolbar with a quick summary of what each tool is used for.
I'm using Photoshop 2021 but you can follow along with earlier versions as well. Just note that some tools may not be available in your version.
This is lesson 2 of 10 in our Learning the Photoshop Interface series.
Let's get started!
Download this tutorial as a print-ready PDF!
The Photoshop toolbar
Photoshop's toolbar is located along the left of the screen:
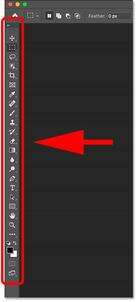
The toolbar.
Choosing a single or double column toolbar
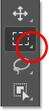
By default, the toolbar appears as a long, single column. But it can be expanded into a shorter, double column by clicking the double arrows at the top. Click the double arrows again to return to a single column toolbar:
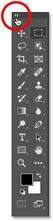
The toolbar can be viewed in a single or double column.
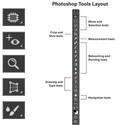
The tools layout
Let's look at how Photoshop's toolbar is organized. While it may seem like the tools are listed randomly, there's actually a logical order to it, with related tools grouped together.
At the top, we have Photoshop's Move and Selection tools. And directly below them are the Crop and Slice tools. Below that are the Measurement tools, followed by Photoshop's many Retouching and Painting tools.
Next are the Drawing and Type tools. And finally, we have the Navigation tools at the bottom:
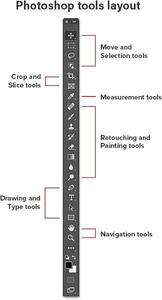
The layout of the tools in the toolbar.
The toolbar's hidden tools
Each tool in the toolbar is represented by an icon, and there are many more tools available than what we see.
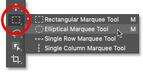
A small arrow in the bottom right corner of a tool icon means that there are more tools hiding behind it in that same spot:
Most of the spots in the toolbar hold more than one tool.
To view the additional tools, click and hold on the icon. Or right-click (Win) / Control-click (Mac) on the icon. A fly-out menu will open listing the other tools that are available.
For example, if I click and hold on the Rectangular Marquee Tool icon, the fly-out menu tells me that along with that tool, the Elliptical Marquee Tool, the Single Row Marquee Tool and the Single Column Marquee Tool are also grouped in with it.
To choose one of the additional tools, click on its name in the list. I'll choose the Elliptical Marquee Tool:
Choosing a hidden tool from the fly-out menu.
The default tool
The tool that's initially displayed in each spot in the toolbar is known as the default tool. For example, the Rectangular Marquee Tool is the default tool for the second spot from the top. But Photoshop won't always display the default tool. Instead, it will display the last tool you selected.
Notice that after choosing the Elliptical Marquee Tool from the fly-out menu, the Rectangular Marquee Tool is no longer displayed in the toolbar. The Elliptical Marquee Tool has taken its place:
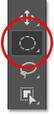
Each spot in the toolbar displays either the default tool or the last tool selected.
To select the Rectangular Marquee Tool at this point, I would need to either click and hold, or right-click (Win) / Control-click (Mac), on the Elliptical Marquee Tool icon. Then I could select the Rectangular Marquee Tool from the menu:
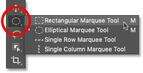
Selecting the Rectangular Marquee Tool from behind the Elliptical Marquee Tool.
Download this tutorial as a print-ready PDF!
A summary of Photoshop's tools
So now that we've learned how Photoshop's toolbar is organized, let's look at the tools themselves.
Below is a quick summary of each of Photoshop's tools, along with a brief description of what each tool is used for. The tools are listed in order from top to bottom, and specific tools are covered in more detail in other lessons.
An asterisk (*) after a tool's name indicates a default tool, and the letter in parenthesis is the tool's keyboard shortcut. To cycle through tools with the same keyboard shortcut, press and hold Shift as you press the letter. This list is up-to-date as of Photoshop CC 2021. Note that some tools are not available in earlier versions.


Where to go next...
And there we have it! Now that we know more about Photoshop's toolbar and its many tools, the next lesson in this series shows you how to reset Photoshop's toolbar back to its original, default layout!
Or check out any of the other lessons in this chapter:
For more chapters and for our latest tutorials, visit our Photoshop Basics section!