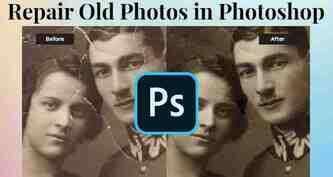
Photoshop Will Soon Be Able to Automatically Restore Old, Damaged Photos
How to Repair Old Photos Easily in Photoshop
Nobody intentionally damages a picture file, but you can accidentally damage one when exporting, transferring, editing, or downloading. If you have also come across this problem, you do not need to worry. Repairing damaged photos with Photoshop is not as difficult as it seems. So, here, we will discussing the right way to perform this and achieve perfect results.
Part 1. Repair Damaged Photos in Photoshop
Photoshop is an ultimate tool for photo editing, repairing old photos and damaged photos. However, the issue is that most people do not know the right way to achieve the best results when repairing old photos in Photoshop. So, we have made this complete guide that can help in the damage photo repair in the Photoshop process.
Step 1. Digitize and Open a Damaged Photo in Photoshop
If you want to repair damaged images with Photoshop, then the first thing you need to do is to digitize your image. Follow these steps to digitize your image:
Scan your image and save it to your computer. Open the image with Photoshop.
Step 2. Crop, Straighten or Rotate the Damaged Photo
Once your image opens and loads in Photoshop, you can proceed with the next step of repairing old photos in Photoshop. In this part, you will repair damaged images with photoshop using crop, straightening, and then rotating the image. It is important to note that you only need to do any of these things if necessary for your image. Here is how you can do:
Cropping
Select the crop icon from the tools. Make selections in your image using a grid.
Straightening
Right-click on the image and get the Ruler Tool. Straighten image with using glid lines of interface.
Rotating
Go to Image and select Image Rotation. Rotate or flip the image as per requirements.
Now you will have an image that you can apply other tools and repairing functions.
Step 3. Reduce Noise in Different Mode
This step is going to be the most important step of all. Here we will be doing most of the repair of damaged images with photoshop work. There are 3 different modes to reduce noise, and here is all you need to know about each of them. When you go to the filter option and then into the noise reduction menu, you can use these different methods:
Basic Mode
Select Basic from reducing noise popup. Set all the details using sliders. Preview results. Click OK to confirm.
Advanced Mode
Select Advanced and then Per Channel. Select each channel individually and keep setting the details using sliders. Preview results and click OK to confirm.
Lab Color Mode
It is a bit different but brings amazing noise reduction results. Here is how you can use this:
Go to Image, then Mode, and then Lab Color option. Select Layers and make a copy layer of the image. Select the Channels tab and make a copy channel. Adjust different settings for brightness and colors to reduce image noise.
Step 4. Use Retouch and Repair Tools to Fix Imperfections
With the noise removed from the image, the next step will be making sure that there are no imperfections left in the image. Photoshop comes with different tools and options for this purpose as well, and here is how you will use different tools to repair damaged images with photoshop.
Spot Healing Brush Tool
Select Spot Healing Brush Tool and choose your brush size. Now select Replace. It will preserve original effects like grain noise and texture on the edges of places where you stroke your brush. Now choose any option according to the requirements. Select sample only from the active layer. Click area that needs repairing. By clicking the brush, Photoshop will automatically retouch and repair the image from that area.
Healing Brush Tool
Select the Healing Brush Tool. Click on the sample and set different options. Set sampling points on the image. With these steps, Photoshop will blend all the imperfections.
Patch Tool
Select Patch Tool. Select area to repair. Adjust different patch tool settings as per requirements. Hold and drag the cursor on the required area and release the button.
Step 5. Apply Filter and Make Color Adjustments
The last thing you need to do is to make sure that the picture colors are correct. Here is how you can apply different filters and other options.
Apply Filter. Go to the Photo Filter option Go to filter menu. Select and apply any filter that you want to apply. Go to Image and then Adjustments, then select Vibrance.
From the popup screen, select any tone-changing options and set them to the best appearance.
Step 6. Export the Newly Restored Photo
Everything is done at your end, and now you only need to export the photo. Here is how you can do it:
Go to File and then Export. Save the image in the location you want to.
Now, wait for the saving to complete, and you will be done with the process of repairing damaged images with photoshop.
Part 2. Repair Damaged Photos with Alternative Tool
The method of damage photo repair in Photoshop is very comprehensive and effective. However, it is not the most efficient choice for many people. The reason is that this process needs a lot of time and expertise in Photoshop. So, the best alternative to this for repairing old photos in Photoshop is to go for iMyFone UltraRepair.
This is a tool that focuses on bringing repairing features for photos of all types. Apart from that, it can also repair things like files, videos, and other digital things. The best part here is that you do not need to do anything as the tool itself will do the job of repairing your damaged photos.
Try It FreeTry It Free
Step 1.Install UltraRepair and choose Photo Repair from the left pannel. Click Add photo to upload the damaged photos you want to repair in Photoshop.
Step 2.Preview the detail information of the uploaded photos. Start by clicking Repair after making sure that no photos lost.
Step 3.Now you can save specific photos separately. You can also click Save All to save photos at one time.
In most cases, your damaged photos would be brandly new after the repair process. If you fail, please do not give up since we will provide you with Advance Repair mode.
Try It Free Try It Free
Part 3. FAQs about Repairing Damaged Photos
1. Can I repair damaged photos online for free?
Yes, there are some online tools available that can repair your damaged photos for free. However, the effectiveness and customizability of all these tools are not so good. So, if you want the best results, it is always a better choice to go through the proper damage repairing process or select the tool carefully.
2. How can I fix a corrupted photo?
There are different ways to fix the corrupted photos. You can use different applications like Photoshop to do it, or restore the image by formatting your files.
Conclusion
Repairing old photos in photoshop can save you in many different situations. Whether you have a damaged picture or a pixelated photo that you need to repair, the repair process in the Photoshop maybe difficult for you. So, the best way for you is to use iMyFone UltraRepair. It will make it even easier for you to complete and achieve the best results.
Try It FreeTry It Free
How to Restore Old Photos in Photoshop?
As photos get older, they may fade, crease, speckle or crack. Most of the times, they hold precious foregone moments of life. Preserving them for generations to come is quite feasible these days with adequate photography restoration tips and techniques. People mostly prefer outsourcing their digital photo restoration requirements to any reputed image editing company.
Download PDF format of this article here ! Download
However if you are adept in Photoshop CS5, you can try old photo restoration by yourself. The below step by step instructions and photo restoration photoshop tips can help.
Scanning the photograph Highest possible quality of scanned image is what your primarily require. Make use of a scanner with minimum 300 dpi. In case if you don’t have a quality scanner with you, a great snap of the picture may serve the purpose. The more details you are able to retain the more perfection you attain.
Make a copy of photograph Before proceeding further, assure that you have an original copy with highest quality. This can keep you safe in case of any unforeseen catastrophe. Having a backup helps also when you are planning to experiment with different techniques with the same image.
Work with layers Create one new layer while retaining the original copy and start working on the newly created layer. ‘Eyeball’ must be turned off after locking the base layer so that it is not altered. This standard practice is followed by most of the professional service providers for restoring old photos in Photoshop.
Crop, rotate, or straighten as per your needs Before you start making modifications, kindly adjust the images as per your liking. Cropping, straightening, and rotating are the basic adjustments you can make. Having a clean and oriented image will make the editing process easier.
Removing dust and scratches Now start by removing the scratches and dust using filters. In the option, retain the setting as low so that the details are not lost. Manual removal may be needed but this tip is really effective. Using preview feature will properly guide you.
Reviewing the pictures for correction After you are eliminating the dust and imperfection, review your image. See if it needs any further correction. If you are 100% sure that the present condition of your picture is exactly what you need, you can directly move to the 10th step.
Making the required adjustments This is the next step you need to take if you are not 100% satisfied with your picture’s current condition. Mostly, people face issues with fixing the damaged spots as well as the color. Photoshop offers a variety of options that can automatically adjust the color, tone, contrast, and overall vibrancy. Similarly, for fixing the damaged spots you can use Photoshop's spot-correct tools like Patch Tool, Clone Stamp, and Spot Healing Brush.
Reducing noise in photograph Remove noise and speckle using the Reduce Noise option from Filter section. Tweak your settings based on the image on which you are working. If it is too grainy opt for filtering at more strength and for lesser specks, reduced filtering is enough.
Enhancing old photographs Further enhancing can be done using spot healing brush and clone tool. In CS5 version, the spot healing brush is more useful and intuitive when compared to the older versions. Clone tool operates well in case if you have to repair larger areas. While operating, keep your image well zoomed so that no details are missed.
Photoshop Will Soon Be Able to Automatically Restore Old, Damaged Photos
There’s now another reason to drag out the photo album and start digitizing that aging collection of old, slowly deteriorating family snapshots . Digitally restoring vintage photos is usually a process that can take hours, even for a skilled photo editor, but a new AI-powered filter coming to Photoshop appears to handle the bulk of the work with just a single click.

Of all the neural network applications that have been revealed over the past few years—some good, some bad—one that has firmly resonat ed with the average consumer is using these tools as a way to connect with our pasts and family members that are no longer with us. Hollywood already seems all in on this idea, as Harold Ramis’ ghostly cameo in Ghostbusters: Afterlife proves, but that was mostly realized through complex (and expensive) visual effects work.
Last year, MyHeritage revealed its Deep Nostalgia tool that automatically animates vintage photos and turns them into short videos, making them look like your distant relatives’ home movies , even if they passed away long before smartphones and camcorders were ever a thing. But long before Deep Nostalgia arrived, talented photo editors have been restoring damaged and faded old photographs, and even colorizing images that only ever existed in black and white, using tools like Photoshop. The results are often incredible, and can make images of your distant relatives look even more lifelike, but the process requires a lot of skill and practic e if you want to achieve convincing results.
New Photo Restoration Neural Filter in Photoshop
Adobe has been adding automated tools to Photoshop for some time now. Powered by the company’s Sensei AI platform, they make mundane tasks like sky replacements and even selecting complex objects much easier, but soon the automated toolset will expand to photo restorations (we don’t see it available in Photoshop 2022 just yet). Adobe teased the new functionality in a short video shared on YouTube, and in addition to removing dirt, scratches, creases, and tears, the tool appears to smooth out the subject’s skin, remove unwanted textures and noise, and can add a splash of color, even on black and white or sepia-tinted imagery.
Advertisement
Adobe also demonstrated the new neural filter working with existing tools such as context aware fill to restore missing sections of an older photo that were torn away and lost. The results aren’t quite as perfect as some of the manual photo restorations we’ve seen performed by Photoshop masters—the filter is still in beta at this point—but the results are still surprisingly good. It’s not known how much control Adobe plans to give users over the neural filter’s processing (we probably wouldn’t be so aggressive with the skin smoothing) or whether it will remain a one click feature when it’s finally available to the public.