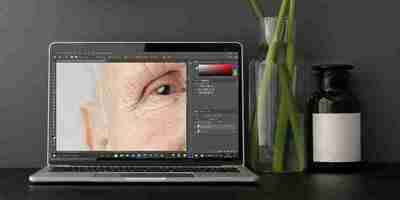
Remove Blemishes for Free Online
4 Blemishes You Can Easily Remove Using Photoshop
Iron out those image imperfections. We explore four common photo blemishes and how to do away with them.
So, you’ve thrown your picture into Photoshop, only to discover a little blemish, stain, or discoloration you want to edit out. The trick to successful editing is maintaining your subject’s natural appearance, so no one even notices the blemish is gone.
Luckily, Photoshop packs a number of easy-to-use tools designed to remove or de-emphasize them.
1. Spots And Freckles
Cleaning up blemishes on the skin is a Photoshop mainstay, and depending on your needs, there are two ways to get rid of them.
Using The Spot Healing Brush Tool
The Spot Healing Brush Tool offers the easiest way to make quick fixes for small spots, pockmarks, acne, freckles, and all those other tiny imperfections that make us who we are.
Open your image and create a New Layer by clicking the Plus sign in the Layers panel.
Look to the ribbon, where you need to set the Type to Content-Aware. To the right of this, check the Sample All Layers box.
Click and run the cursor over any skin blemishes to edit them out.
Using the Healing Brush Tool
The problem you may find is that the Spot Healing Brush Tool’s sample doesn’t quite match the area you’re covering. For greater control over this, switch to the Healing Brush Tool.
It can be helpful to really zoom into your picture now. This gives you a better idea where textures and tone need work.
Create a New Layer, then set the Sample—it’s along the ribbon—to Current & Below.
Make sure you’re sampling the exact area you want by changing the Brush Size. Now, hold down Alt (on Windows) or Option (on Mac) as you click on the part of the skin you want to sample. It should be an area similar to the area you’re touching up.
Brush over the area to clean up blemishes, re-sampling new patches of skin as the lighting, focus, and texture changes.
Related: Adobe Photoshop Keyboard Shortcuts 101
2. Wrinkles
You can use both the Spot Healing and Healing Brush Tools to fill in the wrinkles of your more mature subjects. The problem is, both have a habit of wiping out everything from deep trenches along a brow to slight crow’s feet around the eyes, giving weathered portraits an unnaturally de-aged appearance.
Using The Clone Stamp Tool
To iron out those wrinkles without airbrushing them out of existence, first copy the original layer by dragging it down and over the Plus sign.
Select the Clone Stamp Tool, with the sampling set to Current & Below. Change the Mode from Normal to Lighten.
Holding down Alt or Option, grab a skin sample from near the wrinkle—just as you do when using the Healing Brush Tool.
Roll the cursor over each wrinkle, grabbing new samples when you need them. This leaves wrinkles in place but lightens the darker crevices on the skin. You can also lower the Opacity to add more clarity to wrinkles.
Related: 4 Ways to Use the Photoshop Clone Stamp Tool
3. Teeth Whitening
If you want to make your subject’s pearly whites even whiter, you can use a quick trick to alter the Hue and Saturation of a specific color.
Using Color Select And Saturation
With your image open, click on the Adjustment Layer icon—it’s at the foot of the Layers panel. Here, you want to choose Hue/Saturation.
Click on the Hand icon. Your cursor will now become a pipette for color-picking, so pick and click on a yellow tooth. Aim for the deepest or darkest hue, if you can.
The dropdown menu in the Hue/Saturation box should say Yellows (or sometimes Reds).
Now, whack both the Hue and Saturation sliders all the way to the right, to the maximum. You’ll see those yellowed fangs really stand out.
It’s time to use the Range slider. This is a fiddly bit, and it’ll differ from photo to photo, but you want to use the slider’s outer handles to narrow the range of the color selected.
Click and hold the center of the slider, dragging it along the bar until the teeth are filled in, but the gums aren’t changing color.
Time to refine your selection. Start by slowly increasing the range by dragging the right-side inner handle outward. Then pull the left-side inner handle to the right, smoothing out the area between the teeth and gums.
You should have a good outline of the teeth at this point. It won’t be perfect, but so long as most of the teeth are filled in, it’s fine (and don’t worry if the skin around the mouth changes into this nightmare shade).
Reset the Hue slider to 0; take the Saturation slider below 0. The lower you drop the saturation, the whiter your subject’s teeth become. You’ll need to toy with this to find the "Goldilocks" spot that works for you. Tweaking the Lightness slider may also help.
Ah, but there’s a problem. The teeth may be whitening, but so are parts of the skin. Head back to the Layers panel, and highlight your Hue/Saturation layer.
Go to Image > Adjustments > Invert. Your layer is temporarily hidden, and the original layer with the stained teeth is shown.
Choose the Brush Tool from the toolbar, but make sure you switch the foreground color to White. In the world of Photoshop, white reveals and black conceals.
Carefully rub the cursor over the teeth. Slowly, like an archaeologist uncovering the bones of a T-Rex, whitened teeth are displayed.
You may also find it useful to toy with the Opacity percentage between the two layers to capture a more natural look.
Related: 10 Must-Know Photoshop Skills for Beginner Photographers
4. Red Eye
Red eye—is there anything more frustrating and jarring? It’s a common problem for photographers, but fixing it in Photoshop is probably the easiest trick in the book.
Using The Red Eye Tool
We’re going back to the Healing Brush Tool. Click and hold the icon to select the Red Eye Tool.
Draw a rectangle around the affected area. As you let go of the mouse button, Photoshop automatically eliminates the problem.
For tougher, glaringly red spots, try redrawing the rectangle over the eye until it’s removed.
Fixing Blemishes With Photoshop
Photo fixes have never been easier, but try not to obliterate every blemish—those scars, beauty spots, and kinks across the skin form part of our character.
Photoshop's tools offer a great way to create powerful and emotive portraits that strike a beautiful balance between an edited image and a natural look.
How to Quickly Smooth Skin and Remove Blemishes in Adobe Photoshop CC
Touching up photos is a common task when taking professional photos. Often times small blemishes are removed to give a better final appearance. This task is accomplished quite easily in Adobe Photoshop. Today we are going to learn how to smooth skin and remove blemishes in Adobe Photoshop CC.

How to Remove Blemishes and Smooth Skin in Adobe Photoshop CC.
First, import your required image. Select the skin by choosing the Quick Selection Tool and drag it over the skin to select it. You can remove selecting actions by pressing and holding Alt or Opt. Go to Select and choose Refine Edge. Check ‘Smart Radius’ and increase it to 6.5. Brush over the section where the hair overlaps the skin. Once done, choose Output To ‘New Layer with Layer Mask’. Click the box next to your original photo to make it visible. Go to Filter, Blue, and select Surface Blur. You will need to adjust these depending on the quality of your photo. The right combination will smooth out the skin and hide blemishes..
Recommended settings:
This is what we use for most of our photos: Radius: 16 pixels
Threshold: 12 levels You can stop here if you think it’s enough, otherwise continue and restore the areas of the face that need no help. These include the eyes, eyebrows, etc. Click the Layer Mask and open your Brush Tool. Choose these settings: Size: 25%
Hardness: 0%
Opacity: 100%
Flow: 100% Brush over the areas where you want to reveal the original or untouched photo. You can change the size of the brush by pressing the right or left bracket key. If there are blemishes or pores that are still visible, you can blur that portion. Make the face layer active, open the Blue Tool and choose 100% strength. Select the right brush size and brush over the areas that you want to smooth out. Now, if you have spots remaining then open the Spot Healing Brush Tool and make sure the Content Aware button is selected. Adjust the size of the tool and move over the areas you want to smooth out. Once you’re done, go to Filter>Noise>Add Noise. Finally, choose Gaussian and Monochromatic. You can also increase grain by moving the slider but that’s typically not needed. Done. Export the image and enjoy!
Now you can easily brush over and correct any image that you want.
If you have any questions, let me know in the comment section below!
Remove Blemishes for Free Online
Do not let sunburns, pimples, acne scars, or even freckles ruin an otherwise brilliant photo.

With Fotor's Blemish Remover, you can get rid of blemishes on your photos for good in just a few clicks!
Let's try the best blemish extractor now and experience how to make your selfies or portraits look flawless in three quick and easy steps.