Selection Tools and selections. Photoshop lesson.
Photoshop Tutorials: Direct Selection tool
Direct Selection Tool The Direct Selection Tool selects and moves existing path's / vector shape mask's segments / anchor points: In the Toolbox, select the Direct Selection Tool.
Tool. Drag on the image to select a path or shape segment or click directly on an anchor point to select it * .
. Drag selected anchor point or segment (by an anchor point) to re-shape path or vector shape mask.
Drag direction point of a selected anchor point to change curve's amplitude and / or direction.
To delete selected segment or anchor point press [Delete] key.
To select 2 or more segments or anchor points press [Shift] key while selecting. *In case the work path / vector shape layer is not currently selected, first click on a path or shape to select path / layer name, and then select its segment or anchor point.
How to Use the Quick Selection Tool in Photoshop
Since its release in 1987, Adobe Photoshop has become the world’s leading image editing software. One reason for Photoshop’s enduring popularity among photographers, designers, and artists is its ability to make precise selections of any area in any image – a must for photo editing, photo collaging, illustration, and more. Photoshop features a suite of ten selection tools for defining, refining, and editing selected items in various ways – and one of the most versatile (and efficient) of these is the aptly named quick selection tool.
Whether you’re a Photoshop wizard with years of experience under your belt or a complete newbie just testing out the waters, you’ll turn to the quick selection tool, again and again, to make accurate selections in an instant. This tutorial provides a brief primer on the quick selection tool and the different ways of using it.
How to use the quick selection tool
With so many selection tools in Photoshop, what makes the quick selection tool stand out as one of the most precise and yet easy-to-use tools of its kind? The quick selection tool allows you to isolate an entire area within the image at once, as well as expand or shrink your selection as needed to include all the areas you want.
What’s more, Photoshop’s quick selection tool can select not only color but also textures and patterns. And it comes with a set of refine edge controls that allow you to make extremely precise adjustments to a selection in order to achieve the results you want.
Note: The quick selection tool was first introduced in Photoshop CS3. It’s not available in earlier versions of Photoshop, so this tutorial will assume you have CS3 or higher. And depending on your version of Photoshop, the tool options may look slightly different than those shown here.
From the time it first appeared, the quick selection tool quickly became a favorite of both designers and photographers because it combines both the magic of the magic wand tool, and the convenience and ease of a paintbrush.
Unlike other Photoshop selection tools, the quick selection tool selects not only colors but also textures. As you use the tool, Photoshop is continuously analyzing the image so that it automatically selects pixels that are similar in texture, color, and patterns. That results in an exact selection with only a few clicks.
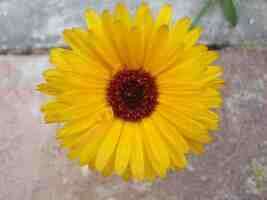
For the purposes of this tutorial, we’ll practice with this image of a flower. You can download a copy from Unsplash here. Unsplash images are free to use for any purpose.
First, we’ll carefully select and remove the background so that we’re left with only the flower. To do that, follow these steps:
Step 1
Open Photoshop and load the flower image you downloaded from Unsplash.
Step 2
Locate the quick selection tool from the toolbox menu that’s docked on the left side of your screen. Photoshop treats the quick selection tool like a brush, so you can find it grouped with the magic wand tool under the brush icon. You may have to click and hold on to the magic wand tool to show more options.
Let’s take a closer look at these options.
The brush presets menu
Like any standard brush, the quick selection tool can have its own brush presets. Since you’ve opened the tool for the first time, this menu should be empty right now. But if you save the settings you create, they’ll show up here as a preset you can return to at any time.
Brush mode
The brush mode section offers three options for managing the selections you make. These include:
New selection: As its name indicates, this option creates a new selection.
As its name indicates, this option creates a new selection. Add to selection: This option adds more pixels to the current selection, which works the same as holding down the Shift key. But unlike other selection tools, you don’t need to manually select add to selection . After you make your first selection, Photoshop will select this mode automatically.
This option adds more pixels to the current selection, which works the same as holding down the key. But unlike other selection tools, you don’t need to manually select . After you make your first selection, Photoshop will select this mode automatically. Subtract from selection: This option removes pixels from the current selection, just like holding down the ALT key.
Brush options
Because Photoshop treats the quick selection tool like a brush, all the standard brush options are available to you, such as changing brush hardness, size, spacing, angle, or roundness. These options can come in very handy when you’re working with very fine details in an image, such as hair or fur.
For this tutorial, we don’t need to be too concerned with most of the brush options selections except for brush shape and size.
Sample all layers
This option tells Photoshop whether to create a selection from all existing layers, or just the currently selected one. Check this option if you want your selection to sample pixels from each layer in your layer stack, and uncheck it if you want Photoshop to select only pixels from the current layer.
Auto-enhance
The auto-enhance option creates selections with smoother edges. It’s important to keep in mind that, as its name indicates, the quick selection tool is designed for making swift selections of similar pixels. But that causes selections to have slightly rough edges – and choosing auto-enhance will remedy that for a better look.
Refine edge
Once you’ve made your first selection, the refine edge option becomes available. This option allows you to make your selection more accurate and detailed by softening and smoothing the edges. This is a very powerful tool for creating detailed selections, as we’ll see later in the tutorial.
Now that we’ve had a look at the options that are available for the quick selection tool, let’s get started with learning how to use it.
Step 3
Select the quick selection tool and make sure that the brush mode is set to new selection. Now, click on the top left corner of the practice image. Photoshop will automatically select a portion of the background, minus the flower.
To continue removing the background, click on pixels adjacent to the selection. Photoshop will continue to “magically” select pixels around the flower as long as you continue to click. If you make a mistake, undo the action by pressing CTRL + Z, or hold the ALT key to deselect unwanted parts of the selection. If you find that you’re over-selecting pixels, your brush might be too large. Try zooming in on the image and reducing the size of your brush for better control.
With just a few clicks in the image, you should have a selection that looks like this:
Step 4
Now go to the top search bar and type in “refine edge.” Press enter. This brings up the refine edge menu in a separate panel. This is where we can fine-tune the selection in a multitude of ways. Remember that this option allows you to soften and smooth your selection’s edges and make other adjustments for a more finished look.
Now, your selection should be covered in white.
Refine edge is a powerful tool in its own right, with multiple options for creating incredibly accurate selections. Options for the refine edge tool include view mode, edge detection, adjust edge, and output.
Refine mode
Refine mode allows you to select options for displaying your selection and making adjustments for a smooth and accurate edge. Refine Mode can display your selection on various backgrounds to reveal problem spots in your selection. It can also display the original selection and show the radius of selected pixels.
Edge detection
The edge detection tool includes a special brush for refining a selection’s radius, found just to the left of the Edge Detection options. When you select the refine radius brush, you’ll find options at the top of the toolbar for adjusting the radius of your selection. Use this brush to paint on your selection. The refine radius brush softens edges and removes any remaining errors from the original selection process.
Global Refinements
This section of the refine edge tool includes several options for detailing selection edges, with both a slider and counter for precision adjustments. Adjust edge allows you to control smoothness, soften with feathering, add contrast, and shift the edge from the original selection.
Output Settings
The output section includes a checkbox to decontaminate colors, which eliminates any color remnants that other tools haven’t already cleaned up. When you’re done, you can select from several output options to save your selection, such as a new layer or layer with a mask.
When you’re satisfied with your choices, click OK to close the refine edge tool.
Try dragging the different options around to see how the various changes affect your selection. You can always see the original selection in view mode by clicking show original or by pressing P.
Returning to our existing selection, here are the options we’re going to use:
Notice that the smart radius box under edge detection is checked, and the radius is set to 3 px. Under adjust edge, there’s a shift edge at -21%. Finally, we changed the output to new layer with layer mask.
You can see these changes in the selection below.
Original:
Modified:
Step 5
With our selection now completed and saved, hit delete to delete the original background. That brings up a prompt for fill options, which asks you to choose a fill color for the new background. Options include black, white, transparency, or a custom color or pattern. You can also select the blend mode, which opens the entire toolset of blending options and sets the opacity of your new fill layer.
For right now, choose a simple white background.
This is what your final image should look like – a crisp, well-defined yellow flower that’s completely separated from its original background.
Congratulations! You’ve just used the quick selection tool to create a highly accurate selection that you can now use in any Photoshop project.
As you can see, the quick selection tool is not only incredibly powerful but also easy to use. You can pick up the basics in a few minutes and fully master the tool in a couple of hours or so.
The interesting thing about the quick selection tool is that it samples colors and textures in the same way as in the first selection. In our flower example, we started our selection from the background. But we could also have started the selection from the flower itself.
Here’s another example of the quick selection tool in action. In the image below, we can select the background by making it our first selection.
With the background selected, we can make it black and white by going to image > adjustments > black and white. This converts the selected background to shades of gray.
We can also select just the post box by making it our first selection:
Now with the post box selected, we can change the color to anything we like by going to image > adjustments > hue/saturation:
You can experiment with the options under hue/saturation to find colors you like. Whatever part of the image you select, Photoshop will sample pixels as it did in the first selection.
Tips for using the quick selection tool
Now that you’ve seen how it works, here are some handy tips for making the most of the quick selection tool:
Use the brush options to make your selections more accurate. Just as with any other Photoshop brush, you can change the brush size (press [ to decrease the size, or ] to increase it), hardness, or roundness to get the best configuration for making a precise selection.
to decrease the size, or to increase it), hardness, or roundness to get the best configuration for making a precise selection. Zoom in when working on edges that are hard to select. That allows you to see edges more clearly and adjust your tools accordingly.
Master the refine edge tool and its many options for smoothing and softening selections. Refine edge comes in very handy when you want to get a smooth selection. That’s especially useful when you’re working with fine details such as hair, fur, and grass. Select “Remember Settings” at the bottom of the Refine Edge panel to save your choices for next time.
If you like a particular brush setting, save it as a preset to save time in future projects. You can save multiple customized brush settings for different needs.
Enable auto-enhance to automatically smooth the edges of your selection.
to automatically smooth the edges of your selection. Practice adding and subtracting from your selection with Shift and ALT to get the most precise selection.
The quick selection tool is one of Photoshop’s most useful features, and it opens up a world of creative possibilities for image-makers of all kinds. In your journey toward Photoshop mastery, you’ll turn to it again and again for photography, illustration, and design projects of all kinds.
Selection Tools and selections. Photoshop lesson.
Zoom in the area with the kiwi. You are going to select it. One way to select is to use the Elliptical Marquee Tool. You are going to use Quick Selection Tool. This tool is a cross between Magic Wand and a Brush Tool. It selects as you move it around. You can change the size of it in the Option bar.
I chose size 8. Now place it over the kiwi and click, hold the mouse and move the cursor over the green area. Don't hold it too long - it will select too much. If it did not work right - deselect and start over.
Move the kiwi over the melon (use Move Tool).
The next tool to use is Lasso Tool. Lasso is a freehand selection tool. You can draw your own selection.
Zoom in the area with the mushroom. To select mushroom draw the selection around it. Try to stay close to the shape. But if you don't - not a big deal. We'll fix it. Remember - drawing your own selection - you need to return to your start point. Selection is a closed shape. So you need to end at your start point.
If you need to fix your selection: use SHIFT to add to selection use Option (ALT) to subtract from selection
Move the mushroom like you see on this picture.
Zoom in the area with the grapefruit. You are going to use Magnetic Lasso Tool. It is similar to Lasso Tool. It also allows you to "draw" the selection, but..... Magnetic Lasso will snap to the edges of the objects that you draw. Actually, it snaps to the biggest contrast between the colors (values). Usually, the biggest contrast is the edge of an object vs. the background.
This is what you do: 1. Click at the bottom left corner of the grapefruit with your Magnetic Lasso tool
2. Start dragging the tool outlining the top part of the shape. Stop at the bottom right corner.
3. Double-click at the bottom right corner. It will close the selection with a straight line.
Move the selection towards the melon. You are going to make an ear out of it. Next - rotate the ear ( and resize it) To do this go to Edit > Transform > Free Transform
or Command T (Ctrl T) You will see a bounding box around the selection.
Inside the bounding box is a Rotation point. Think about it as a pin that holds the shape. If you rotate the shape the pin would stay where it is now. You can move the Rotation point within the shape or outside the shape. Place the cursor next to a corner of the bounding box. The cursor should become a double-headed arrow. Rotate. To resize the shape drag a corner of the box. To resize without distorting and stretching the selection - hold SHIFT while resizing.
Edit > Transform > Warp Push the curve in. Enter
Choose Move Tool. Duplicate the ear.
(hold Option or Alt while dragging)
Flip the ear: Edit > Transform > Flip Horizontally Deselect Save.
For the next task you will be using two tools: Lasso Tool and Polygonal Lasso Tool. Polygonal Lasso Tool allows you to make selections with straight segments. All you do is click.. click... click... Zoom in the area with the bow tie pasta piece.
Choose Lasso Tool
It is really important to follow the steps exactly as they are described: 1. Start at the upper left corner. Click and drag the selection line following the shape of the bow tie. Stop at the upper right corner. 2. Do not release the mouse yet!!! With the mouse down, hold Option (Alt) key. 3. Now release the mouse (still holding the Option (Alt) key down). The cursor changed to Polygonal Lasso Tool. 4. Start clicking to follow the pasta's zigzag shape. 5. Stop at the bottom right corner. 6. With the mouse down, release the Option (Alt) key. The cursor changes back to Lasso Tool. 7. Follow the shape of the pasta and stop at the bottom left corner. 8. Holding the mouse down, hold Option (Alt) key. Draw the left zigzag side. 9. Finish your selection at the start point.
Drag the bowtie below the melon head. Deselect. Save.
The next selection is the intricate shape of a bunch of green onions. We are lucky we need to select this complex shape from a solid color background (white). There will be 2 steps in selecting it: 1. Use Rectangular Marquee Tool and draw a rectangular selection around the shape. Make sure you just get the white background into your selection.
2. Choose Magic Wand Tool. You are going to deselect the white area from this rectangular selection. Make sure "Contiguous" option is checked.
Remember? To subtract from selection you hold down Option (Alt) key. So... Holding the Option (Alt) key - click on the white area inside the selection.
This will leave you with a perfect selection of the onions.
Move it above the eye. Duplicate it: Use move Tool and hold Option (Alt) Flip the eyebrow: Edit > Transform > Flip Horizontally Deselect. Save.
Repeat the steps above to select the parsley bunch. Select a rectangle (Marquee tool) Choose magic Wand. Change Magic Wand option: Uncheck Contiguous. Hold Option/Alt key and click inside the selestion.
The intricate selection is ready.
Move the parsley bunch under the nose.
Duplicate and flip. Deselect. Save.
Now let's get rid of the left side of the image! Choose Crop Tool Draw a box around the Melonhead person.. :) You can adjust the size of it (and even rotate) Press RETURN (ENTER) File > Save