Using Adobe Illustrator How to Convert Text to Outlines
How to Flip Text on a Path in Illustrator
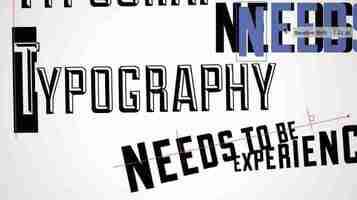
Adobe Illustrator is a great graphic design program to use when you want to create editable vector graphics. A vector graphic can be scaled up without losing any detail, so you can make an illustration, including typography, that will look as good on a billboard as a business card.
Imagine creating a round badge or logo, and you want to type text around a circular path. You might want the text at the bottom of the circle to flip to the opposite side of the path, so it’s easily legible. In this Illustrator tutorial, we’ll teach you how to flip text on a path in Illustrator, so the text isn’t upside down.
Table of Contents
How to Flip Type on a Path in Illustrator
Whether using Adobe Illustrator CC or an earlier version of Illustrator, a path is simply one (or more!) straight or curved lines. A path can be open or closed, depending on whether the endpoints are joined together.
We’ll start with a simple circle design. We’ll create a circular path, and then we’ll use the type tool to type text along that path. Finally, we’ll flip some of the text, so it appears right side up along the bottom of the circle.
Select the Ellipse tool.
Hold down the Shift key and draw a circle on the canvas. Holding the Shift key will force the ellipse you create into a perfect circle. Any stroke or fill color will disappear once you add text.
In the Type Tool flyout menu, choose the Type on a Path Tool.
In the Window menu, select Type > Paragraph > Center to center the text you’re about to type. The Windows shortcut for the Paragraph panel is Ctrl + Alt + T. Mac users can use Option + Command + T.
With the Type on a Path tool still selected, click the top of the circle you created in step 2. Illustrator will add lorem ipsum text parallel to the baseline path of the circle.
Select the font and character size in the Character tab on the Type panel or display the character panel by selecting Windows > Type > Character.
Enter the text you want at the top of the circle.
You’ll see three handles (also called alignment brackets) near the text: one to the left, one in the middle, and one on the right. Use these handles to rotate the text around the circle until it’s right where you want it.
Next, we’ll copy what we have so far and duplicate it. Using the Direct Selection tool on the toolbar, select the circle and then choose Edit > Copy or use the keyboard shortcut Ctrl + C.
Next, paste what we copied in front of what’s already on the artboard. Do that by selecting Edit > Paste in Front. Depending on what font you used, you might notice that the text looks slightly darker since there are now two stacked copies of it on the text path. An easier way to confirm that you have two copies of the text is to look in the Layers panel. You should see two entries for your text. If you want, you can rename one to indicate it’s the copy in front.
In the Layers panel, turn off the visibility of the bottom layer.
Select the Type Tool, select the text on the path, and type the new text—the text you’ll move to the bottom of the circle path.
Now comes the fun part. Open the Path Options dialog box by selecting Type > Type on a Path > Type on a Path Options. For the text effect, choose Rainbow, and in the Align to Path dropdown, select Ascender. Also, check the Flip box, and select the OK button. (Check the Preview box to get an advanced look.)
Note: For the Align to Path options, choosing Baseline will put the text right on the path. Ascender puts the text on the outside of the circle. Descender will locate the text on the inside of the circle. Lastly, Center will place the text right at the center of the path.
Click anywhere outside the text to deselect it, and, once again, use the handles to adjust the spacing and move the text along the path to the bottom of the circle.
Next, turn the visibility of the top layer of text back on.
That’s how you add and flip text on a path in Adobe Illustrator.
Insert a Symbol in Your Design
An easy way to add an extra element or two to a design in Adobe Illustrator is to insert something from the Symbols panel. Follow the steps below to add a symbol to your design.
View the Symbols panel by selecting Window > Symbols.
Use the Symbols Library dropdown arrow to view a list of all the libraries installed on your computer. Select one of them to launch a panel where you can use navigation arrows to page through each Symbols library.
When you find a symbol you want to use, drag and drop it into your design. Use the Selection Tool to resize the symbol to fit your design.
Adobe apps have all kinds of hidden features like Symbols that you can only take advantage of if you know they’re there. We’ve got tutorials on how to achieve many effects in Adobe Photoshop, like how to add a border to images, shapes, and text or use masks to hide layers, or even how to do a face swap.
And if you’re beginning to use Adobe Indesign, you’ll want to check out our tutorials on how to link text boxes or flow text around an image.
Make the most of Illustrator CC's Touch Type tool
You probably don't need us to tell you that Illustrator CC is a brilliant graphic design tool. Whether you want to create typographic layouts, stunning illustrations or objects and elements destined for the web, it's the ideal tool. It fits into Creative Cloud perfectly, with maximum compatibility with other apps and, of course, the brilliant ability to upload directly to Behance from the File menu, sync with Kuler and share files across multiple machines.
With the new Touch Type tool you can bring a new fluidity to your graphics work. Here I'll show you how to use it to edit and manipulate live text on the fly.
01. First, find it
Roughly style up some text in Illustrator CC. Open the Touch Type tool, in the Tools panel under the Type tool or via the Character panel (Window>Type). With the tool selected, click on a character in your text frame and a bounding box will appear around that character. All of the corners will have a handle and there is an additional handle above the box, each of which has a different function for editing the character.
02. Moving and rotating
The bottom left handle is the move function. You can also move the character by clicking inside the bounding box. The character's new position will be shown in blue with the original visible behind. Centrally above the bounding box is the rotate handle. Hover over this and a rotation icon will appear. Click and drag to rotate the character. Remember as you move one character it will affect the position of the next.
03. Scaling
The top left handle controls the proportional scaling of your character. After you've dragged the handle and scaled your character have a look in the Character panel. The percentage increase or decrease will be shown in the vertical and horizontal scale fields of the panel and will be displayed by your cursor. The final two handles control the vertical top left and horizontal (bottom right) scaling.
04. Quick character changes
The Touch Type tool doesn't enable you to make changes to multiple letters in one go, but that's not a problem as you can easily use the Eyedropper tool to duplicate styles. Alternatively, you can cut and paste letters and the applied formatting will remain - then, because the text is live you can simply change the character. Another option is to create a character style that you can then apply to individual characters.
05. Selecting characters
You will find at times certain characters can be difficult to select with the Touch Type tool - especially when you have characters stacked or a mixture of different sized characters. A really simple way around this is to change the size of your text frame so you're focusing just on the characters you need to work on at any one time. Alternatively, adding a soft return might create the space you need.
06. On a path...
Finally, you can use the Touch Type tool with type on a path. Draw a path with the Pen tool and add your text to it using the Type on a Path tool found under the Type tool in the Tools panel. To refine the look of the type open the type on the Path Options panel found under Type Type on a Path Type on a Path Options. Here you will find a number of different effects options and positions for aligning your text.
Words: Jo Gulliver
This article originally appeared in Computer Arts issue 224.
Using Adobe Illustrator How to Convert Text to Outlines
Adobe Illustrator How to Convert Text to Outlines
When using Adobe Illustrator how to (and when to) convert text to outlines for press-ready vector artwork is essential knowledge. Fonts can cause problems when sending artwork to press. If you've used a typeface that your printing house doesn't have, the document will print incorrectly. This is why you'll find that fonts within most vector logos (containing text) will have been converted to outlines, or paths. This effectively means that the text is no longer text - it has become a graphic, and the text cannot be altered.
Converting text to outlines is very easy in Illustrator. The "PRO" text in the graphic shown below (left) has a blue line underneath it. This shows that the text is made up of a typeface, not a graphic. The little blue square at the left end of the line indicates that the text is ranged left. If the type were centred, the little square would be in the middle of the line.
It's good practice to keep an editable copy of your document as an AI file before you convert text to outlines and save the file as an Illustrator EPS file. This is so that you can come back and edit it non-destructively later, instead of having to recreate the artwork with text again.
To convert text to outlines, go Select > Select All. It doesn't matter if other graphic elements are selected. Select Type > Create Outlines from the menu. The text will become outlined and can't be edited as text (see the image below right). Now, as you can see, the line beneath the text has gone. The text characters now have editable paths, or outlines, around them - they are no longer text, but vector graphics, and can be edited as such.
Resources & More Information